The Ultimate Walt Disney World Packing List: What to Actually Bring
Published June 14, 2026 · Updated September 9, 2026
At a Glance
- Best for: Families and first-timers who over-pack — and anyone tired of hauling a backpack they barely open
- Don’t miss: Refillable water bottle, travel-size SPF 50+, a compact poncho, and a portable charger (so SupaPark’s live alerts never die mid-day)
- Skip: Full-size shampoo/conditioner/body wash (resort rooms have refillable dispensers) and basic first-aid — every park’s First Aid Center hands out free single-dose meds, band-aids, sunscreen, and lip balm
- Resort hack: Pack only prescription meds and a travel-size toothpaste; let Disney’s amenities cover the rest and free up bag space
- Biggest win: Knowing what to leave home is half the battle — a lighter day bag means faster security, less back strain, and more time actually riding
This guide helps families pack smart instead of packing everything — the single biggest win is cutting your park bag down to what you’ll genuinely use, so you breeze through bag check and spend the day enjoying the parks instead of lugging dead weight.
The New Reality of Airline Baggage Fees
The era of casually overpacking for Disney World is over; with airlines aggressively charging for luggage, you need to pack like every cubic inch is costing you money.
Airline bag rules can quietly wreck a good packing plan, and the landscape has officially shifted. For over 50 years, Southwest Airlines was the ultimate cheat code for Disney families thanks to its beloved “two free checked bags” policy. That perk officially ended on May 28, 2025. While other airlines occasionally run flash promos offering free bags on select routes—such as a limited-time “Economy Bundle” that includes a free carry-on and seat selection—those are almost always restricted by tight booking windows or specific travel dates.
The practical takeaway: you can no longer build a winter or spring Disney packing list that only works if checked bags are free. When you are packing for a family of four, adding just one extra checked bag each way eats into your dining or Lightning Lane budget fast. Before you pack, you have to decide what you are actually paying to move.
Navigating the New Baggage Math
If you are a loyal Southwest flyer heading to Orlando, your packing strategy needs an immediate update. Bags now cost extra for standard tickets, but there are still a few ways to bypass the fees if you know how to play the loyalty game.
| Passenger Status / Fare Type | Southwest Baggage Allowance | The Smart Move |
|---|---|---|
| Standard / Wanna Get Away | Zero free checked bags | Pack carry-on only, or consolidate the whole family’s liquids and heavy items into one single paid checked bag. |
| Rapid Rewards Credit Cardholders | One free checked bag per ticket purchased | Put the family’s flights on the card to maximize the free bag allowance across your whole party. |
| A-List Members | One free checked bag | Great for a solo traveler or a couple traveling light. |
| A-List Preferred / Business Select | Two free checked bags | Business as usual. Keep one of these bags half-empty for bringing souvenirs home. |
The Pre-Flight Baggage Checklist
Before you throw three extra Spirit Jerseys into your suitcase, you need to shift the bulk away from your luggage and onto your person, while strictly limiting the things you bring “just in case.”
If the forecast calls for a chilly morning in EPCOT or a late night at Magic Kingdom, you need layers. But you do not need a dedicated heavy coat for every single person in your group.
Follow this checklist to avoid surprise fees at the check-in counter:
- [ ] Check your airline’s current checked bag and carry-on rules: Do this before you open your suitcase. Dimension limits and fee structures change frequently.
- [ ] Put bulky layers on your body for the flight: Tie that heavy hoodie around your waist or wear your bulkiest sneakers onto the plane.
- [ ] Use compression cubes for hoodies, fleece, and kids’ sweatshirts: These condense thick fabrics and buy you crucial space in a carry-on.
- [ ] Avoid “just in case” coats for every person: If the forecast is mostly warm, do not waste luggage space on heavy outerwear you might never touch.
- [ ] Pack one shared emergency layer: If the forecast is mild, bring one oversized zip-up hoodie for the group that anyone can throw on if they get cold waiting for fireworks.
- [ ] Leave space for souvenirs: If you are buying bulky items—especially if you’re bringing jackets home unworn—you need a way to get them back. Leave a 10% void in your bag on the way down.
Pro tip: Never pack your daily park essentials in a checked bag. Your sunscreen, travel-size first-aid kit, MagicBands, and any daily medication must go in your personal item under the seat. If your paid checked bag gets delayed, you can still rope-drop Slinky Dog Dash the next morning without scrambling to buy an overpriced phone charger at the resort gift shop.
Rethinking Souvenir Transport
If you successfully pack everything into a carry-on for the flight down, do not ruin your budget on the flight back. Buying a lot of merchandise in the parks often forces families to check a bag on the return trip, instantly wiping out the money they saved flying to Florida.
Instead of paying an escalating baggage fee at the Orlando airport just to bring home a few mugs and bulky plush toys, pack a flat, lightweight duffel bag inside your carry-on. If you buy too much in the parks, you can fill the duffel with your dirty laundry, check it for the flight home, and keep your fragile souvenirs safe with you in the cabin. Alternatively, look at shipping your merchandise directly from your Disney World resort to your house—the flat shipping fee is often cheaper than a checked bag fee, and you don’t have to haul it through the airport.
Day Bag Showdown: Backpacks vs. Slings vs. Fanny Packs
The bag that gets you through security fastest and swings to your front one-handed beats the one that holds the most — every time. At rope drop, when Disney starts moving guests through security and into the park before posted open, a clean scanner pass is the difference between catching Slinky Dog Dash at a walk-on and eating a 60-minute standby line by mid-morning.
How they actually compare
Walt Disney World uses walk-through detectors now — you keep your bag on, but loose metal and dense, packed pockets still trigger secondary checks. The leaner and more organized the bag, the faster you clear.
| Bag type | Capacity | Comfort (8–10 mi/day) | Sweat factor | Security speed | Best for |
|---|---|---|---|---|---|
| Backpack | High — fits ponchos, layers, full snack stash | Best for heavy loads; weight sits on both shoulders | Worst — full back panel traps heat in FL humidity | Slowest — you take it off, agents see a deep bag worth a second look | Families, all-day kit, multi-park days |
| Sling / crossbody | Medium — charger, water, sunscreen, light snacks | Great — swings front-to-back, open one-handed in line | Medium — one strap, breathable back | Fast — small, shallow, easy to clear | Couples, light packers, the “keep hands free” crowd |
| Fanny pack / belt bag | Low — phone, cards, sunscreen stick, lip balm | Best — near weightless, never in the way | Best — minimal contact, dries fast | Fastest — tiny profile rarely flags | Solo riders, second bag, coaster days |
Match the bag to the trip, not the Pinterest board
- Traveling with little kids? A backpack is unavoidable — you’re carrying the ponchos, the spare socks, the snacks. Accept the heat penalty and pick one with a mesh back panel and external water-bottle pockets so you’re not unzipping the main compartment at every fountain.
- Two adults, fast-moving day? A sling is the sweet spot. You can swing it to your chest and grab sunscreen without breaking stride in the standby line — exactly what you want when you’re hustling Toy Story Land at open.
- Coaster-heavy plan? A fanny pack rides under the lap bar. On Cosmic Rewind, TRON, or Slinky Dog there’s no loose-article worry, and you skip the bin shuffle entirely.
Pro tip: Pack the bag in layers by frequency, not by category. Sunscreen, phone, and a charger go in the outermost zip you can reach one-handed; ponchos and backups go deep. A shallow, sane-looking top pocket also clears security faster — agents flag dense, overstuffed bags for a second look, and that second look is the line you’re trying to beat at rope drop.
Pack it for a fast scanner pass
- [ ] Empty water bottle on the way in (fill at a fountain past security — over 200 locations)
- [ ] Loose metal (multitools, big keychains) left at the resort
- [ ] Charger and cables in one pouch, not scattered through pockets
- [ ] Sunscreen stick instead of a full bottle for the kids — no spill, no bulk
- [ ] Poncho rolled tight in a bottom corner, not blocking the main zip
- [ ] Nothing in the main compartment you can’t explain at a glance
The size trap
The most common mistake is buying for the worst day and carrying it on every day. A 25-liter backpack makes sense for a rainy Animal Kingdom open with a toddler; it’s pure dead weight on a kid-free Hollywood Studios sprint. If your trip is mixed, bring a backpack for the heavy days and a sling for the light ones — and let the sling ride inside the backpack on transit days so you’ve always got the lean option.
The one thing to remember: Prioritize a bag you can swing to your front, open one-handed, and clear security without a second glance. Hands-free and fast-through beats roomy almost every time — because the bag’s real job is to disappear so you can ride.
Tech Essentials: Keeping Your SupaPark Alerts Alive
Your phone is your park day’s command center — and a dead battery at 1 PM means you miss the Lightning Lane refill, the dining drop, and the next move SupaPark just teed up for you. Plan your power like you plan your rides.
A full Disney World day runs your phone hard: mobile order, My Disney Experience for booking Lightning Lane, Genie— wait, scratch that — Lightning Lane Multi Pass refills, PhotoPass, maps, and a steady stream of SupaPark alerts pinging you when a ride craters to walk-on or a hard-to-get table frees up on Drop Watch. That’s the catch with everything SupaPark does for you: it only helps if your screen turns on. The single biggest packing mistake I see is treating “charger” as an afterthought.
How much power do you actually need?
One person, one long day, heavy use will drain a phone twice over. Size your battery to your group, not your optimism.
| Power option | Roughly what it covers | Best for |
|---|---|---|
| 10,000 mAh bank | ~2 full phone charges | Solo or couple, moderate use |
| 20,000 mAh bank | ~4 charges | Family sharing one bank all day |
| In-park rental (FuelRod) | Top-ups, swap stations parkwide | Forgot yours / backup only |
| Hotel-only charging | Zero daytime safety net | Don’t rely on this |
Around $30–$50 gets you a solid 20,000 mAh bank that’ll outlast the fireworks — buy it before the trip, not at a gift shop markup.
Pro tip: Charge the power bank itself overnight, every night. A high-capacity bank that’s been sitting at half from your last trip is just a heavy paperweight by mid-afternoon — the bank is only as good as last night’s top-up.
Cords are the part everyone forgets
Banks get the attention; cords are what actually fail. Florida heat, sweat, and being yanked out of a bag all day shred cheap cables.
- Pack two charging cords, not one — the spare weighs nothing and saves the whole system if one frays.
- Bring the right tips for your group: a USB-C and a Lightning side if you’ve got mixed phones.
- Go short (6–12 in) for in-bag charging so the cord isn’t looping out where it snags on a turnstile.
- A cord that only sort of connects is worse than none — it tricks you into thinking you’re charging while the battery slides toward zero.
The day-of tech checklist
Run this before you leave the room each morning:
- [ ] Power bank charged to 100% overnight
- [ ] Two cords with the correct tips, in an outside pocket you can reach one-handed
- [ ] Phone at full charge before the gates open
- [ ] SupaPark alerts on, with notifications allowed so Drop Watch and ride-down pings actually reach your lock screen
- [ ] Low-power mode ready to flip on once you hit ~30%
Stretch your battery without missing a thing
You don’t have to choose between conserving power and staying on top of the day:
- Turn down screen brightness. The number-one daytime drain, and you rarely need full brightness in a queue.
- Close the background apps you opened at breakfast — video and games keep sipping power.
- Keep notifications on. It’s tempting to silence everything to save battery, but that defeats the point: SupaPark’s whole job is to find you the second a wait drops or a reservation opens. Lean on alerts instead of constantly refreshing the app yourself — checking manually every five minutes burns far more battery than letting the pings come to you.
- Charge while you sit. Plug into the bank during a show, a table-service meal, or the bus back — not while you’re sprinting between headliners.
The one thing to remember
Pack a 20,000 mAh bank, two good cords, and charge both the bank and your phone overnight — that’s the whole kit. Do that and your phone stays alive from rope drop to the last firework, which means every Lightning Lane refill, every Drop Watch alert, and every “ride this next” nudge actually lands. The smartest planning tool in the world can’t help you through a dead screen.
Hydration, Sunscreen & Health Essentials
Defeating the Florida Sun
The move is to apply your base layer of sunscreen at the hotel, then pack highly accessible touch-up options for the parks.
Florida’s sun routinely pushes the UV index to 9+ while temperatures soar into the 90s. Missing a single two-hour reapplication window can turn a great vacation into a miserable, painful ordeal. You do not want to be carrying around a massive pump bottle of lotion all day.
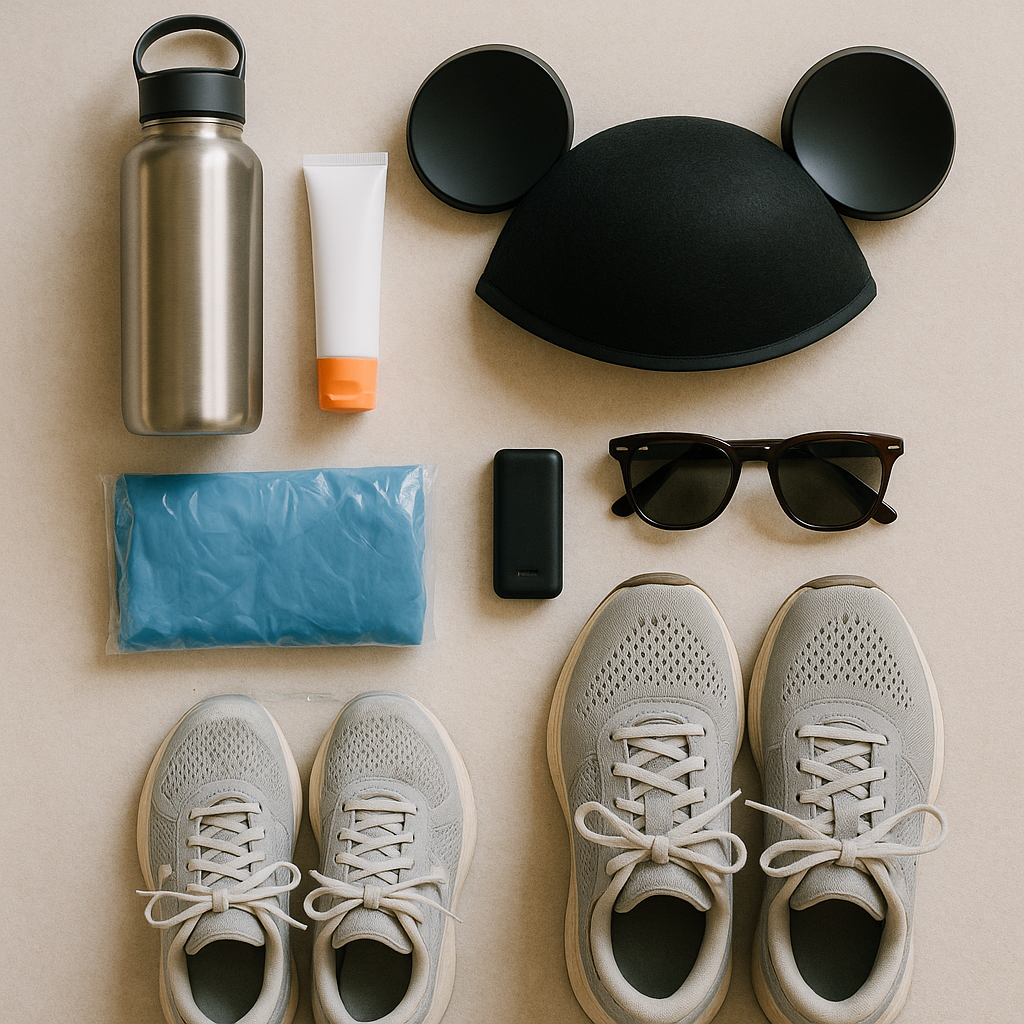
- Pack a travel-size SPF 50+ bottle (under 3 ounces, making it TSA-compliant) and store it in an external zip pocket of your park bag. When you can grab it without rummaging, you are far more likely to actually use it.
- Opt for water-resistant formulas. Between the unpredictable afternoon downpours, sweaty walks through World Showcase, and water rides like Kali River Rapids, standard sunscreen will wash right off.
- Pro tip: Slip a small sunscreen stick into each child’s pocket. Sticks don’t melt or spill, and kids can easily reapply it to their own faces and arms while waiting in standby lines, completely eliminating the midday sunscreen fight.
Smart Hydration Strategies
Skip the heavy, expensive disposable water bottles and leverage Disney’s free refill infrastructure instead.
Carrying a 24-pack of water into the park adds brutal weight to your bag, and buying single bottles wastes money and time. You need a frictionless way to drink water while moving. Locate the blue water-fountain icons on the SupaPark map—there are over 200 refill stations across the parks, usually located near restrooms and major walkways.
| Hydration Option | Cost | The Insider Verdict |
|---|---|---|
| Yak & Yeti Tumbler | Around $30 | Best for heavy drinkers. Bought at Animal Kingdom, this unlocks free, all-day fountain beverage refills at the restaurant’s quick-service window. |
| Plush-Carrier Reusable Bottle | Around $30 | Best for kids. Bottles themed to Marie or Simba come with a wearable strap. Keeps hands free and fits easily in stroller cup holders. |
| Free Ice Water Cups | Free | Good in a pinch, bad for speed. Any quick-service counter will give you a free cup of ice water, but you have to wait in the food line to get it. |
| Standard Bottled Water | ~$4 each | Skip it. Adds unnecessary weight to your bag and generates trash. |
If you are utilizing Early Theme Park Entry, make filling your water bottle the very first thing you do. Do not waste the lowest-crowd hour of the morning trying to hunt down a beverage.
The Minimalist Park First-Aid Kit
Stop overpacking “just in case” medical supplies and rely on Disney’s First Aid centers for the basics.
Every single Disney park has a dedicated First Aid center—usually located near the front of the park or the central hub. These centers offer free, single-dose pain relievers (ibuprofen, acetaminophen), standard band-aids, lip balm, and sunscreen. If you just have a minor headache, walk in and ask.
Because of this, your personal day-bag health kit should only contain the hyper-specific items that Disney does not hand out for free. Pack these in a single, lightweight zip-pouch:
- [ ] Heavy-duty blister pads: A Disney park day averages 8 to 10 miles of walking on hard concrete. Blisters are an absolute certainty. The free standard band-aids at First Aid will rub off in ten minutes. Pack premium hydrocolloid blister patches or moleskin and apply them the second you feel a hotspot.
- [ ] Anti-chafing balm: Florida’s humidity is unforgiving. A travel-size anti-chafe stick applied to thighs and feet will save your trip.
- [ ] Daily antihistamines: Even if you don’t typically suffer from allergies, Central Florida pollen and unfamiliar foods can trigger sudden reactions. Keep a few doses of Claritin or Benadryl on hand.
- [ ] Personal prescription medications: Bring only the exact number of pills you need for the day, rather than carrying the entire bulky pharmacy bottle.
By stripping your health kit down to just these essentials, you drop dead weight from your bag while keeping the actual trip-savers immediately accessible.
Weather Warfare: Rain Gear and Cooling Tech
Florida weather swings from blistering 90-degree heat to torrential downpours in the same afternoon—pack to survive both without hauling a heavy bag.
Disney World weather requires strategy, not just a glance at a forecast app. The heat hits different when you are walking miles on concrete, and the daily summer thunderstorms arrive fast and hit hard. If you are not prepared, you will end up soaked, sunburned, or spending premium prices on generic park gear. Here is how to pack smart for both extremes.
Beating the 90-Degree Heat
The sun is relentless, and managing your core temperature is what keeps a long park day going.
When the Florida sun hits 90°F with a UV index of 9+, staying cool is not about comfort—it is about stamina. You need gear that actively lowers your temperature while you stand in outdoor standby lines or navigate unshaded areas like Toy Story Land.
| Cooling Gear | Pros | Cons | The Smart Move |
|---|---|---|---|
| Cooling Towels | Cheap, pack flat, activate with any water fountain or sink. | Need to be re-wet constantly; can get damp and heavy in your bag. | Best for sudden, extreme heat relief. Drape over your neck while waiting in outdoor queues. |
| Wearable Neck Fans | Hands-free, consistent breeze, battery lasts for hours. | Bulky to pack; useless if the battery dies before noon. | Excellent for kids in strollers and adults who hate the feeling of wet towels. |
Pro tip: Pack a portable charger or power bank so your neck fans (and your SupaPark real-time alerts) never die in the middle of a hot afternoon.
Sun Protection Strategy
Apply sunscreen before you leave the resort room, and reapply every two hours.
Missing a single re-application can turn a fun day into a painful one. Do not rely on finding shade; pack specific, travel-friendly sun protection.
- [ ] Pack a travel-size SPF 50+ lotion (under 3 oz for TSA compliance) in an external zip pocket so you can grab it without rummaging.
- [ ] Bring a water-resistant formula for rainy-day poncho situations or heavy sweating.
- [ ] Slip a small sunscreen stick into each child’s pocket. Sticks do not spill and are easy for kids to use on their own.
Surviving the Sudden Downpours
Rain in Disney World is inevitable, but letting it ruin your day is optional.
Afternoon thunderstorms are a daily reality in Central Florida. When the sky turns black, outdoor rides close and the crowds scramble for the nearest gift shop. Your goal is to stay dry, keep moving, and take advantage of the cleared-out pathways.
| Rain Gear | Pros | Cons | The Smart Move |
|---|---|---|---|
| Compact Ponchos | Ultra-lightweight, cover your bag, keep your hands free. | Can feel like a sauna in the heat; cheap ones tear easily. | The ultimate park essential. Buy a durable, reusable pack of ponchos before your trip. |
| Travel Umbrellas | Offer personal shade; no clammy plastic feeling. | Useless in driving wind; dangerous in tight crowds; tie up one hand. | Leave the umbrella at home. They are a liability when navigating packed walkways. |
The Rain-Ready Checklist
Pack these essentials to handle sudden storms without missing a beat.
When the rain starts, you want to be able to transition in seconds.
- [ ] Add a lightweight rain poncho to your bag every single morning, even if the sky is blue. This is especially vital for late-night closings—on the longer Animal Kingdom evenings, bring an insulated water bottle and a lightweight poncho. The extra hour means more time in line and more chances to need a quick water refill or protection from a pop-up shower.
- [ ] Pack a spare pair of socks in a ziplock bag. Wet feet cause blisters, which will end your Disney trip faster than anything else.
- [ ] Wear water-resistant shoes or sandals that dry quickly. Avoid heavy canvas sneakers that stay soggy all day.
- [ ] Bring a lightweight zippered pouch to protect electronics, paper tickets, and your official park map.
Do not let the weather dictate your park strategy. With the right cooling gear and a solid rain plan, you can outlast the crowds when the heat peaks or the sky opens up.
Dressing for 20,000 Steps: Footwear and Clothing
The shoes you’d wear to brunch will betray you by 2 PM. A Disney day runs 8–10 miles on hot pavement, and the difference between a great afternoon and a limping one is almost always footwear. Pack like you’re hiking, not strolling.
Footwear: comfort beats cute, every time
The single biggest rookie mistake is bringing brand-new shoes “for the trip.” New shoes plus 20,000 steps equals blisters by lunch. Break in any shoe for at least two full weeks of real walking before you fly — if it rubs at home, it will shred your heel at Magic Kingdom.
| Footwear choice | Best for | The catch |
|---|---|---|
| Broken-in athletic sneakers | All-day walking, most guests | Bulkier in your bag — wear them on the plane |
| Cushioned walking shoes (memory-foam style) | Sore-foot-prone adults, long days | Less support on water-ride splash zones |
| Sport sandals with a back strap | Hot days, water parks, quick-dry | Skip flimsy flip-flops — zero support, blister magnets |
| A second backup pair | Rain days, swapping mid-trip | Takes space; rotate to dry shoes fully overnight |
Two pairs is the move if you have room. Rotating shoes lets each pair dry out and spreads pressure across different parts of your feet — your soles will thank you on day four.
- [ ] Two weeks of break-in walking before departure
- [ ] Primary broken-in sneakers (worn on travel day)
- [ ] Backup pair or sport sandals for rain/water
- [ ] Spare socks in the day bag for surprise downpours
Socks and chafing: the un-sexy stuff that saves your day
Sweat plus friction plus heat is the blister formula, and Florida supplies all three. Cotton socks soak and stay wet; moisture-wicking athletic or wool-blend socks pull sweat away and dramatically cut blister risk.
For thigh chafe — the silent day-ruiner in shorts and Florida humidity — anti-chafe is non-negotiable for a lot of people:
- An anti-chafe balm or stick (the deodorant-style ones) applied to inner thighs and heels before you leave the room
- Blister-cushion bandages in the day bag — pre-tape any hot spot the second you feel it, don’t wait for the blister
- Moisture-wicking underwear or fitted shorts under dresses/skirts
Pro tip: Don’t wait until something hurts. Tape your known hot spots and apply anti-chafe in the morning as part of your sunscreen routine — prevention costs you 30 seconds; a real blister costs you the afternoon.
The AC paradox: pack a layer even in July
Here’s what catches first-timers off guard: it’s 92°F outside, but the indoor queues, restaurants, and slow-moving dark rides are aggressively air-conditioned. You’ll go from sweating in a standby line to genuinely chilly inside within minutes. The fix is a packable layer that lives in your bag.
| Layer option | Why it works | Note |
|---|---|---|
| Lightweight zip hoodie or fleece | Warm enough for cold restaurants, packs small | Best all-rounder |
| Compact rain poncho | Doubles as a wind/AC layer and rain cover | Cheaper at home than in-park |
| Light long-sleeve / sun shirt | Sun protection outside, warmth inside | Great for kids who run cold |
- [ ] One light layer per person (hoodie, fleece, or long-sleeve)
- [ ] Compact poncho — afternoon storms are near-daily in summer
- [ ] Quick-dry fabrics over cotton so you’re not soggy after a splash ride or a rain band
Dressing the kids (and yourself) for the long haul
- Dress in breathable, quick-dry fabrics — moisture-wicking athletic wear beats cotton tees that stay damp all day.
- Hats and sunglasses earn their bag space; a wide-brim hat does more for an overheated kid than another water break.
- Bring one full spare outfit for younger kids — water rides, ice cream, and surprise rain make a mid-day change a lifesaver.
The one thing to remember: Break in your shoes, wick away the sweat, and always carry a light layer. Get those three right and you’ve handled the part of a Disney day that quietly wrecks everyone else’s.
Food, Snacks & Beverage Solutions
Bringing your own snacks and optimizing your breakfast strategy is the easiest way to save money and reclaim wasted morning hours at Disney World.
Cooler & Breakfast Basics
Skipping the traditional sit-down breakfast is the ultimate veteran move to maximize Early Theme Park Entry. Every minute you spend waiting for eggs and bacon at your resort is a minute you aren’t standing in a short standby line for a headliner ride.
- [ ] Pack a small, soft-sided cooler with easy breakfast items like cereal, whole fruit, pastries, or pre-made muffins.
- [ ] Eat in your resort room or while walking to the bus to completely bypass the 7:00 AM restaurant rush.
- [ ] Review the free “50 bucket-list snacks” list from the Disney Springs updates before your trip. Knowing exactly which treats you’re going to chase in the parks helps you pack the right-sized cooler and containers for leftovers.
Reusable snack bags—whether silicone or standard zip-top—are park-bag non-negotiables. They are perfect for bringing in your own granola bars and cut fruit to fend off mid-afternoon toddler meltdowns without spending a dime. Just as importantly, they give you a leak-proof place to stash half-finished park food. If you buy a hearty snack like the Barbacoa Beef on Baked Mac & Cheese from Animal Kingdom’s Eight Spoon Café, you can slide the entire container into a zip-top bag when you need to keep moving, keeping your day bag organized and completely mess-free.
Reusable Drink Gear & Hydration Hacks
Florida heat requires constant hydration, but buying single-use bottles will quickly drain your wallet and weigh down your bag. Bring the right reusable gear to cut down on waste and stay fueled.
| Drink Solution | Estimated Cost | Why the Pros Pack It |
|---|---|---|
| Yak & Yeti Tumbler (Animal Kingdom) | Around $30 | Unlocks free, all-day drink refills in the park, eliminating the need to constantly buy expensive sodas. |
| Themed Reusable Bottle (e.g., Simba plush carrier) | Around $30 | Fits easily in stroller cup holders and provides a lightweight, kid-friendly backup to refill at any of Disney’s 200+ water fountains. |
| Disposable Bottled Water | $2–$3 each | Adds unnecessary weight, plastic waste, and cost. Skip this entirely if you brought a reusable option. |
How to execute the hydration strategy without slowing down:
- [ ] Check the SupaPark map for the blue water-fountain icons—they are everywhere, particularly near main attractions, restrooms, and food courts.
- [ ] Make “refill water bottle” the very first item you tick off your daily park-bag checklist.
- [ ] If you are an early-entry guest, fill your bottles at the hotel or before the park gates even open so you stay hydrated during that initial sprint to your first attraction.
Smart Snack Management in the Parks
Cash is still king for quick, impulse snacks at standalone carts. Keep a few dollars in a dedicated, easily accessible coin pouch to avoid holding up the line or waiting on a slow card swipe. This is the smartest way to grab a quick Experiment 626 Cone at the Polynesian’s Pineapple Lanai or a savory bite in Animal Kingdom while your group keeps moving.
For sticky, melting treats like a Citrus Swirl or a Pina Colada Slush from Sunshine Tree Terrace, dropping the cup into an empty zip-top bag contains the condensation and mess. It keeps your hands free for taking photos, scanning Lightning Lane passes, or wrangling kids through heavy crowds.
If you have travelers with food sensitivities, always pack a travel-sized antihistamine in your snack pouch. Disney is fantastic with allergy-friendly menus, but having your own backup medication provides immediate peace of mind if a cross-contamination issue occurs during a busy dining service.
Pro tip: Pack a light, grab-and-go snack and a full water bottle specifically for rope drop. Having your food ready before the official opening time means you can slip straight into the park and head for your first Lightning Lane Multi Pass selection or a popular standby line, rather than wasting precious early-morning minutes hunting for a quick-service pastry.
Family Packing: Stroller Cargo and Kids’ Essentials
Pack two bags, not one: a stroller basket that holds the bulk, and a small front-loading day bag you can grab in two seconds without unloading the whole stroller. Strollers get parked far from ride entrances, sometimes relocated by cast members, and they’re not lockable — so the rule is simple: anything you’d panic about losing or need right now lives on your body, not in the basket.
Stroller basket vs. day bag: who carries what
The basket is your supply depot. The day bag is your grab-and-go. Split them like this:
| Stays in stroller basket | Lives in your day bag (on you) |
|---|---|
| Backup snacks, extra water bottles | Wallet, phone, hotel key, sunscreen stick |
| Spare clothes / diapers stash | A few diapers + wipes for the next change |
| Rain ponchos for the group | Allergy meds, EpiPen, kids’ meds |
| Sun hats, light layers | Refillable water bottle (fits the cup holder) |
| Cooler with breakfast/lunch overflow | A small toy + one quiet-time distraction |
Why it matters: when a ride goes walk-on or your Lightning Lane window opens, you want to move fast. Digging through a packed basket while a toddler melts down is how families burn 20 minutes they didn’t have.
Pro tip: Tie a bright ribbon or clip a cheap luggage tag to your stroller handle. The parking corrals fill with near-identical black strollers, and cast members do move them — a visual marker saves you the end-of-day scavenger hunt.
Managing Rider Switch without becoming a pack mule
Rider Switch (Disney’s official “one adult waits, the other rides, then they swap without re-queuing”) is your best friend for headliners with height limits — think Cosmic Rewind, Seven Dwarfs Mine Train, or Avatar Flight of Passage, all of which are Lightning Lane Single Pass rides you don’t want to waste.
The gear problem: the parent who rides can’t take the stroller into the queue. So plan the handoff:
- [ ] Park the stroller and pull the day bag before you split up
- [ ] The waiting parent keeps the stroller, the non-rider, and the snacks
- [ ] The riding parent carries only phone + loose-pocket items (zip pockets only — coasters launch hard)
- [ ] Swap the day bag at the handoff if the second rider needs it
- [ ] Use the wait to do a diaper change or water refill so it’s not dead time
One smart sequencing move: let the cautious kid watch the launch from the exit area while the first group rides. A child who says “again!” after watching is ready to swap in; a child who covers their eyes just answered the question for you — and saved your Single Pass.
Packing light for toddlers (without forgetting the stuff that matters)
You do not need to bring the whole nursery. Disney’s First Aid Centers in every park stock free band-aids, and resort rooms cover the basics. Pack for the next few hours, refill from the basket, and lean on the parks.
What earns its space:
- Stroller as the workhorse: it carries the cargo so your shoulders don’t. Bring a rain cover — it doubles as gear protection when you park it during a downpour.
- Diaper math: roughly one per two hours in the day bag, the rest in the basket. Wipes solve diapers, spills, sticky hands, and face-cleanups, so over-pack those.
- One change of clothes per young kid, sealed in a zip bag (the wet swim/spill stuff rides home in the same bag).
- Quiet-zone kit: a small toy and a snack for the inevitable midday reset. The afternoon meltdown is predictable — plan for it instead of reacting to it.
- A measuring approach: know your kid’s height before you go so you’re not guessing at ride entrances. Height tracking saves you from queuing for a ride they can’t board.
What to leave home: bulk diaper packs (resort gift shops and nearby stores restock you), full-size toiletries, and a separate first-aid haul. Travel-size and refill beats hauling.
The one thing to remember
Two-bag system: bulk in the basket, essentials on your body. Mark your stroller, pre-stage the Rider Switch handoff so the rider travels light, and pack for the next few hours rather than the whole trip — the basket and the parks fill in the rest. SupaPark’s family planning tracks each kid’s height against ride eligibility and flags Rider Switch attractions, so you know which queues are worth splitting up for before you’re standing at the entrance.
Prohibited Items: What Will Get Confiscated at Security
A quick check of the prohibited list before you leave the resort saves you from the agonizing choice of trashing expensive gear or walking a mile back to your car.
If you pack a banned item, Disney security will catch it at the metal detectors. There is no locker area at the front gate where you can stash prohibited items for the day. If you bring something banned, you face a brutal decision: surrender the item to the trash bin right there, or turn around, hike back to your car, bus, or monorail, and lose valuable early-morning park time. When every minute counts toward knocking out headliners at rope drop, a security snag is the last thing you want.
The Immediate Confiscation List
Keep these items entirely out of your carry-on, day bag, and any secondary bags (including your stroller or service dog bag).
- [ ] Selfie sticks and long extension poles. Disney banned these years ago because they were hitting ride mechanisms and obstructing views.
- [ ] Loose ice and dry ice. If you bring a small cooler for snacks, you cannot fill it with cubed ice.
- [ ] Glass containers. This includes glass water bottles and glass perfume bottles. The only exception is small glass baby food jars.
- [ ] Oversized strollers. Your stroller must be no larger than 31 inches wide and 52 inches long. Disney strictly enforces this at the security checkpoints.
- [ ] Stroller wagons. Brands like Keenz or WonderFold are prohibited, regardless of their dimensions. Even if you push them rather than pull, they are not allowed.
- [ ] Folding chairs or camp stools. You cannot bring your own seating for parades, fireworks, or long standby lines.
- [ ] Weapons and self-defense items. This includes pocket knives, pepper spray, mace, and anything that looks like a weapon (even toy blasters that aren’t sold in the parks).
Smart Substitutes for Banned Gear
You do not have to sacrifice comfort or convenience just because an item is banned. The move is to pack the Disney-approved alternative so you still get the utility without the security hassle.
| Banned Item | The Disney-Approved Alternative | The Insider Benefit |
|---|---|---|
| Selfie Sticks | Small handheld grip (under 12 inches) or phone tripod | You still get stable family photos by using your phone’s built-in timer, without risking a confiscation at the gate. |
| Loose Ice | Reusable gel ice packs or frozen water bottles | Ice packs keep your cooler cold all day without melting into a sloppy puddle that delays you at bag check. |
| Glass Bottles | Insulated stainless steel tumblers | Stainless steel will not shatter on the pavement, and it keeps your water ice-cold during a hot afternoon. |
| Stroller Wagons | Traditional double stroller (side-by-side or tandem) | Meets Disney’s footprint limits while still hauling two kids. If you do not own one, rent from a local vendor who delivers. |
| Camp Chairs | Lightweight foam sitting pads or extra ponchos | Gives you a clean, dry spot to sit on the pavement while waiting for the Magic Kingdom fireworks, taking up zero space in your bag. |
How to Fly Through the Security Scanners
Walt Disney World uses advanced walk-through security scanners. In most cases, you do not need to take your backpack off or empty your pockets. You simply walk through at a normal pace. However, certain everyday items routinely trigger the system, forcing you into the slow-moving secondary bag check line. If you want to bypass the manual bag search, you need to manage the heavy metal and dense electronics in your day bag.
Hold problem items out in front of you. When you approach the scanner, pull out your insulated water bottle, heavy portable charger, and full-size umbrella. Hold them straight out in front of your chest as you walk through. This signals to the system exactly what the dense objects are, keeping you out of the secondary screening line.
Pack light and skip redundant toiletries. Disney resort rooms provide refillable dispensers for shampoo, conditioner, and body wash. Keep large liquids and aerosol sunscreens out of your main bag and your service dog bag. Pack only prescription meds and a travel-size toothpaste; you will free up space for an extra waste-bag roll or a compact rain poncho.
Leverage the First Aid Centers. Do not pack a massive medical kit that looks suspicious on an x-ray. Every park’s First Aid Center offers free single-dose medication, band-aids, sunscreen, and lip balm. You can leave those items at home and rely on the centers, freeing up space and ensuring you breeze through security.
Pro tip: Treat the Disney security checkpoint like the airport. A quick glance at the official warning list before you zip everything up saves you a security hold-up. Slipping straight through the gates is the critical first step to a successful morning, keeping you on schedule to hit the standby line for your top priority before the park gets crowded.
What to Leave at Home: Smart Substitutes and On-Site Hacks
The smartest way to pack for Disney World is knowing exactly what you can get for free on property, saving you baggage fees and heavy day bags.
Airline baggage rules are quietly wrecking traditional packing plans. With major airlines like Southwest ending their legacy two-free-checked-bags policy for many travelers (as of May 28, 2025), every square inch of your suitcase costs money. Overpacking “just in case” items or hauling things Disney already provides is a costly rookie mistake. Do not build a Disney packing list that only works if checked bags are free.
Here is exactly what you should leave out of your luggage, and the smart on-site hacks to replace them.
The “Do Not Pack” Luggage Audit
Before you zip your suitcase, run through this final culling checklist to ensure you aren’t paying to fly unnecessary weight to Orlando:
- [ ] Full-size shower liquids: Leave the heavy shampoo and body wash bottles in your bathroom.
- [ ] Bulk pharmacy boxes: Do not bring the 500-count bottle of ibuprofen or massive box of band-aids.
- [ ] Flats of bottled water: Never waste luggage weight or grocery delivery fees on disposable water cases.
- [ ] Prohibited camera gear: Keep selfie sticks over 12 inches out; they will be confiscated at park security.
- [ ] Individual winter coats: Unless a true cold front is forecasted, skip packing a heavy jacket for every single person.
Leverage First Aid Centers Instead of Bulk Meds
Relying on Disney’s in-park medical centers instead of your own pharmacy haul saves crucial space in your daily park bag.
Every Disney park features a dedicated First Aid Center staffed by registered nurses, and they offer far more than just a quiet place to sit. These centers provide free, single-dose over-the-counter medications, including pain relievers like ibuprofen or acetaminophen. They also hand out free band-aids, blister pads, sunscreen packets, and lip balm.
Instead of carrying a bulky medical kit that weighs down your backpack, you can leave those items at home. Just rely on the centers for your mid-day headaches or scraped knees.
Pro tip: Pack a tiny, travel-size blister kit for your hotel room to address morning foot care, but let the in-park First Aid centers handle your mid-day aches and scrapes for free.
Skip Redundant Toiletries
Disney resort rooms provide high-quality shower essentials, making your travel toiletry bag largely unnecessary.
Whether you are staying at a Value resort or a Deluxe, Disney resort showers are equipped with refillable, wall-mounted dispensers for shampoo, conditioner, and body wash. These are restocked daily by housekeeping.
Pack only your non-negotiables: prescription medications, specific sensitive-skin face washes, and a travel-size toothpaste. Ditching the heavy liquids frees up significant space in your bag, which is better used for an extra waste-bag roll, a compact rain poncho, or leaving room for souvenirs.
Rethink Your Hydration Strategy
Hauling cases of disposable water is a waste of money and energy when smart, reusable options exist.
Staying hydrated in the Florida sun is mandatory, but how you do it matters. Disney walks average 8 to 10 miles a day, and carrying extra disposable bottles adds brutal weight to your bag. Instead, use a combination of free park resources and strategic reusable options.
| Hydration Strategy | Cost | Pros & Cons |
|---|---|---|
| Park Water Fountains | Free | Over 200 locations park-wide. Highly convenient, but Florida tap water has a distinct taste some guests dislike. |
| Quick-Service Ice Water | Free | Any counter-service restaurant will hand you a free cup of ice water. Refreshing and filtered, but requires waiting near the mobile-order pickup area. |
| Reusable Tumblers & Carriers | Around $30 | Items like the Yak & Yeti tumbler offer free, all-day refills; plush carriers (like Simba designs) make carrying standard bottles easier. Great value, but requires upfront purchase. |
| Disposable Bottled Water | Around $4–$5 | Convenient in a pinch, but wildly expensive over a week and adds heavy trash to your bag. Skip it entirely if you have a reusable option. |
Share the “Just in Case” Layers
Consolidate your emergency weather gear to avoid bulky suitcases and heavy backpacks.
Florida weather is famously unpredictable, but packing a fleece or jacket for every single family member “just in case” is a massive drain on luggage space. If the forecast is generally mild, pack one or two shared emergency layers for the group.
Use compression cubes for any hoodies you do bring. For late-night park closings—like those longer Animal Kingdom evenings—a lightweight, compact rain poncho is a much smarter use of space than a bulky jacket. It traps body heat if it gets breezy and keeps you dry on water rides, all while folding down to the size of a deck of cards.
Avoid Security Hold-Ups
Know the prohibited list before you reach the front gates so you don’t lose time at bag check.
Keep large liquids, weapons, and standard selfie sticks out of your day bag. If you want group photos, swap the banned selfie stick for a small handheld grip (under 12 inches) or simply rely on your phone’s built-in timer. A quick glance at the TSA warning list and Disney’s prohibited items before you zip everything up saves you a frustrating security hold-up when you should be rope-dropping your first Lightning Lane.
Cost Breakdown: Packing vs. Purchasing On-Site
The biggest hidden cost of a Disney trip isn’t just the markup on forgotten essentials—it’s the park time you waste standing in line to buy them.
Buying a power bank or an umbrella inside Magic Kingdom comes with a steep convenience fee. But more importantly, realizing your phone is dead while you’re trying to book your next Lightning Lane Multi Pass selection means you lose precious planning time. You don’t need to haul a massive survival kit, but strategically packing the right high-margin items before your flight saves you significant cash and keeps you out of gift shop checkout lines.
The “Buy at Home vs. Buy in the Park” Math
The “Disney tax” is real. Here is exactly what you stand to lose by relying on in-park purchases for your daily necessities.
| Essential Item | Pack It (Home Cost) | Buy It (In-Park Cost) | The Smart Play |
|---|---|---|---|
| Rain Poncho | ~$2–$5 (multi-pack) | ~$12–$15+ | Pack cheap, compact ponchos. Use them once, toss them, and keep your bag light. |
| Sunscreen | ~$8–$10 | ~$15–$20+ | Bring a travel-size SPF 50+. If you run out, hit a First Aid Center before buying retail. |
| Power Bank | ~$20–$30 | ~$30+ (plus swap fees) | Bring your own high-capacity charger. Disney sells FuelRods, but they require frequent swapping. |
| Bottled Water | Free (tap/fountain) | ~$4–$5 per bottle | Bring a reusable bottle. Buying four bottles a day for a family of four wastes $80 quickly. |
| Basic First Aid | ~$3–$5 | ~$10+ | Don’t buy full packages in the park. Get free single doses at First Aid. |
The Pre-Trip Packing Checklist
With airline baggage rules tightening—like Southwest ending their blanket two-free-checked-bags policy—bag space is premium real estate. Only pack what actually saves you money or time.
- [ ] Secure your rain gear: Florida rain is a daily guarantee. A compact poncho or small umbrella in your day bag prevents a costly scramble when the sky opens up.
- [ ] Pack a dedicated power bank: Your phone is your lifeline. If your battery dies, you lose access to your Lightning Lane bookings, dining reservations, and those critical SupaPark real-time Drop Watch alerts. Bring a reliable charger so your park day doesn’t flatline.
- [ ] Bring travel-size sunscreen: The Florida sun frequently hits a UV index of 9+. Bring a travel-size SPF 50+ bottle (under 3 oz to clear TSA) and stash it in an outer pocket for quick access. Stick sunscreens are also perfect for kids to apply themselves.
- [ ] Leave “just in case” toiletries behind: Disney resort rooms provide refillable dispensers for shampoo, conditioner, and body wash. Save the luggage space for souvenirs or extra shoes.
- [ ] Filter out prohibited items: Keep large liquids, weapons, and selfie sticks out of your day bag. A quick glance at the Disney and TSA warning lists before you zip up saves you a massive headache and security hold-up at the front gate.
Bag Space vs. Locker Rentals
When deciding what to bring from home, remember that carrying everything has a physical cost, and storing it has a financial one. Renting a locker in the parks costs around $10 to $15 per day. If you pack a massive, heavy backpack with full-size sunscreen bottles and bulky jackets, you will end up paying for a locker just to save your shoulders.
- [ ] Use compression packing cubes: If you are visiting during the cooler months and need hoodies or fleece layers, use compression cubes in your luggage, and only bring one shared emergency layer into the park.
- [ ] Swap the selfie stick for a hand grip: Selfie sticks are banned and will be confiscated. Use a small handheld grip (under 12 inches) or rely on your phone’s built-in timer.
Smart Substitutes & On-Site Cash Hacks
If you do find yourself needing something in the park, don’t default to the nearest merchandise shop. Use these insider workarounds to keep your budget intact.
- Leverage the First Aid Centers: This is the best-kept secret in the parks. Every park’s First Aid Center offers free single-dose medication (like ibuprofen or antihistamines), band-aids, lip balm, and sunscreen. You can leave the bulky medical kits at home and rely on the centers for minor issues, freeing up day bag space and saving you from buying a $10 pack of Tylenol.
- Upgrade Your Hydration Strategy: Paying $5 for water is a rookie mistake. Bring a reusable option—like the Marie or Simba water bottle with a plush carrier (around $30)—that easily fits in stroller cup holders or your bag, and fill up at the hundreds of free water fountains located near restrooms and quick-service spots.
- Use the Animal Kingdom Tumbler Hack: If your family prefers iced tea or soda over water, grab the Yak & Yeti Tumbler at Animal Kingdom (around $30). It unlocks free, all-day drink refills at their quick-service window. It cuts down on your beverage budget and eliminates plastic waste.
- Bypass the Bag Fee: Disney charges a $1 fee per plastic shopping bag at checkout. Bring your own reusable tote—like the sturdy “Seaside Is Where I Belong” bag (around $45) you can buy once and use for the whole trip—to stash your merchandise.
- Keep small cash for quick bites: Drop-in snack spots often have long lines just for the checkout. Keeping a few dollars in a small coin pouch for items like the $7.29 Barbacoa Beef on Baked Mac & Cheese at Animal Kingdom’s Eight Spoon Café helps you avoid digging through your wallet or dealing with card swipe delays.
Pro tip: Do not waste early morning rope drop minutes digging for your wallet to buy a water bottle or sunscreen. Keep your day bag packed, your power bank fully charged, and a lightweight poncho easily accessible before you ever leave your resort room. When the gates open, your only focus should be walking straight onto your first ride.
Security Checkpoint Strategy: Packing to Avoid the Bag Search
The fastest way into the park isn’t carrying a smaller bag—it’s knowing exactly which items trigger the metal detectors and keeping them in your hands, not on your back.
Disney World uses advanced contactless security scanners designed to let you walk straight through the arches with your day bag fully zipped on your shoulders. But if the system detects dense metallic shapes or clustered electronics, you will get pulled aside for a manual, zipper-by-zipper bag check. A security hold-up at 8:00 AM can cost you your Early Theme Park Entry advantage, putting you behind thousands of people marching toward the biggest standby lines. You don’t necessarily need to pack less; you just need to pack smarter and know the system’s weaknesses.
The “Hold It Out” Hack
The security scanners are highly sensitive to dense cylindrical objects and heavy electronics. If you leave these buried in your backpack, security will stop you, and they will dig through every compartment to find the source. The easy bypass? Take the trigger items out before you walk through the detector.
Hold these specific items straight out in front of you (like carrying a pizza box) as you walk through the scanner:
- [ ] Metal water bottles and insulated tumblers (like a Yeti or Stanley)
- [ ] Large portable battery banks and heavy charging bricks
- [ ] Hard-shell metal glasses cases
- [ ] Full-size umbrellas (compact travel umbrellas are usually fine, but pull them out if they have a heavy metal frame)
Pro tip: Group all your “trigger items” in one easily accessible exterior pocket or put them together in a small pouch at the very top of your main compartment. When you approach the security tables, you can grab them all in one handful, walk through the scanner, and drop them right back in without breaking your stride.
Packing the Bag Itself
Even if you hold out your umbrella, you might still get flagged randomly or for something unexpected. How you organize the inside of your day bag dictates whether that manual search takes thirty seconds or five agonizing minutes. A disorganized abyss means a serious delay.
| Packing Strategy | Security Check Speed | The Reality |
|---|---|---|
| Clear Packing Cubes | Fastest | The gold standard. The guard unzips the main bag, instantly sees your chargers and ponchos through the clear plastic, and waves you through. |
| Multiple Small Pockets | Moderate | Keeps you organized, but the guard is required to unzip every single exterior pocket they can find to verify the contents. |
| One Big Compartment (Loose) | Slowest | Security has to physically poke and dig through loose hoodies, snacks, and gear. High risk of items falling out on the table. |
If you are packing multiple bags for your group, designate one “clean bag” (just extra clothes, diapers, and a poncho) and one “tech bag” (chargers, cameras, and dense items). Send the clean bag through the scanner on the back of someone who can walk quickly, and let the tech bag wearer prepare to be stopped.
Navigating the Prohibited Items List
Disney’s prohibited items list is strictly enforced. Getting caught with banned gear at the gate means choosing between throwing it in the trash or making a long, miserable walk back to your car or resort bus to store it.
- [ ] The TSA Rule of Thumb: Keep large liquids, weapons, self-defense items (like pepper spray or mace), and pocket knives completely out of your carry-on luggage and day bag. A quick glance at the standard TSA warning list before you zip everything up in the hotel room saves you a massive security hold-up.
- [ ] Skip the Loose Ice: Coolers are allowed if they are smaller than 24"x15"x18", but loose ice or dry ice is banned. Pack reusable ice packs or freeze your water bottles overnight to keep things cold.
- [ ] Selfie-Stick Alternatives: Selfie sticks and extendable camera poles are strictly prohibited and will be confiscated. If you need a camera grip, use a small handheld mount (under 12 inches) or rely on your phone’s built-in timer.
- [ ] No Glass Containers: With the exception of small baby food jars, leave all glass at home. Transfer any necessary items into silicone tubes or plastic baggies before you leave your room.
By knowing what sets the machines off, dumping the prohibited items, and having your bag perfectly staged, you bypass the crowds clogging the inspection tables and walk straight to the tap points.
Key Takeaways
Pack like a veteran, not a worried first-timer: Bring less, organize better, and keep your hands free so you can move fast and comfortably through a 10-mile park day.
The Bottom Line on Packing Smart
Packing well for Walt Disney World isn’t about bringing every possible “just in case” item; it’s about anticipating the heat, the walking, and the volatile Florida weather. Airline bag rules can quietly wreck a good packing plan. With carriers like Southwest officially ending their long-running two-free-checked-bags policy in mid-2025, the math on bringing bulky luggage has changed significantly.
Before you pack, decide what you are actually willing to pay to move. You do not want to build a packing list that only works if checked bags are free. The less you have to check on the plane—and the less you have to lug around the theme parks—the better and more agile your trip will be.
Pro tip: You will be moving fast and standing in crowded lines. A bag you can swing to your front and open one-handed easily beats a traditional backpack that you have to take completely off every time you need your phone, sunscreen, or a quick snack.
The Ultimate Park Bag Checklist
Before you head out to the parks each morning—especially if you are trying to make Early Theme Park Entry to knock out headliners before the standby lines explode—run through this daily checklist. These are the non-negotiables:
- [ ] Travel-size sunscreen: Apply before you leave the resort room and reapply every two hours. Florida UV hits 9+ and the sun reflects off the pavement. A small sunscreen stick is perfect to slip into a child’s pocket, or use a travel-size water-resistant bottle kept in an external zip pocket for quick access.
- [ ] Reusable water bottle: Disney has over 200 free water fountains. Bringing a durable, lightweight option (like a plush-carrier bottle for around $30) saves you from buying expensive disposable water all day.
- [ ] Compact rain poncho or umbrella: Sudden afternoon downpours are a daily occurrence in Florida. A cheap, lightweight poncho keeps you moving to your next Lightning Lane while everyone else ducks into gift shops for cover.
- [ ] Portable charger or power bank: A dead phone means losing access to your Lightning Lane selections, wait times, and mobile food orders. Bring a reliable power bank so your SupaPark real-time alerts never die.
- [ ] Spare socks and shoes: Wet feet lead to blisters fast. A dry pair of socks takes up virtually no room and is a lifesaver after an unexpected rainstorm or a water ride like Tiana’s Bayou Adventure.
- [ ] Measuring tape: Keep a small tape measure to do a quick height check before walking across the park, ensuring you know exactly which rides your kids are eligible for without risking a meltdown at the entrance.
- [ ] First-aid basics: Just pack the essentials in a small zip-pouch: blister pads, an antihistamine, and a basic pain reliever.
- [ ] Lightweight zippered pouch: Perfect for keeping your EPCOT festival passports, official maps, and receipts dry, organized, and easily accessible.
Smart Substitutes to Save Space
You can significantly streamline your luggage by taking advantage of what Disney already provides for free.
| What to Leave Home | The Better On-Site Alternative |
|---|---|
| Bulky First-Aid Kits | Every park’s First Aid Center offers free single-dose pain relievers, band-aids, lip balm, and sunscreen. Skip the giant medical kit. |
| Large Toiletries | Disney resort rooms have built-in refillable dispensers for shampoo, conditioner, and body wash. Just pack your prescription meds and travel toothpaste. |
| Heavy Jackets (for everyone) | Unless the forecast is freezing, avoid “just in case” coats for every person. Pack one shared emergency layer for the group if the weather is mild, and use compression cubes for hoodies. |
| Disposable Water Bottles | Rely on a reusable bottle or purchase the Yak & Yeti tumbler at Animal Kingdom for free all-day refills. Locate free water fountains using the blue icons on the SupaPark map. |
Set Up Your Alerts Before You Go
Even the best-packed day bag won’t help you if you miss out on the experiences you came for. Before you zip your suitcase and head to the airport, get your digital strategy ready.
Go to supapark.com to download the free park-specific packing checklists from the updates page, and more importantly, set up your live Drop Watch alerts. SupaPark is your real-time intelligence engine—it catches the exact moment a hard-to-get dining reservation opens up from a cancellation, or when a sold-out Lightning Lane suddenly refills. It pings you instantly so you can jump into the My Disney Experience app and grab it before anyone else. With your bag packed efficiently and your SupaPark alerts running automatically in the background, you will spend less time stressing, less time waiting, and a lot more time enjoying your vacation.
<!-- SUPAPARK-LINKS:START -->
Keep planning: today’s crowd forecast · is Lightning Lane worth it
<!-- SUPAPARK-LINKS:END -->