The Ultimate Walt Disney World Packing List: What to Bring by Season, Family Size, and Trip Style
Published June 23, 2026 · Updated September 9, 2026
At a Glance
- Best for: Families and planners who want a perfectly organized park bag without hauling unnecessary weight around all day.
- Smart move: Using a slide-in insert for your Loungefly backpack—they are the most popular park bags but notoriously lack built-in pouches for quick access.
- Don’t forget: A high-capacity portable phone charger and a multi-device MagicBand+ charging station to avoid playing “musical outlets” in your hotel room.
- The catch: Southwest Airlines ended its famous free checked bags policy last year, making strategic, carry-on-friendly packing more critical than ever to avoid extra fees.
This guide helps Walt Disney World visitors build the perfect suitcase and daily park bag for any season, group size, or touring style. By packing the right organizers and leaving the clutter behind, you’ll sail through park security, keep your devices powered from rope drop to fireworks, and save money on airline fees.
The Changing Math of Luggage: Factoring in Airline Fees
Paying to check family luggage is often more expensive than shipping diapers and snacks directly to your Disney resort, especially now that Southwest’s famous “bags fly free” era is officially over.
For over 50 years, Southwest Airlines was the ultimate cheat code for Disney World overpackers. But as of May 2025, their beloved “two free checked bags” policy is gone. Unless you hold specific loyalty status—A-List Preferred gets two free checked bags, while standard A-List and Rapid Rewards credit card holders get one free bag per ticket purchased—you are now paying extra for every suitcase under the plane.
While competing airlines occasionally run limited-time promotions offering a free checked bag on select economy bundles for non-stop flights, banking on those pop-up promos is a gamble. For a family of four, round-trip checked baggage fees can easily add up to hundreds of dollars.
But the financial hit is not the only downside to heavy packing. Back in the day, the complimentary Disney’s Magical Express bus handled your luggage directly from the plane to your hotel room. That service ended in 2022. Today, if you check bags, you have to wait at the busy Orlando International Airport (MCO) carousels, claim everything yourself, and drag it all to a paid shuttle like Mears Connect or stuff it into the trunk of a rideshare. Checking bags now costs you both money and precious vacation time.
The Luggage vs. Delivery Showdown
If you are hauling bulky items like diapers, wipes, sunscreen, and pre-packaged snacks, checking a massive suitcase is no longer the smart move. You are much better off packing light and relying on delivery services to supply the heavy essentials once you arrive.
| Method | Cost Range | Pros | Cons |
|---|---|---|---|
| Checking Bags | High (Round-trip fees per bag) | Everything is with you immediately; no need to coordinate resort deliveries. | Expensive; requires hauling heavy bags through MCO to your ground transportation. |
| Grocery Delivery (Instacart, Amazon Fresh) | Moderate (Groceries + delivery fee + tip) | Fresh items and cold water cases available; delivered straight to bell services. | Requires coordinating delivery windows; perishables must be refrigerated by the resort. |
| Shipping a Box (UPS, FedEx) | Moderate (Postage + Disney package fee) | Guaranteed arrival of specific specialty or allergy-friendly items from home. | Packing and shipping ahead of time is a hassle; transit delays can happen. |
| Retail Shipping (Amazon Prime, Walmart+) | Low (Often free shipping + Disney package fee) | Cheapest way to get heavy, non-perishable essentials straight to the resort. | Disney charges a per-package receiving fee; items sometimes arrive in multiple boxes. |
Pro tip: If you ship packages directly to your Walt Disney World resort via Amazon or Walmart+, address the package to the lead guest on your hotel reservation and include your arrival date. The resort will hold it securely at the front desk or bell services. Disney does charge a small per-package receiving fee (usually around $6), but paying that minor fee is drastically cheaper than shelling out for round-trip airline baggage fees.
How to Condense Your Family’s Luggage
Beating the baggage fees means fitting more into carry-ons. This requires strategy, not just sitting on a suitcase to get it zipped. Here is the blueprint for packing lighter without sacrificing what you actually need for a park day.
- [ ] Coordinate the chargers: You do not need a separate charging block for every single phone and watch in your group. Bring a single multi-port USB charging hub. A good multi-charger can juice up four MagicBand+ devices and phones simultaneously from one hotel outlet, saving you from dealing with massive cord clutter.
- [ ] Utilize resort laundry: Disney World hotels have on-site laundry facilities, and Disney Vacation Club villas (1-bedroom and larger) have washers and dryers right in the room. Plan to do one load of laundry mid-trip. Packing for four days instead of eight cuts your clothing bulk in half.
- [ ] Rethink the park bags: Ditch the massive, disorganized backpack. Opt for a streamlined Loungefly or a slim belt bag. Add a cheap bag organizer insert to keep your portable chargers, sunscreen, and essentials highly accessible so you aren’t digging through a cavernous bag in the middle of Magic Kingdom.
- [ ] Wear the heavy layers on the plane: If you are traveling during the winter months when Orlando mornings are chilly, wear your sweatshirts and jackets on the plane rather than cramming them into a carry-on suitcase.
- [ ] Share the toiletries: Instead of every family member packing their own shampoo and body wash, bring one set of travel-sized liquids for the group. Better yet, save the bag space entirely and rely on the complimentary pump bottles of body wash, shampoo, and conditioner provided in every Disney resort shower.
- [ ] Ditch the “just in case” gear: It rains in Florida, but packing five heavy umbrellas takes up massive real estate. Pack cheap, disposable ponchos that fold flat, and leave the heavy rain gear at home.
If you are strategic with your carry-ons and let delivery services do the heavy lifting for snacks and baby supplies, you can completely sidestep the new airline baggage fees. Keep the luggage light, bypass baggage claim at MCO, and get to the parks faster.
The Core Baseline: Things Every Disney Traveler Needs
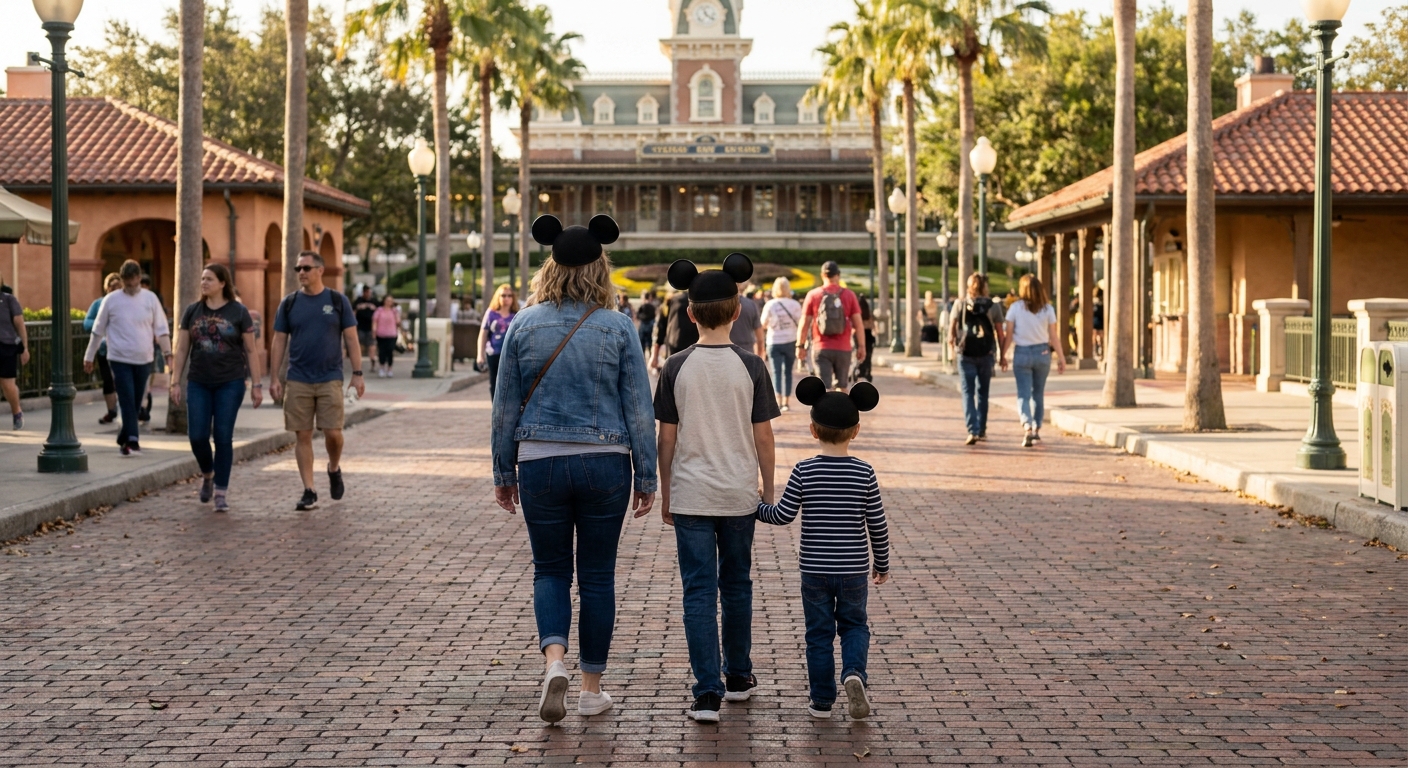
Pack for a 10-mile daily marathon, not a fashion show: if it doesn’t help you survive 12 hours on your feet, sweating, and managing phone-draining logistics, it doesn’t belong in your bag.
Your baseline packing list needs to prioritize pure function. With Southwest Airlines killing its 54-year-old “two free checked bags” policy back in May 2025, throwing extra “just in case” items into a massive suitcase will now cost you round-trip fees on almost every airline unless you hold elite status. Packing lean is a financial necessity. Here is exactly what you actually need to survive a park day.
The Essential Park Loadout
- [ ] Heavily broken-in footwear: Bring at least two pairs of comfortable walking shoes and rotate them daily to avoid pressure-point blisters. Never wear brand-new shoes to EPCOT.
- [ ] Pre-emptive blister care: Pack friction-defense balm and pre-cut moleskin. Apply it before you start walking, not after the blister forms.
- [ ] Physical ID and a backup credit card: MagicBands and Apple Pay occasionally glitch or system-wide registers go down. Keep your physical ID and one physical card on you.
- [ ] Discounted Disney Gift Cards: Budget your snacks and souvenirs by pre-buying gift cards. Warehouse stores like Sam’s Club regularly sell $200 Disney gift cards for around $180. That $20 savings basically covers a day of Lightning Lane Multi Pass for one person.
- [ ] A high-capacity portable charger: The My Disney Experience app runs GPS, Bluetooth, and live wait times constantly. Your phone will die by 2:00 PM without a robust power bank.
- [ ] A 4-in-1 MagicBand+ charger: MagicBand+ devices require daily charging. Instead of playing musical outlets in your hotel room at midnight, pack a multi-charging cable that juices up to four bands simultaneously.
Pro tip: Loungefly backpacks are the most popular park bags at Disney World, but they are essentially black holes with zero internal pouches. Buy a cheap mini-backpack organizer insert online and slide it into your Loungefly. It gives you instant compartments for your chargers, lip balm, and phone, saving you from digging blindly while standing in the security line.
Choosing Your Daily Park Bag
Your bag dictates how fast you move through security and how your back feels by hour ten. Here is how the most popular options break down:
| Bag Type | The Verdict | Pros | Cons |
|---|---|---|---|
| Belt Bag / Fanny Pack | The Minimalist Move | Forces you to pack light; ultra-fast security checks; stays on during most rides. | Won’t hold water bottles, umbrellas, or bulky backup chargers. |
| Loungefly Mini-Backpack | The Fan Favorite | Fits the Disney aesthetic; holds a moderate amount of gear; weather-resistant. | Expensive; zero internal organization (unless you buy an insert); sweaty back. |
| Standard Athletic Backpack | The Sherpa Load | Holds water bottles, ponchos, and souvenirs for the whole family easily. | Heavy; requires taking it off for rides; slower security checks. |
Skip the massive tote bags. If you have to dig blindly to find your portable charger while standing in the blistering sun waiting for your Lightning Lane, your bag strategy is failing you. Stick to the baseline, organize the interior, and keep your load light.
The Rope Drop Survival Kit
Rope drop isn’t just about waking up early; it’s a tactical strike that requires arriving 60 minutes before park opening with a bag optimized for speed, tech survival, and immediate action.
Rope dropping used to be a straightforward hustle—show up early, walk fast, and beat the lines. But recent changes to Early Entry, land access, and crowd flow have made it a whole different game. If you’re not adapting, you’re losing valuable time. The first 100 minutes of your park day dictate the momentum for the rest of it. By the time the official park opening rolls around at 9:00 AM, you’re going to see a 100-minute wait time difference between the top headliners and secondary attractions.
To secure that massive wait advantage, you need to be at the front gates by 8:00 AM or earlier. Disney routinely lets guests through security and into holding areas 15 to 30 minutes before the posted time. When those ropes finally drop, every second you spend digging through a disorganized bag is a second lost to the crowds sprinting behind you.
The “Speed First” Packing Checklist
With major airlines recently ending legacy free-checked-bag policies, packing tight and smart from the flight to the park is more important than ever. Your park bag should be ruthlessly efficient so it doesn’t slow you down at the bag check or in the queues.
- [ ] Mini-backpack organizer insert: Loungefly backpacks are arguably the most popular bags in the parks, but their giant, single-pocket design creates a black hole for your gear. A structured organizer insert slides right in, adding essential pockets so you can grab your ID or phone instantly.
- [ ] Multi-device portable charger: The My Disney Experience app—and your constant refreshing for dining Drop Watch alerts—will decimate your phone battery. Bring a heavy-duty charger capable of juicing up your phone and up to four MagicBand+ devices simultaneously so your group isn’t playing musical outlets.
- [ ] Pre-filled reusable water bottles: Do not waste the crucial first hour of the day standing in a 20-minute line for a quick-service water cup or a coffee.
- [ ] Grab-and-go breakfast: Pack granola bars or trail mix. Eat in the hub holding area while waiting for the morning announcements, not while walking to your first ride.
- [ ] Weather gear (stowed low): Keep cooling towels or rain ponchos at the very bottom of the bag. You won’t need them during the cooler 8:00 AM hustle.
Navigating the Early Entry Trap
Having the right gear only helps if you know where to deploy it. If you are staying at a Disney World hotel, you get Early Theme Park Entry, giving you a 30-minute head start. But you need to know exactly what is actually operating, because the entire park does not open at once.
| Park & Scenario | The Early Entry Reality | The Smart Move |
|---|---|---|
| Magic Kingdom Access | Only Fantasyland and Tomorrowland are open. Frontierland, Adventureland, Liberty Square, and Storybook Circus are closed. | Prioritize Space Mountain or Peter Pan’s Flight to maximize your 30 minutes. |
| Magic Kingdom Headliner | TRON Lightcycle / Run is NOT open during Early Entry, despite being in Tomorrowland. | Do not waste your head start waiting at a closed queue. Buy the Lightning Lane Single Pass, or pivot here right at 9:00 AM. |
| Animal Kingdom Reality Check | Avatar Flight of Passage can hit a 145-minute wait by 8:00 AM—right when the park opens for Early Entry. | If you aren’t at the absolute front of the tapstiles by 7:15 AM, skip it. Ride Na’vi River Journey or Expedition Everest instead. |
The Mid-Morning Pivot
By 10:30 AM, the rope drop advantage evaporates, and standby lines will surge to their daily peaks. This is when your survival kit shifts from “speed” to “stamina,” and you rely heavily on the Lightning Lane Multi Pass selections you booked in advance. As soon as you tap into your first Lightning Lane of the day, pull out your fully charged phone and immediately book your next one. Keep refilling them one at a time as the day goes on.
Pro tip: When the mid-morning crowds hit Magic Kingdom and you need to reorganize your bag, hydrate, or secure your next Lightning Lane without getting bumped into, head straight to the Carousel of Progress. It is a steadfast, reliable 5-minute wait that guarantees a dark, air-conditioned theater where you can sit down and strategize your next move in peace.
Summer & Early Fall: Packing for Heat and Hurricanes
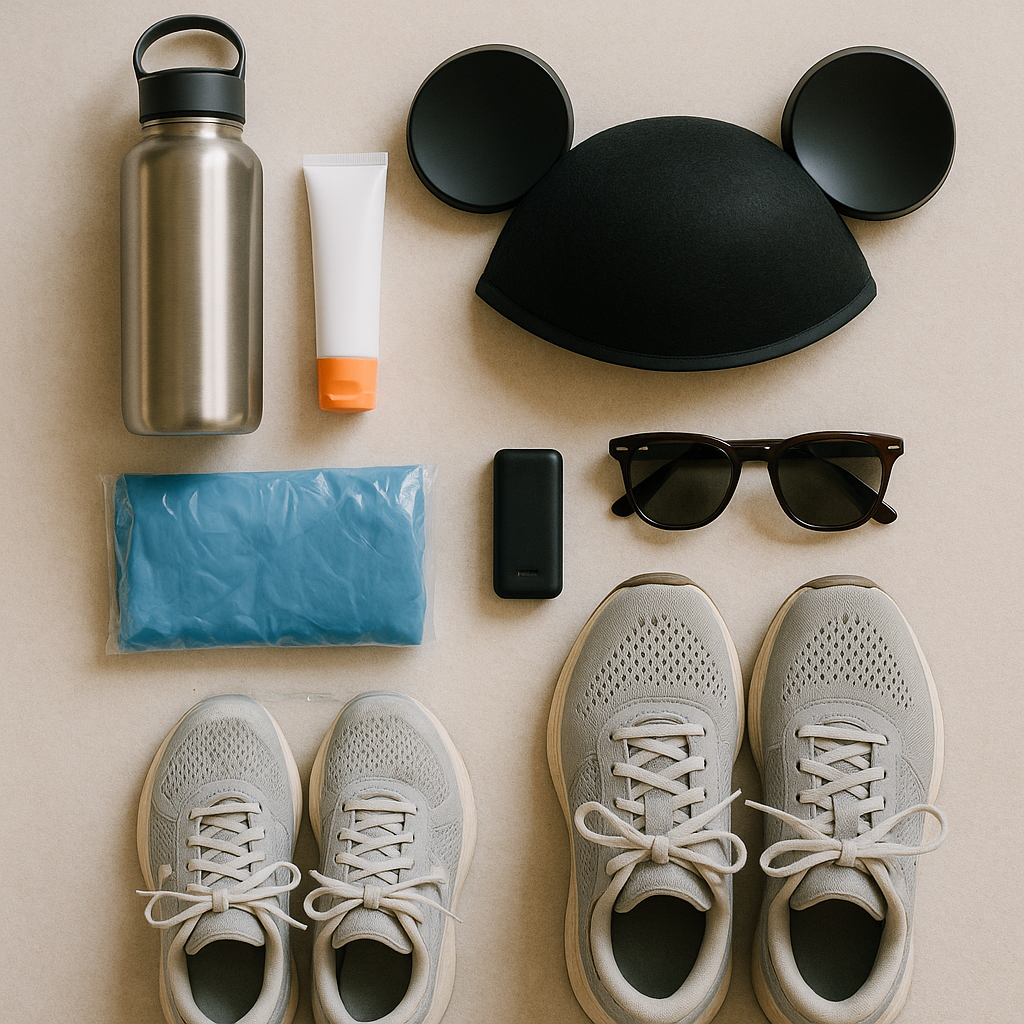
The summer packing goal is simple: stay dry enough, charged enough, and cool enough to keep making good decisions after 2 PM.
Disney World heat is not just “bring sunscreen” heat. In summer and early fall, you’re dealing with 95-degree afternoons, pavement that radiates heat back at you, and rain that can go from nothing to sideways downpour in five minutes. The guests who handle it best are not the ones with the biggest bags. They’re the ones with the right small gear in the right pockets.
Your Heat-and-Rain Core Kit
- [ ] Cooling towel for each person
- [ ] Portable neck fan or handheld fan
- [ ] Quality poncho for each person
- [ ] One extra gallon-size zip bag for wet gear
- [ ] Hydration multipliers or electrolyte packets
- [ ] Refillable water bottle
- [ ] Portable phone charger
- [ ] Mini bag organizer or pouches
- [ ] Small towel or microfiber cloth
- [ ] Backup socks for kids, rain-heavy days, or stroller families
That looks like a lot, but the trick is packing flat and modular. A Loungefly backpack, sling bag, tote, or belt bag can work, but summer exposes bad bag organization fast. If your poncho is buried under snacks, your charger cable is tangled, and your cooling towel is loose and damp, you will hate your bag by lunch.
Use small pouches or a mini backpack organizer so every category has a home: rain, cooling, charging, medicine, snacks. Loungefly-style mini backpacks are popular, but many have limited built-in pockets, so an insert can make a huge difference.
Pro tip: Put the ponchos at the very top of the bag, not the bottom. In Disney summer rain, the 30 seconds you spend digging is exactly when everyone gets soaked.
Poncho vs. Umbrella: Bring the Poncho
Umbrellas sound civilized until you’re in a crowded walkway, pushing a stroller, or trying to scan into a ride while rain is bouncing off the ground. For most Disney park days, ponchos win.
| Item | Best For | Downside | Smart Move |
|---|---|---|---|
| Quality poncho | Sudden storms, strollers, keeping bags dry | Can feel hot and sticky | Bring one per person, plus a bag for wet storage |
| Cheap disposable poncho | Emergency backup | Tears easily and rarely fits well | Fine as a spare, not your main plan |
| Umbrella | Resort walks, low-crowd moments, sun shade | Annoying in crowds and ride queues | Skip unless someone in your group really needs shade |
| Rain jacket | Cooler months or light rain | Too warm for summer storms | Usually overkill from June through early fall |
A better poncho matters because daily storms are normal in this season. Thin emergency ponchos can work once, but they tear, cling, and are miserable to repack. A reusable poncho gives you more coverage, protects your bag, and is much easier to shake off before boarding something indoors.
For families, color-code or label ponchos before the trip. When the sky opens near World Showcase or Frontierland, you do not want four identical wet ponchos in a pile.
Cooling Towels and Fans Are Not Optional
Cooling towels are one of the highest-value summer items because they work before you feel overheated. Wet one in a restroom sink, wring it out well, and wear it around your neck while walking between lands.
Portable neck fans are also worth the bag space, especially for stroller naps, long outdoor queues, and transportation waits. Choose a rechargeable fan before the trip and test the battery. A fan that dies at 1 PM is just bulky plastic.
The best use pattern:
- [ ] Wet cooling towels before the hottest part of the day, not after everyone is cranky
- [ ] Use fans in outdoor waits, bus stops, and parade/fireworks holding areas
- [ ] Take indoor breaks before the group hits a wall
- [ ] Rotate into air-conditioning during the early afternoon
In Magic Kingdom, Carousel of Progress is the classic reset button: usually a short wait, a dark theater, and reliable air-conditioning. It is not the flashiest attraction, but in July heat, a calm indoor break can save the rest of your evening.
Hydration Multipliers Beat “We’ll Just Drink Water”
You should drink water constantly, but plain water is not always enough when you’re sweating through a rope-drop-to-fireworks day. Electrolyte packets or hydration multipliers are tiny, pack flat, and help replace what your body is losing in the heat.
Bring more than you think you’ll use, especially if your group includes kids, grandparents, or anyone who does not naturally drink enough. Keep them in a dry pouch, not loose in the bag where rain can ruin them.
A good rule: use one in the late morning and another mid-afternoon on the hottest days. Do not wait until someone has a headache.
Rope Drop Changes What You Need in the Bag
Summer rewards early starts. If Magic Kingdom opens at 9 AM, arriving at the front gates around 8 AM or earlier on busy days can matter because Disney often starts moving guests through security and into holding areas before the posted opening. Disney resort guests also get Early Theme Park Entry, which gives eligible guests 30 minutes before regular park opening.
That means your bag needs to be ready before you leave the room. No “we’ll organize it on the bus.” Your phone will be working hard in My Disney Experience for plans, mobile order, Lightning Lane, photos, and group texts, so a portable charger is a summer essential, not a nice-to-have.
Pack your morning-access items where you can reach them without stopping:
- [ ] Phone and portable charger
- [ ] Cooling towel
- [ ] Sunglasses
- [ ] Water bottle
- [ ] First poncho if clouds are building
- [ ] Electrolyte packet for late morning
The first 15–30 minutes can be your best low-wait window of the day, but only if you’re not unpacking your whole bag on a bench while the crowd moves past you.
Winter & Spring: The Layering Strategy
January through March packing is not about “cold” or “hot” — it’s about surviving both before lunch.
Disney World winter and early spring can pull a full costume change on you: a 45-degree rope-drop morning, a sunny 80-degree afternoon, then a chilly walk back to the bus after fireworks. The mistake is packing like you’re going to Florida. The move is packing like you’re going to be outside for 14 hours with no easy reset button.
Pack for the temperature swing, not the forecast high
The high temperature is the least useful number on your weather app. If Magic Kingdom hits 78 in the afternoon, that does not help you at 7:45 AM standing outside security in a cold breeze with a stroller, sleepy kids, and a plan to beat the Seven Dwarfs Mine Train crowd.
Your winter/spring park outfit should be built in removable layers:
- [ ] Breathable base layer: short-sleeve tee, athletic top, or lightweight long sleeve
- [ ] Light mid-layer: hoodie, quarter-zip, thin fleece, or cardigan
- [ ] Packable outer layer: windbreaker, rain shell, or compressible jacket
- [ ] Bottoms that work in both temperatures: leggings, joggers, jeans, or quick-dry pants
- [ ] Backup warmth for kids: hat, thin gloves, or an extra sweatshirt
- [ ] Compact poncho or rain shell, especially in March
- [ ] Extra socks if you’re wearing sneakers all day
Do not bring your bulkiest coat unless the forecast is unusually cold. A heavy jacket feels smart at 7 AM and becomes a punishment by noon. You want layers that can be tied around a waist, stuffed under a stroller, or compressed into a packing cube.
Pro tip: The best Disney World winter layer is not the warmest one — it’s the one you can carry for eight hours without hating it.
The rope-drop problem: cold mornings reward the prepared
Early mornings matter more in winter and spring because the people who arrive late lose the biggest low-wait window of the day. If the park opens at 9:00 AM, you may want to be at the front gates around 8:00 AM or earlier on busy days, especially if you’re trying to use that first 15–30 minutes well.
That is exactly when the weather can feel the worst.
Disney resort guests also get Early Theme Park Entry, usually 30 minutes before official park opening, which can shift the whole morning earlier. Not every land or attraction is available during Early Entry, so the first choice of the day matters. At Magic Kingdom, for example, Early Entry access often centers on Fantasyland and Tomorrowland, while some major targets are not available until regular opening. That means you may be standing, walking, and waiting in the cold before the day really starts moving.
If you under-pack layers, your group is more likely to bail on rope drop, duck into shops, or lose momentum before the lines start building. That can cost you more time than the sweatshirt was ever going to cost you in bag space.
Locker rental: smart splurge or wasted money?
Locker rentals are the classic winter/spring trade-off. You pay for convenience, but you also avoid dragging jackets through every queue, restaurant, restroom, and stroller parking area.
Use this as the decision point:
| Option | Best For | Upside | Trade-Off |
|---|---|---|---|
| Carry layers all day | Adults, minimalists, short park days | No extra cost, fastest movement | Annoying once the day warms up |
| Stroller storage | Families with young kids | Easy place for jackets and blankets | Not useful in ride queues; stroller parking can shift |
| Rent a locker | Full-day guests, park hoppers starting early, families with bulky layers | Keeps the morning gear out of your hands | Costs extra and requires backtracking |
| Skip jackets and tough it out | Very light packers | Less to manage | Bad call if the morning is truly cold |
The locker only makes sense if the jackets would otherwise slow you down. If you’re carrying one thin hoodie per person, skip it. If you have four people, two puffy jackets, a blanket, and a midday dining reservation where nobody wants to manage a pile of outerwear, the locker starts looking very reasonable.
The hidden cost is location. A locker near the front of the park is great at arrival and exit, but inconvenient if you need your jacket back while you’re deep in Frontierland, World Showcase, Pandora, or Galaxy’s Edge. If you rent one, commit to a clean plan: dump layers after the morning rush, then retrieve them before fireworks or your final transportation push.
Flying in? Your baggage strategy matters more now
Airline bag rules can quietly wreck a good packing plan. Southwest’s long-running two-free-checked-bags policy ended for many travelers starting May 28, 2025, with exceptions for certain status levels, fare types, and cardholders. Other airlines run baggage promos from time to time, but those are usually limited by booking window, route, or travel date.
The practical takeaway: do not build a winter/spring Disney packing list that only works if checked bags are free.
Before you pack, decide what you’re actually paying to move:
- [ ] Check your airline’s current checked bag and carry-on rules
- [ ] Put bulky layers on your body for the flight if needed
- [ ] Use compression cubes for hoodies, fleece, and kids’ sweatshirts
- [ ] Avoid “just in case” coats for every person
- [ ] Pack one shared emergency layer for the group if the forecast is mild
- [ ] Leave space for souvenirs, especially if you’re bringing jackets home unworn
For families, the baggage math gets real fast. One extra checked bag may be worth it if it prevents a miserable cold rope drop. But paying for multiple bags just to haul bulky coats you wear for two mornings is usually not the smartest spend.
The best setup by trip style
| Trip Style | What I’d Pack |
|---|---|
| Adults-only long weekend | One hoodie or quarter-zip each, one packable rain shell |
| Family with stroller | Kids’ sweatshirts, one blanket, adult light layers, stroller clips |
| Rope-drop-heavy trip | Warmer morning layers, but all compressible |
| Deluxe hotel / midday break trip | Lighter park bag; swap clothes during the break |
| Park Hopper day | Layers that fit in one backpack or a locker plan from the start |
For January through March, your goal is simple: be warm enough to show up early, light enough to move fast by noon, and organized enough that your jackets do not become the main character of the day.
Packing for Families with Toddlers and Strollers
Your stroller is not just transportation; it is your mobile command center, and the goal is to make it easy to search, easy to park, and light enough to move fast.
Toddlers change the whole packing equation at Disney World. You need diapers, snacks, backup clothes, sunscreen, water, entertainment, and emergency patience. But if you pack like you are moving into Magic Kingdom for the week, you will spend the day digging through bags, dragging a heavy cooler through security, and repacking the stroller every time you park it.
The smarter move is to build zones: essentials on your body, kid supplies in the diaper bag, snacks and water in a small soft cooler or insulated pouch, and stroller extras in an organizer you can remove quickly.
Set Up Your Stroller Like a Park Bag
Stroller parking areas get crowded, especially near Fantasyland, Toy Story Land, and Pandora. Cast Members may move strollers to keep walkways clear, so your setup needs to be recognizable without leaving valuables exposed.
| Stroller area | What to put there | Why it works |
|---|---|---|
| Handle organizer | Wipes, hand sanitizer, small snacks, sunglasses, park map-sized items | Fast access without opening the diaper bag |
| Under-seat basket | Rain cover, extra clothes, lightweight blanket, spare shoes | Bulky but low-value items stay out of your main bag |
| Clip-on pouch or packing cube | Diapers, changing pad, diaper cream | Grab-and-go for bathroom runs |
| Parent belt bag or sling | Phone, wallet, ID, room key, portable charger | Never leave valuables with the stroller |
| Bright stroller tag or ribbon | Name label, colorful strap, luggage tag | Easier to spot after Cast Members move it |
Pro tip: Pack one small “change kit” per toddler in a zip bag: diaper or pull-up, wipes, disposable changing pad, and backup shorts. When someone needs a bathroom stop, you grab one kit instead of hauling the whole diaper bag into a crowded restroom.
A mini backpack organizer or insert is also a quiet lifesaver if your park bag has one big open compartment. It keeps sunscreen, meds, snacks, charging cords, and backup clothes from turning into a bottomless pit. The same idea works inside a diaper backpack: use pouches by category instead of one giant bag of everything.
Diaper Bag Essentials That Actually Earn Their Space
Do not pack for every possible disaster. Pack for the Disney disasters that actually happen: spills, heat, bathroom timing, rain, overstimulation, and phones dying because you are constantly checking My Disney Experience.
- [ ] Diapers or pull-ups, plus two more than you think you need
- [ ] Travel wipes and a small pack of sanitizing wipes
- [ ] Disposable or foldable changing pad
- [ ] Diaper cream in a small tube
- [ ] One full toddler outfit in a zip bag
- [ ] Lightweight layer for cold restaurants and buses
- [ ] Compact rain cover for the stroller
- [ ] Sunscreen stick for faces and spray/lotion for bodies
- [ ] Hat and child sunglasses
- [ ] Small comfort item that is not irreplaceable
- [ ] Portable phone charger and short charging cable
- [ ] Refillable water bottle for each adult
- [ ] Collapsible cup or small toddler bottle
- [ ] A few quiet distractions for lines and restaurants
If your toddler uses a pacifier, bring more than one and clip it. If they are potty training, add sticky notes or a compact folding potty seat if that is part of your normal routine. Disney bathrooms are frequent, but the walk from “I need to go” to an actual stall can still feel very long with a toddler.
Think About Rider Switch Before You Pack
Rider Switch is where toddler packing gets strategic. If one adult is waiting with a child who cannot or does not want to ride, that waiting adult needs supplies too. Do not send all snacks, water, and entertainment with the riding group.
For headliners with height requirements, decide in advance who is carrying the “waiting kit.” This matters at attractions like TRON Lightcycle / Run, Seven Dwarfs Mine Train, Guardians of the Galaxy: Cosmic Rewind, Star Wars: Rise of the Resistance, and Avatar Flight of Passage, where part of your group may be using Lightning Lane Single Pass or standby while another adult waits with the little one.
A good Rider Switch waiting kit is small:
- [ ] One snack
- [ ] One water bottle or toddler cup
- [ ] Wipes
- [ ] Small toy, sticker sheet, or bubble wand if appropriate
- [ ] Cooling towel or fan in hot months
- [ ] Portable charger if the waiting adult has the phone with plans and alerts
The best waiting spots are not always right outside the ride entrance. With toddlers, shade, bathrooms, and space beat proximity. Near Magic Kingdom rope drop, for example, Early Theme Park Entry usually focuses on Fantasyland and Tomorrowland, but not every headliner is open during that window. If your group is splitting for rides, have the non-riding adult wait somewhere comfortable instead of hovering in a crowded walkway.
Snacks and Water Without the Giant Cooler Problem
You do not need a massive cooler to survive Disney World with toddlers. You need a controlled snack system that keeps blood sugar steady without making security and stroller parking miserable.
Skip the hard-sided cooler unless you have a medical need. A small soft-sided lunch cooler, insulated pouch, or packing cube works better for most families. The trick is to pack snacks that do not melt, crush easily, or require utensils while walking.
| Better toddler snack | Why it works |
|---|---|
| Applesauce pouches | Quick, tidy, and easy in stroller lines |
| Crackers or pretzels | Good for waiting without much mess |
| Granola bars | Compact and sturdy in the heat |
| Freeze-dried fruit | Lighter than fresh fruit and less leaky |
| Mini muffins or breakfast bars | Useful for early mornings before a real meal |
| Electrolyte packets | Helpful on hot days without carrying extra drinks |
Bring refillable water bottles, but do not overpack them. Water is heavy fast. A smarter setup is one bottle per adult, one toddler cup, and refills through the day. If you are also carrying a stroller fan, MagicBand+ chargers, phone chargers, and kid supplies, weight adds up quickly.
For rope drop, pack breakfast-style snacks where you can reach them without stopping. If the park opens at 9:00 AM, being at the front gates around 8:00 AM or earlier on busy days can matter because guests are often moved through security and into holding areas before the posted opening. That is not the moment to unpack a cooler. That is the moment for a pouch, a bar, and a stroller cup.
Keep the Heavy Stuff Out of Your Day
If you are flying, baggage policies can change and checked-bag perks are not something to assume. That matters for stroller families because diapers, wipes, fans, extra shoes, and snack containers eat luggage space fast. Pack the irreplaceable toddler items from home, but consider buying bulky basics after arrival or having them delivered to your hotel.
For the park itself, the winning formula is simple: one organized diaper bag, one small snack cooler, one parent valuables bag, and a stroller basket with low-value extras. Anything beyond that needs to justify its weight. At Disney World with toddlers, the best-packed family is not the one that brought the most. It is the one that can find the wipes in five seconds.
The Adult-Only & Festival Goer Packing List
Pack lighter than you think, dress one notch nicer than your park-day default, and do not turn EPCOT festival day into a backpack endurance test.
Adult-only Disney World trips are usually less about hauling snacks, ponchos, bubble wands, and stroller gear, and more about moving quickly: EPCOT festival booths, resort lounges, hard-to-get dining reservations, late-night park hopping, and maybe a Single Pass headliner squeezed between cocktails and dinner. Your packing strategy should match that.
The Festival Rule: Hands Free Beats Overprepared
EPCOT festival days punish big bags. You are walking long loops around World Showcase, balancing small plates, drinks, phones, sunglasses, and sometimes a gift card or MagicBand+. A heavy backpack sounds practical at 10:00 AM and feels like a bad decision by France.
For festivals, your best setup is a small crossbody, belt bag, or compact sling with only the essentials:
- [ ] Phone
- [ ] Slim wallet or card holder
- [ ] ID
- [ ] Portable charger and short cable
- [ ] Sunglasses
- [ ] Lip balm
- [ ] Blister bandages
- [ ] Hand wipes or sanitizer
- [ ] Compact reusable bag for small purchases
- [ ] Light rain shell or tiny umbrella if the forecast looks messy
Skip the giant water bottle unless you truly need it. You can ask for free cups of water at many quick-service spots, and carrying a full bottle all day adds weight fast. If you do bring one, make it slim and lightweight.
Pro tip: For EPCOT festivals, a Disney gift card can be a smart budgeting tool: load your food-and-drink amount for the day, then stop when it is gone instead of letting every booth tap blur together.
Bag Choice: What Actually Works
| Bag type | Best for | Trade-off |
|---|---|---|
| Belt bag | Festival grazing, bar crawls, quick park hopping | Limited space, so you must edit hard |
| Small crossbody | Adults who want style plus function | Can swing forward on rides or while eating |
| Compact sling | Charger, sunglasses, light layer, meds | Easy to overstuff if you treat it like a backpack |
| Loungefly-style mini backpack | Cute outfit photos, light park days | Minimal internal pockets unless you add an organizer |
| Full backpack | Rainy days, medical needs, longer all-day touring | Heavy, sweaty, and annoying in crowded festival lines |
If you love mini backpacks, add a small insert or pouch system. Most cute park bags are terrible at organization, and you do not want to dig through one main compartment every time you need your ID, charger, or blister bandage.
Dress for the Reservation, Not Just the Park
Adult-only trips often include the restaurants people plan their whole itinerary around: California Grill, Topolino’s Terrace, Narcoossee’s, Jiko, Flying Fish, or a late EPCOT dinner after festival booths. You do not need formalwear, but you do want one outfit that can survive a park day and still feel appropriate at a nicer table.
Pack one “parks-to-dinner” outfit formula:
- [ ] Breathable dress, jumpsuit, or linen-blend set
- [ ] Collared shirt or polished tee
- [ ] Lightweight cardigan, overshirt, or wrap for cold dining rooms
- [ ] Comfortable sandals, loafers, flats, or clean sneakers
- [ ] Small jewelry or accessory that upgrades the look without taking space
- [ ] Stain wipe, because EPCOT sauces do not care about your reservation
The smart move is not packing a totally separate fancy outfit for every dinner. Bring pieces that mix with park clothes and still look intentional at a resort restaurant.
Shoes Matter More Than Outfits
Adult-only Disney trips can become sneaky high-mileage days because nobody is stopping for stroller breaks. EPCOT festival laps, Skyliner transfers, resort hopping, and evening park hopping can stack up quickly.
Bring two proven pairs, not one new “cute but maybe fine” pair.
- [ ] Primary walking shoes already broken in
- [ ] Secondary pair with a different pressure pattern
- [ ] Blister bandages
- [ ] Thin no-show socks or anti-rub balm
- [ ] Sandals only if you already know they can handle miles
If you are doing EPCOT by day and a dining reservation at night, the best shoes are the ones that can pass in both places. Clean fashion sneakers are usually the adult Disney MVP.
Airline Packing Has Changed the Math
Do not assume checked bags are automatically free anymore. Southwest’s long-running two-free-checked-bags perk changed for many travelers starting May 28, 2025, with exceptions for certain elite status members, Business Select, and some Rapid Rewards credit card holders. The bigger lesson: check your airline’s current baggage rules before you pack the “just in case” suitcase.
For adult-only trips, this usually means carry-on packing is the move:
- [ ] One neutral dinner layer
- [ ] Two or three breathable tops
- [ ] One nicer bottom or dress
- [ ] One park-to-dinner shoe
- [ ] Minimal toiletries
- [ ] Compression cubes if you are sharing luggage space
- [ ] Laundry detergent sheets for longer stays
If a checked bag costs extra, ask whether those extra outfits are really worth it. Most adult Disney trips benefit more from mobility than wardrobe variety.
What to Leave at the Hotel
Your room is the right place for “maybe later” items. Your park bag is for what you will realistically use before your next break.
Leave these behind unless the forecast or plan demands them:
- [ ] Full-size sunscreen bottle
- [ ] Extra shoes
- [ ] Large camera gear
- [ ] Multiple outfit changes
- [ ] Heavy souvenir purchases
- [ ] Big refillable bottle if you hate carrying it
- [ ] Festival merch you bought early in the day
If you plan to shop, buy later or use a lightweight foldable tote. Better yet, make festival booth eating and drinking your priority first, then shop on the way out.
The Adult-Only Packing Sweet Spot
Your goal is simple: move like someone who can change plans fast. If a Lightning Lane refill opens, a dining reservation drops, or wait times crater somewhere unexpected, you do not want a 15-pound backpack slowing you down.
SupaPark can help with the timing side: live waits, best-time-to-ride forecasts, Lightning Lane refill alerts, and dining Drop Watch at supapark.com. You still book in My Disney Experience, but SupaPark helps you catch the opening instead of staring at your phone all day.
For adults, the best Disney World packing list is not the longest one. It is the one that lets you say yes quickly.
The Park Bag Comparison: Backpack vs. Sling vs. Belt Bag
The bag you pick decides how fast you clear security and how wrecked your shoulders are by 3 PM — choose for the day, not the photo. A Loungefly looks great on the monorail, but if it’s crammed and disorganized, you’ll be the person holding up the bag-check line digging for a phone while a cast member waves the next family through.
Here’s the honest breakdown of the three bags people actually carry through Walt Disney World.
The comparison at a glance
| Bag type | Capacity | Physical toll | Security speed | Best for |
|---|---|---|---|---|
| Backpack (incl. Loungefly) | High — fits charger, ponchos, snacks, layers, a small first-aid kit | Moderate to heavy; two shoulders share the load but a full pack gets sweaty and heavy by afternoon | Slowest — bigger bag, more pockets to open, more likely to get a second look | Families, full park-open-to-close days, anyone carrying for kids |
| Sling / crossbody | Medium — phone, wallet, sunscreen, a thin poncho, light snacks | Light to moderate; one shoulder bears it all, so it can ache if overpacked | Fast — smaller and quicker to open and show | Couples, adults touring solo, half-days, park hoppers who travel light |
| Belt bag / fanny pack | Low — phone, cards, MagicBand+, lip balm, a granola bar | Lightest; rides on your hips, hands-free, nothing on your shoulders | Fastest — small enough that you often breeze through with minimal inspection | Rope-droppers, water park days, anyone who wants to move quick and skip the clutter |
How your bag affects security
Disney’s bag check is a real bottleneck at rope drop, when everyone funnels in at once. The math is simple: the smaller and tidier the bag, the faster you’re through. Guests with no bag at all often get their own faster lane.
- A stuffed backpack with a dozen zippered pouches means more compartments to open and more time at the table.
- A belt bag or no-bag setup frequently clears in seconds.
- If you’re trying to be among the first through the gates — and you should be, since that first 15–30 minutes is your best shot at a headliner before waits explode — a lighter bag is a genuine time advantage.
Pro tip: If you’re rope-dropping a Single Pass headliner like TRON Lightcycle / Run or Seven Dwarfs Mine Train, go as small as you can — a belt bag or sling. Shaving even a couple of minutes at bag check can be the difference between a 10-minute morning ride and a 60-minute afternoon wait on the exact same attraction.
The Loungefly reality check
Loungefly mini-backpacks are easily the most popular park bag, and they look the part. The catch: most of them have minimal interior pockets, so everything pools at the bottom and you end up excavating for your phone — which you’ll be reaching for constantly to scan into Lightning Lanes and check the My Disney Experience app.
The fix is a cheap bag organizer insert (the kind that slides into a backpack and adds structured pockets, usually under $20). It turns a pretty-but-bottomless bag into something you can actually find things in — and that keeps you moving at every checkpoint and ride scanner instead of holding up the line.
Matching the bag to your day
- Full family day, open to close: Backpack. You need the capacity for ponchos, a portable charger, snacks, and a layer for the air-conditioned theaters. Accept the slightly slower security and the shoulder fatigue — it’s the right trade.
- Adults touring light or park hopping: Sling. Enough room for the essentials, quick at bag check, easy to swing around to your front in a queue.
- Rope drop, water parks, or “I want to move fast”: Belt bag. Hands-free, fastest through security, nothing weighing on your shoulders.
The one thing to remember
Pack for how you’ll actually move through the day, not how the bag photographs. A bloated backpack costs you minutes at every security stop and aches by afternoon; a lean sling or belt bag keeps you fast and comfortable. If you do carry a roomy Loungefly, drop an organizer insert inside so you’re never the person digging at the bag-check table while the line stacks up behind you.
On-Site vs. Off-Site Packing Nuances
Your park bag needs to be more self-sufficient when you stay off-site, because leaving for a mid-day break is harder when you’re tied to a hotel shuttle schedule.
The biggest packing difference between a Disney resort stay and a nearby Good Neighbor hotel stay is not the room. It is the reset button. If you are using Disney transportation, leaving Magic Kingdom after lunch, cooling off, changing socks, and coming back later is usually realistic. If you are relying on a scheduled shuttle from a Good Neighbor hotel, that same break can turn into a timing trap.
Good Neighbor hotels can be a smart value play. Delta Hotels Orlando Celebration, for example, is about five minutes from Disney World and has offered Annual Passholder deals with up to 30% off regular room rates, free parking, free breakfast for up to four people, and complimentary transportation to Disney parks. That can be a real savings win, especially for families who need space and breakfast included. Just do not pack like you are staying on the monorail loop.
| Stay style | Daily packing mindset | Mid-day break reality | Best use case |
|---|---|---|---|
| Disney resort with buses, boats, monorail, or Skyliner | Lighter park bag, easier room access | More flexible, especially if your resort has direct transportation | Families with naps, outfit changes, pool breaks, or stroller resets |
| Good Neighbor hotel shuttle | Pack for the whole park day | Breaks depend on shuttle timing and return windows | Budget-focused trips, Annual Passholder hotel deals, guests with cars |
| Off-site with your own car | Pack a “car locker” plus smaller park bag | Easier than a shuttle, but parking/tram time still matters | Families bringing extra clothes, snacks, coolers, or baby gear |
If You’re Using a Good Neighbor Shuttle, Pack Like You May Not See the Room Until Night
Complimentary transportation is useful, but it is not the same as Disney’s constant internal transportation network. Many off-site shuttles run on set schedules, may require reservations, and may not be convenient for a quick two-hour nap break.
That changes what belongs in your bag:
- [ ] Full-day phone battery plan, including a portable charger and cords
- [ ] Cooling towels or fans for summer afternoons
- [ ] Ponchos or compact rain jackets, even if the forecast looks fine
- [ ] Backup socks for rain, sweat, and blister prevention
- [ ] Simple first-aid kit with blister care
- [ ] Kids’ change of clothes in a compression bag
- [ ] A small snack stash for shuttle waits
- [ ] Stroller cover if you are parking it outside attractions
- [ ] Medication you might need before late evening, not just “back at the hotel”
Pro tip: If your hotel shuttle has a long gap in the afternoon, treat the park as your “home base” and plan your break inside the park instead of trying to leave.
That means Carousel of Progress at Magic Kingdom, indoor shows, long meals, shaded playground-style pauses, or a slow lap on Disney transportation if you are allowed to access it from where you are. Carousel of Progress is especially useful because it often has a very low wait and gives you a dark, air-conditioned reset without spending extra money.
Disney Transportation Lets You Pack Lighter, But Not Carelessly
Staying at a Disney resort gives you better access to buses, boats, the monorail, or the Skyliner, depending on your hotel. It also gives eligible guests Early Theme Park Entry, which means you may be leaving the room earlier and moving faster at the start of the day.
For rope drop, do not pack a bag that takes forever at security. If the park opens at 9:00 AM, arriving at the tapstiles around 8:00 AM or earlier on busy days can matter because guests are often moved through security and into holding areas before official opening. A bulky, disorganized bag can cost you the exact minutes you woke up early to win.
For Disney resort days, your best setup is usually:
- [ ] Slim morning park bag
- [ ] One portable charger
- [ ] Sunscreen stick instead of a large bottle
- [ ] One emergency layer or poncho
- [ ] Minimal snacks
- [ ] Room reset kit left behind for the afternoon
That room reset kit should have dry shoes, backup outfits, more sunscreen, swimsuits, and anything your family needs before returning for evening plans.
The Mid-Day Break Math Is Different Off-Site
A Disney resort break can be worth it when heat, crowds, and overstimulation are peaking. An off-site shuttle break has more friction: wait for the shuttle, ride back, walk to the room, rest, reverse the whole thing, then re-enter the park. If the return shuttle does not line up cleanly, you can lose prime evening time.
So the smarter off-site move is often a “soft break”:
- Eat during peak ride waits.
- Use indoor attractions during the hottest part of the day.
- Stack lower-effort shows after lunch.
- Save headliners for late evening when families start leaving.
- Use Lightning Lane Multi Pass refills strategically through the day instead of assuming you can reset at the hotel.
If you are staying off-site because of a strong discount, free breakfast, or free parking, great. Just spend some of that savings mindset on preparation. Bring the battery, the socks, the rain gear, and the kid reset items with you.
Flying Changes the Packing Equation, Too
Checked-bag policies are shifting across airlines, and that matters for Disney World because families tend to overpack “just in case” items. Southwest’s long-running two-free-checked-bags policy changed in 2025 for many travelers, while other airlines have offered limited-time bundles with perks like a free carry-on, seat selection, flight changes, and sometimes a checked bag on select nonstop flights.
Do not build your Disney packing plan around an airline perk unless you have confirmed it for your exact fare. If bags cost extra, prioritize items that save your park day: shoes, chargers, rain gear, kid supplies, and medications. Buy replaceable bulk items later if needed.
The real rule: on-site guests can pack for convenience; shuttle-dependent off-site guests should pack for independence.
Tech & Power: Keeping the ‘Disney OS’ Running
Your phone is not optional at Disney World anymore, so pack like a dead battery would wreck your day.
My Disney Experience is where you manage Lightning Lane selections, check plans, mobile order, dining reservations, maps, photos, wait times, and park hours. SupaPark is where live alerts can catch the stuff you would otherwise miss: a dining reservation drop, a Lightning Lane refill, a ride going down, or a wait suddenly cratered to walk-on territory.
That means your phone is basically the operating system for your Disney day. Treat power like sunscreen: bring more than you think you need, and do not wait until you are at 12% outside Big Thunder Mountain Railroad to figure it out.
The Power Bank Rule: One Per Adult, Minimum
For most families, the right move is not one giant battery everyone fights over. It is one slim power bank per adult, plus a backup strategy in the hotel room.
| Park style | What to pack | Why it works |
|---|---|---|
| Light park day | One 10,000mAh power bank | Enough for topping off one phone through a normal day |
| Rope drop to fireworks | One 10,000-20,000mAh bank per adult | Covers heavy My Disney Experience use, photos, video, maps, and alerts |
| Family with stroller | One larger shared bank plus smaller personal banks | The stroller can carry the heavy one while adults keep quick access |
| Teen-heavy group | One labeled bank per person | Prevents the classic “who used the charger?” argument |
| Split-party touring | Each group needs its own power source | You may separate for rides, Rider Switch, snacks, or hotel breaks |
A 10,000mAh bank is the sweet spot for most guests: portable, not too heavy, and usually enough to recharge a phone at least once. If you film a lot, use location services all day, or stay from Early Theme Park Entry through nighttime entertainment, go bigger or bring two.
Pro tip: Do not pack one power bank at the bottom of the family backpack. Put one charging cable and one battery in the easiest-to-reach pocket, because the moment you need it will probably be while walking, holding a drink, or trying to modify a Lightning Lane.
Why This Matters for Lightning Lane and Alerts
Lightning Lane Multi Pass is not just a morning task. You buy it per day, make your first selections in advance, then keep refilling one at a time after you redeem a selection or its window passes. That means your best moves may happen in little windows throughout the day.
You need battery for:
- [ ] Checking and modifying Lightning Lane Multi Pass selections
- [ ] Buying or monitoring Lightning Lane Single Pass options for rides like TRON Lightcycle / Run, Seven Dwarfs Mine Train, Guardians of the Galaxy: Cosmic Rewind, Star Wars: Rise of the Resistance, and Avatar Flight of Passage
- [ ] Getting SupaPark alerts when a ride drops, goes down, or a dining reservation opens
- [ ] Mobile ordering before peak meal rushes
- [ ] Checking live waits before walking across a park
- [ ] Coordinating with your group when people split up
- [ ] Scanning into parks, Lightning Lanes, and plans through My Disney Experience
The hidden cost of a dead phone is not just inconvenience. It can mean missing the refill, missing the dining drop, or wasting 20 minutes walking toward a ride that just spiked.
Cable Management: Tiny System, Huge Sanity Saver
Disney bags get chaotic fast: ponchos, snacks, cooling towels, sunglasses, sunscreen, trading pins, receipts, and somehow three half-empty water bottles. Your tech needs its own mini zone.
Pack this:
- [ ] One short charging cable per power bank
- [ ] One extra full-length cable for the hotel
- [ ] USB-C cables if your devices support them
- [ ] Lightning cables if anyone still uses an older iPhone
- [ ] A tiny zip pouch or tech organizer
- [ ] A bright cable tie or label for each person’s charger
- [ ] A wall charger that can refill multiple devices overnight
Short cables are better in the parks. A 6-foot cord dangling from a backpack while you are boarding Pirates of the Caribbean is annoying; a 6-inch or 1-foot cable keeps the phone-and-bank combo manageable in a pocket or pouch.
If you use a Loungefly-style mini backpack, add an insert or organizer. Those bags are popular, but many have minimal internal pockets, which makes chargers disappear into the bottom. A simple organizer turns the bag from “digging expedition” into “grab and go.”
Hotel Charging: Stop Playing Outlet Roulette
The hotel room is where most families fail. Four people return tired, sweaty, and hungry, then everyone needs to charge a phone, watch, tablet, headphones, MagicBand+, camera battery, and power bank at the same time.
Bring a multi-port wall charger or compact charging station. This is especially useful if your room has awkward outlets behind furniture or only one convenient nightstand plug.
| Hotel charging item | Best for | Skip it if |
|---|---|---|
| Multi-port USB wall charger | Most families and groups | You only have one or two devices total |
| Small power strip with USB ports | Longer stays, stroller families, tablet users | You are flying carry-on only and packing very light |
| 3-in-1 phone/watch/earbud charger | Apple-heavy travelers | Your group has mixed device types |
| MagicBand+ multi-charger | Families using multiple MagicBand+ bands | You are not using MagicBand+ |
A small wall charger with several ports is usually the most packable choice. If your group uses MagicBand+, consider a charging setup that can handle multiple bands at once so nobody wakes up with a dead band on a Magic Kingdom morning.
The Park-Day Charging Routine
Do this every night, no exceptions:
- [ ] Plug in every phone before showers or bedtime
- [ ] Recharge every power bank
- [ ] Put the park battery back in the day bag, not on the nightstand
- [ ] Check that each cable matches the device it is packed with
- [ ] Turn on SupaPark alerts before the next park day
- [ ] Confirm My Disney Experience login access before you leave the room
In the parks, start charging before you are desperate. If your phone hits 50% before lunch, plug in while eating or watching a longer show. Carousel of Progress is not just a near-always easy Magic Kingdom break; it is also a great air-conditioned reset while your phone gets a quiet top-off.
The smartest Disney tech setup is boring: charged phone, charged battery, correct cable, easy pocket. Get that right, and the rest of your planning tools can actually do their job.
Budgeting for Incidentals (And Saving with Gift Cards)
The cheapest “souvenir” at Disney World is the one you never have to buy because you packed it at home.
Forgotten basics are where Disney World quietly eats your budget. Not because one poncho or charger ruins the trip, but because families tend to forget the same high-need items at the exact moment they become urgent: sunscreen at noon, ponchos when the sky opens, a charger when your phone is at 9% and you still need My Disney Experience.
The park markup problem
Inside the parks, convenience is the product. You are not paying for the world’s most special sunscreen; you are paying because you need it now and leaving the park wastes time.
| Item you forgot | Why it hurts in the park | Smarter packing move |
|---|---|---|
| Sunscreen | You may need it immediately, especially in spring, summer, and early fall | Pack a full-size bottle for the room and a small stick or travel tube for the park bag |
| Ponchos | Rain usually creates a buying rush, especially near ride exits and gift shops | Bring lightweight ponchos for every person, plus one extra for a stroller or backpack |
| Portable charger | Your phone powers Lightning Lane, dining, photos, maps, and mobile order | Bring one charger per heavy phone user, or a multi-device charger for the room |
| Charging cords | Easy to forget, annoying to replace, and useless if you brought the wrong type | Pack a small cord pouch with USB-C, Lightning if needed, and a wall plug |
| Bandages / blister care | A small foot problem can derail the whole evening | Bring a tiny first-aid pouch with blister patches, bandages, and pain relief |
| Cooling towel / fan | Heat purchases feel “worth it” in the moment because everyone is melting | Buy before the trip and test it before packing |
The real cost is not just money. It is time. If you stop in the middle of Magic Kingdom to hunt down a charger, you may also miss the shorter wait window you were trying to hit. If you leave EPCOT to fix a packing mistake, you are trading park time for an errand.
Build an “oops budget” before you go
Even a well-packed family will forget something, break something, or suddenly need something. Plan for it instead of pretending you will pack perfectly.
A practical incidentals buffer:
- [ ] Small family or couple: budget a modest cushion for one or two emergency buys
- [ ] Family of four or more: assume at least one forgotten weather, tech, or comfort item
- [ ] Summer trip: add extra room for cooling gear, sunscreen, and rain backups
- [ ] Stroller-age kids: budget for spill replacements, extra snacks, and backup layers
- [ ] Airline travelers: remember that baggage fees can change the math on “just pack more”
That last point matters. Southwest’s two-free-checked-bags policy ended for many passengers starting May 28, 2025, with some exceptions for higher-status travelers and certain cardholders. The lesson is not “overpack no matter what.” It is to compare the cost of checking a bag against the cost of replacing essentials at Disney prices.
If a checked bag lets you bring sunscreen, ponchos, diapers, chargers, extra shoes, and breakfast items for a whole family, it may be the cheaper move. If you are flying carry-on only, your packing list needs to be ruthless: small, high-impact, expensive-to-replace items get priority.
Use discounted Disney Gift Cards as your emergency fund
Disney Gift Cards are one of the better budgeting tools because they create a separate pool of Disney money before you arrive. You can use them toward many Disney purchases, including meals, merchandise, tickets, packages, and other eligible Disney expenses.
The smarter play is buying them at a discount when reputable retailers offer deals. For example, Sam’s Club has run limited-time Disney Gift Card promotions, including a past deal with $200 Disney gift cards sold for $180 each, online only, with a limit of four per membership and email delivery. That kind of offer effectively gives you a built-in discount before you ever enter the park.
Do not count on any specific promo being available for your dates. Treat discounted gift cards like airfare deals: great when you catch them, not guaranteed when you need them.
| Gift card strategy | Best for | Watch-out |
|---|---|---|
| Buy discounted Disney Gift Cards before the trip | Meals, souvenirs, emergency basics, planned spending | Promos are limited-time and may have purchase limits |
| Keep one small card as the “oops fund” | Forgotten poncho, charger, sunscreen, kid emergency | Still spend it like real money |
| Use gift cards for planned expenses first | Helps avoid overspending on impulse buys | Track balances so you are not juggling half-used cards at checkout |
| Buy non-Disney gift cards by mistake | Not ideal for park spending | Disney+ gift cards, for example, are for streaming, not your park-day purchases |
Pro tip: Set aside one discounted Disney Gift Card specifically for incidentals, not snacks or souvenirs. That mental label keeps a rainy-day poncho purchase from turning into three impulse buys on Main Street.
What I’d pack before relying on park stores
These are the items that punch above their weight because they are small, useful, and annoying to replace mid-day:
- [ ] Two ponchos per adult bag, or one per person minimum
- [ ] Travel sunscreen plus a face stick
- [ ] Portable charger already charged the night before
- [ ] Short charging cable that fits your phone
- [ ] Compact medicine and blister kit
- [ ] Zipper pouch for cords, lip balm, hand sanitizer, and bandages
- [ ] Backup sunglasses or hat for kids who lose things
- [ ] A few gallon-size plastic bags for wet clothes, ponchos, or snack messes
For families using MagicBand+, a multi-device charging setup in the hotel room can prevent the nightly outlet scramble. The same goes for phones, stroller fans, headphones, and battery packs. Charging chaos is one of those tiny hotel-room problems that becomes a park-day problem by 2 PM.
The smartest way to think about “savings”
Packing saves you the most money on predictable problems. Gift cards help with the unpredictable ones.
So the move is simple: pack the boring essentials, create a small incidentals budget, and use discounted Disney Gift Cards when you can get them from a trustworthy retailer. That way, when Florida weather, dead batteries, or kid emergencies happen, you are not paying full panic price for something you could have handled before breakfast.
Prohibited Items: What Will Get You Stopped at Security
Getting flagged at Disney security doesn’t just cost you the confiscated item—it costs you the most valuable 15 minutes of your morning when wait times are at their absolute lowest.
Rope dropping Disney World is a completely different game now. If Magic Kingdom opens at 9:00 AM, rolling up to the front gates at 8:45 AM means you’ve already lost. You need to be at the touchpoints by 8:00 AM, because Disney routinely starts letting people through the security checkpoints and into holding areas well before the posted Early Entry time.
That first 30 minutes of the morning is a high-stakes, 100-minute choice. If you get pulled into the dreaded secondary bag check line because you packed a prohibited item, you burn your Early Entry advantage. That 10-minute delay is often the difference between a walk-on for Seven Dwarfs Mine Train and instantly facing a 100-minute standby line. To breeze through the scanners and protect your morning strategy, you need to know exactly what Disney bans.
The “Do Not Pack” Checklist
Before you leave your hotel room, verify your park bag is totally clear of these commonly confiscated items:
- [ ] Wagon strollers: This includes Keenz and any stroller that is pulled rather than pushed. Standard strollers are fine, provided they are no larger than 31” wide and 52” long.
- [ ] Loose ice: Disney strictly bans loose or dry ice. If you are packing a cooler bag for snacks, you must use reusable gel ice packs.
- [ ] Glass containers: With the sole exception of small baby food jars, glass is completely forbidden. Leave the glass perfume bottles, Tupperware, and beverage bottles at the resort.
- [ ] Selfie sticks: Any extension pole for cameras or phones will be taken at the gate. Handheld grips and non-extending gimbals are perfectly fine.
- [ ] Folding chairs: Even those small, collapsible tripod camping stools you see heavily advertised online are banned.
- [ ] Weapons and self-defense items: Security is zero-tolerance on pocket knives (even tiny Swiss Army knives on keychains) and pepper spray or mace. Leave them at home.
- [ ] Oversized bags: Backpacks, coolers, and suitcases larger than 24" long x 15" wide x 18" high will not make it into the park.
Allowed vs. Prohibited: The Quick Guide
Disney security is notoriously literal with its definitions. Here is what you should pack to stay compliant without sacrificing convenience:
| What You Want to Bring | The Disney-Approved Alternative | Why It Matters |
|---|---|---|
| Stroller wagon | Double side-by-side stroller | Wagons are banned to prevent severe walkway congestion and tripping hazards. |
| Loose ice in a cooler bag | Reusable gel ice packs | Loose ice melts, requires dumping, and makes security bag inspections a wet mess. |
| Selfie stick | Non-extending phone grip | Extension poles are banned for safety on rides and to prevent blocking views in dense crowds. |
| Large power strip | Multi-device MagicBand+ charging block | Security often flags bulky power strips on the scanners. A compact multi-device block is faster to check and charges up to four bands at once. |
Bag Organization is Your Security Lightning LanePro tip: The contactless security scanners will automatically flag dense metal items like umbrellas, metal water bottles, and thick portable battery packs. Take these items out of your bag and hold them straight out in front of you (along with your phone) as you walk through the detector. This simple move bypasses the physical bag search line almost every time.
Your bag organization strategy matters more now than ever. With Southwest Airlines ending its beloved 54-year “two free checked bags” policy on May 28, 2025, we are seeing a massive shift in how people pack for Disney. To avoid paying extra bag fees, guests are aggressively cramming more items into their carry-ons and daily park bags.
If you are hauling a stuffed Loungefly backpack—which notoriously lacks internal pouches—you are asking for a security hold-up. Instead, use a mini-backpack organizer insert. It slides right into your Loungefly, adding multiple pockets that keep your essentials strictly organized. When you approach the security tables, you can instantly pull out your metal water bottle and battery pack without frantically digging through a bottomless pit of tangled cords and snacks.
Every minute you save at security is a minute you can use to position yourself at the front of the Early Entry pack. When you’re trying to knock out top-tier attractions before the crowds arrive, a clean, compliant park bag is the ultimate insider hack.
Key Takeaways
Pack for mobility first: the lighter your bag, the more rides you ride. Every minute you spend digging through a stuffed backpack at bag check, or shifting a heavy tote between shoulders in a 90-minute standby line, is a minute you’re not enjoying the park. The goal of a Disney World packing list isn’t to bring everything — it’s to bring the right things, organized so you can grab them in two seconds and move.
The core strategy, summarized
- Pack light, pack smart. A streamlined park bag beats a maxed-out one. You’ll walk 8–12 miles a day; your shoulders will thank you.
- Prepare for weather you can’t predict. Central Florida flips from blazing sun to a 20-minute downpour and back. Layer-able, packable gear handles both without you running back to the hotel.
- Optimize gear for the day’s flow. The right charger, the right bag organization, and a couple of cooling/rain pieces turn a survivable day into a smooth one.
Your non-negotiable park bag
The most-recommended bag (the Loungefly backpack) looks great but runs short on pockets — everything sinks to the bottom. A simple mini-backpack organizer insert fixes that and is the single best upgrade for a chaotic bag.
- [ ] Portable charger — you’ll lean on the My Disney Experience app all day (Lightning Lane, mobile order, wait times), and it drains a phone fast. A multi-device charger that also tops off MagicBand+ is worth the space.
- [ ] Bag organizer insert — turns one big pocket into many; you find sunscreen before the toddler melts down.
- [ ] Refillable water bottle — Florida heat is no joke; free ice water is available at any quick-service counter.
- [ ] Compact poncho — packs to fist size, beats a $ in-park rain poncho.
- [ ] Sunscreen + a hat — reapplication beats regret.
Pack to the season and the trip style
| Season | The real challenge | What earns its space |
|---|---|---|
| Summer (Jun–Sep) | Heat + daily afternoon storms | Cooling towel, poncho, extra charger, electrolyte packets |
| Winter (Dec–Feb) | Warm midday, genuinely cold mornings/nights | Packable layers you can shed by 11 AM and re-add at fireworks |
| Spring/Fall | Wild day-to-day swings | A light layer + poncho; check the forecast the night before |
Pro tip: The smartest “gear” is knowing where to cool off for free. The Carousel of Progress in Magic Kingdom almost always runs a five-minute wait into a dark, air-conditioned theater — the perfect mid-afternoon reset that costs you nothing and saves your feet. Build one or two of these AC breaks into your day instead of packing your way out of the heat.
Gear that supports your touring plan
Packing light pays off most at rope drop, when mobility is everything. A few realities to plan your gear around:
- Early Theme Park Entry gets on-site guests in 30 minutes before official open — but not every land or ride is available. At Magic Kingdom, early entry typically starts around 8:30 AM for a 9 AM open, with only Fantasyland and Tomorrowland open; headliners like TRON Lightcycle / Run and Seven Dwarfs Mine Train (both Lightning Lane Single Pass) aren’t running yet.
- You’ll be moving fast and standing in lines — a bag you can swing to your front and open one-handed beats one you have to take off.
- Free line-skipping still works: ride at rope drop, during parades/fireworks, or as crowds leave for the night. Lightning Lane Multi Pass and Single Pass are the paid options when a ride’s standby line is brutal.
The one thing to remember
Pack like a veteran, not a worried first-timer: a lightweight, well-organized bag with a charger, water, sun protection, and a poncho covers 90% of what a Disney World day throws at you. Bring less, organize better, and keep your hands free — that’s what keeps you moving.
Want to skip the guesswork on timing? SupaPark’s best-time-to-ride forecaster and live wait alerts tell you exactly when a headliner drops to a walk-on, so you can plan your day — and your bag — around the moves that actually matter. Find it at supapark.com.
<!-- SUPAPARK-LINKS:START -->
Keep planning: today’s crowd forecast · is Lightning Lane worth it
<!-- SUPAPARK-LINKS:END -->