Disney World Money-Saving Masterclass: How to Cut Ticket, Resort & Food Costs Without Cutting the Magic
Published June 14, 2026 · Updated September 9, 2026
At a Glance
- Best for: Budget-minded families and planners who want the full Disney World experience — headliner rides, sit-down meals, on-property stay — without the premium price tag.
- Biggest win: Booking the cheapest 2026 ticket dates (mid-Aug to late-Sept, base ~$119/day) and pairing them with free Early Theme Park Entry.
- Typical savings: Up to ~$40/day on admission; the right tactics can take a ~$1,200 trip closer to ~$900.
- Best time to go: Aug 18–28 or Sept 1–24, 2026 — Disney’s pricing engine sits at the base rate on 30+ of these dates.
- Don’t miss: Early Theme Park Entry (30 min early, free with ANY Disney resort — even Value-tier All-Stars), the refillable resort mug for unlimited drinks, and free Disney bus/Skyliner/monorail to skip the ~$30–$35 daily parking fee.
- Skip: Lightning Lane on consistently short-standby rides like “it’s a small world,” and pricey character meals like Cinderella’s Royal Table — swap in Tusker House or Garden Grill for a comparable experience for less.
- Worth paying for: A Lightning Lane Single Pass (~$19–$22) on high-demand headliners like TRON Lightcycle / Run or Guardians of the Galaxy: Cosmic Rewind, where standby routinely runs 60+ minutes even on light days.
This guide is for anyone who’s stared at a Disney World quote and felt the sting — it walks you through the exact low-price ticket calendar, resort and dining hacks, and Lightning Lane spending rules that trim the bill without trimming the magic. The single biggest move: lock in the cheapest 2026 dates and let free Early Theme Park Entry buy you the same early rope-drop hours a deluxe-resort guest pays a premium for.
How Disney Pricing Actually Works (Date-Based Everything)
At Disney World, almost every number on your quote is tied to the calendar — so the single biggest lever you have isn’t a coupon or a hack, it’s the dates you pick. Tickets, Lightning Lane, hotel rates, and even crowd levels all swing with the day of the year. Choose your window well and the savings stack before you’ve done anything clever.
Four things that move with the date
Disney runs date-based pricing across the board. The same exact park day costs wildly different amounts depending on when you go:
| What’s date-driven | How it swings | Your move |
|---|---|---|
| 1-day ticket price | Base rate on the cheapest 2026 dates vs. a $10–$20 premium on holidays and peak weeks | Target the low calendar (mid-Aug to late-Sept 2026 hits the base rate on 30+ days) |
| Lightning Lane | Multi Pass and Single Pass prices float by demand — a price spike signals a busy day | Buy on calmer dates; a high LL price is a crowd warning |
| Hotel rooms | Value-season nights cost far less than holiday/peak nights | Book around your cheap ticket dates, not the other way around |
| Crowds | Same park, totally different wait times week to week | Aim for low-crowd windows so standby and LL both go further |
Notice the pattern: cheap dates tend to be low-crowd dates tend to be cheap-Lightning-Lane dates. They move together, which is why date selection is the master setting.
No park reservation required — stop planning around a rule that’s gone
One myth that still trips up planners: you do not need a separate park-pass reservation on a standard date-based ticket. The COVID-era system that made you “reserve your park day” is gone for standard tickets. Buy your dated ticket, show up, walk in. That means you’re free to pick parks day-of based on what’s actually happening — weather, crowds, what you feel like riding — instead of locking yourself in months ahead.
The mental model: cheap dates first, then layer
Build your trip in this order and the savings compound instead of competing:
- [ ] Pick the cheapest low-crowd dates — this sets the floor for tickets, hotel, and Lightning Lane all at once
- [ ] Add Early Theme Park Entry — free with any Disney resort stay (all tiers, even Value); 30 minutes of low-wait riding before everyone else
- [ ] Layer hotel and ticket discounts on top of an already-cheap base
- [ ] Decide Lightning Lane last, once you know how busy your dates actually run
Do it backwards — lock the hotel or the headliner ride first — and you end up paying peak prices to fit a date you picked for the wrong reason.
Pro tip: Early Theme Park Entry gives a $0 Value-resort guest the same early park access as a deluxe guest. That extra 30 minutes is some of the lowest-wait ride time of the whole day — you’re effectively buying back time that peak-date crowds would have eaten, without spending a dollar on Lightning Lane.
Why “when” beats every other hack
You can grind every food and merch tip in this guide, but none of them move the total like choosing a base-rate, low-crowd week. A single-day ticket can swing by $10–$20 between a quiet September Tuesday and a holiday Saturday — multiply that across a family and several days and the date alone is often a few hundred dollars. Lower crowds on those same dates also mean shorter standby lines, so the money you would’ve spent skipping lines stays in your pocket.
Let the data pick your window
You don’t have to guess which weeks are quiet. SupaPark’s crowd forecasts are free, and they’re built on the most accurate Disney World prediction engine anywhere — so you can scan ahead, spot the low-cost, low-crowd windows, and line your dates up before you book a thing. Check the forecast at supapark.com, find the soft spots in the calendar, then build the rest of your trip on top of them.
The one thing to remember: at Disney World, when you go is the decision that quietly sets the price of everything else. Nail the dates first — cheap and low-crowd — and every other money-saving move in this guide works harder.
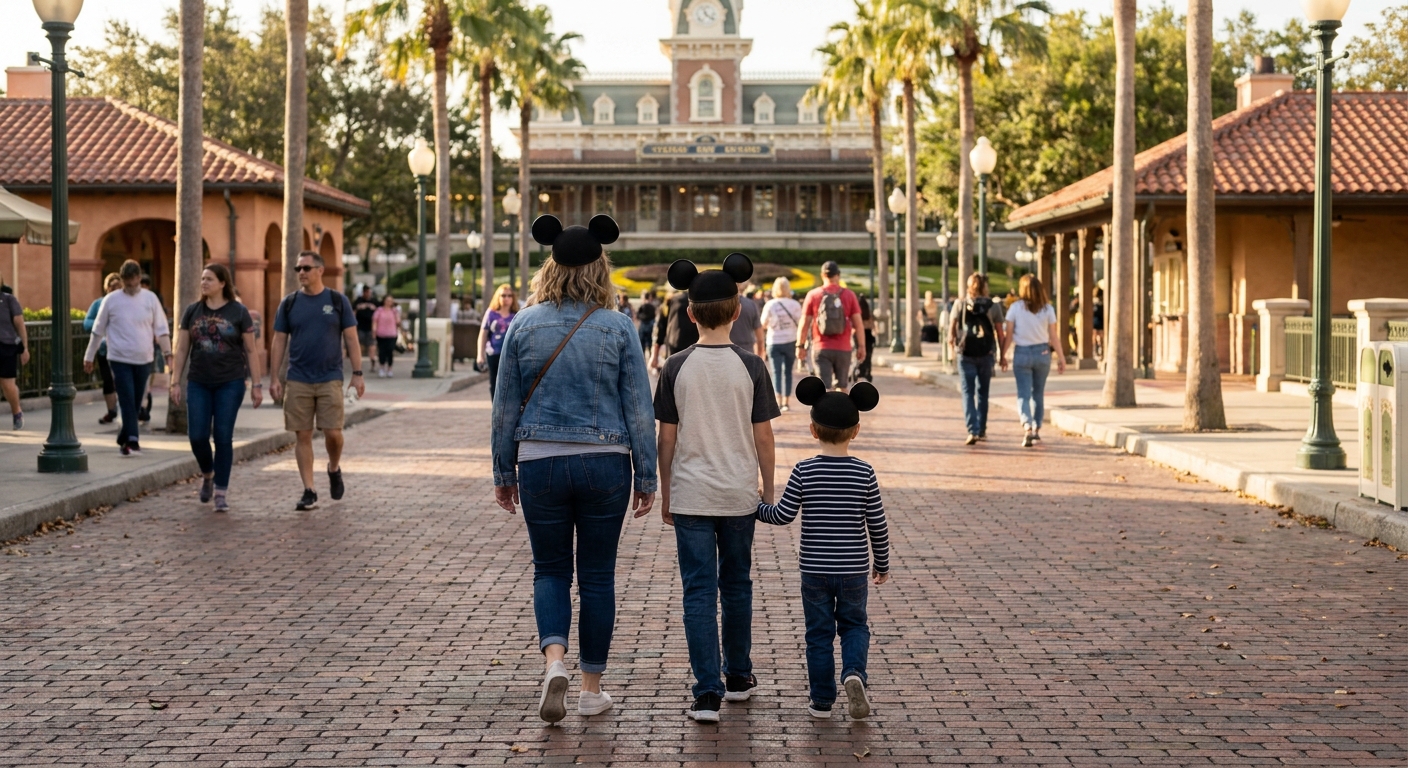
Cheapest Times to Visit: Date Windows That Slash Every Cost
The single biggest money move you can make is picking the right week — the same trip can cost hundreds less just by shifting dates, because tickets, rooms, AND Lightning Lane all bottom out at the same time. Disney’s pricing engine is demand-based, so when crowds drop, every line item drops with it. Build your whole trip around a low-demand window and you save before you’ve booked a thing.
The three cheap windows worth targeting
There are a few stretches each year when the calendar quietly turns into value season:
- Late August through pre-Thanksgiving (roughly mid-Aug to late Sept): The deepest ticket discounts of the year land here — base single-day pricing in 2026 sits at its floor (around $119) across a 30-plus-day run in late August and most of September. Rooms follow, and Lightning Lane prices drift down with the thinner crowds.
- January and February value season (after New Year’s, outside Presidents’ Day week): The quietest the parks get all year. Lightning Lane Multi Pass can hit its lowest floor — as cheap as around $25 in January versus far more on peak days.
- Early December (before the holiday surge): Holiday décor is up, weather is crisp, and pricing hasn’t spiked yet. A genuine sweet spot if you can go before mid-month.
Why one date change cuts three costs at once
| Cost | How low dates help |
|---|---|
| Tickets | Date-based pricing drops to the base rate on low-demand days — you skip the $10–$20 holiday/peak premium. |
| Rooms | Resort rates fall in slow seasons, and the best room discounts tend to land on these same windows. |
| Lightning Lane | Daily per-ride pricing is dynamic; quieter parks = lower Multi Pass and Single Pass prices. |
It’s all the same demand signal. Lower crowds pull every dial down together — that’s why chasing the cheap window beats hunting individual coupons.
Pro tip: Lightning Lane price IS a crowd forecast. A price spike on a given date means a surge crowd is coming — so a high Multi Pass price is your early warning to shift days or pick a different park. SupaPark’s sell-out and refill predictions track these moves in real time, so you can spot the cheap, quiet days before you commit.
The school-calendar tradeoff
Here’s the catch for families: the cheapest weeks are cheap because school is in session.
- Parents who can pull kids for a few days get the biggest savings of anyone — September and late January are gold.
- Locked to school breaks? You’re aiming at the most expensive weeks (spring break, summer, Thanksgiving, Christmas). If you can’t move dates, your savings have to come from tickets, dining, and Lightning Lane strategy instead.
- Pre-K and homeschool families have the most flexibility — use it.
Weather and event tradeoffs
Cheap dates come with strings. Know them before you book:
| Window | The upside | The tradeoff |
|---|---|---|
| Late Aug–Sept | Lowest ticket prices, thinner crowds | Peak heat + afternoon thunderstorms; active hurricane season |
| Jan–Feb | Lowest crowds, lowest Lightning Lane floor | Occasional cold snaps; some ride refurbishments |
| Early Dec | Holiday overlay, mild weather | Books up fast; prices climb sharply mid-month |
Two more things to weigh: some headliners close for refurbishment in slow seasons, and several low-crowd dates overlap with separately-ticketed after-hours events (Halloween and holiday parties), which can shorten regular park hours on party nights. Check the calendar so a “cheap” day doesn’t surprise you with an early close.
Build the trip around the window
- [ ] Pick your cheap window first, then back into flights and time off — not the reverse.
- [ ] Cross-check ticket base-rate dates against the room-discount calendar; overlap = double savings.
- [ ] Pair any on-site stay with free Early Theme Park Entry (30 min early, every Disney resort) for deluxe-style morning hours at value pricing.
- [ ] Watch Lightning Lane prices on your target dates — let a price dip confirm the quiet day and a spike steer you off a crowded one.
- [ ] Avoid party nights and refurb closures unless the event is the point.
The one thing to remember: Don’t shop for discounts — shop for dates. Lock in a low-demand window and tickets, room, and Lightning Lane all get cheaper at once, no coupon required.
Ticket Savings: Date-Based Tickets, Length-of-Stay & Add-On Math
The single biggest lever on your ticket bill isn’t a coupon — it’s when you go and how many days you buy. Disney World tickets are date-based, meaning the price floats with expected crowds. The same one-day ticket can swing dozens of dollars depending on whether you pick a slow late-August weekday or a holiday week. Lock your dates while the cheap ones are still available, because as a date’s demand fills in, its price ticks up — wait, and you pay more for the exact same day.
Why more days = lower per-day cost
Multi-day tickets spread a big fixed cost across more days, so each additional day gets cheaper. A 5-day ticket isn’t five single-day prices stacked up — the per-day rate drops sharply after day three or four. The flip side: stop adding days once you stop adding park time. A 7-day ticket you only use five days for is just a more expensive 5-day ticket.
- The first 1–2 days carry the highest per-day cost.
- Days 4, 5, and beyond often add only a modest amount each.
- Breakeven logic: divide total ticket price by days you’ll actually be in a park. If adding one more day drops your per-day number and you’d genuinely use it, add it. If not, don’t.
Park Hopper vs. Water Park & Sports — when each earns its keep
Add-ons are where budgets quietly leak. Buy the one that matches how you tour; skip the one that doesn’t.
| Add-on | Worth it for | Skip it if | Real-world note |
|---|---|---|---|
| Park Hopper | Multi-day trips, EPCOT dinner after a Magic Kingdom morning, chasing lower waits across parks | One short trip where you’ll do one park per day | You can now hop anytime the parks are open — the old 2 PM restriction is gone; the destination park just needs capacity |
| Water Park & Sports | Families planning real Typhoon Lagoon/Blizzard Beach days | You “might” hit a water park once | Only pencils out if you’ll use multiple entries; one casual visit rarely beats a standalone ticket |
Pro tip: Park Hopper’s hidden value isn’t variety — it’s flexibility under live conditions. If your home park is having a heavy crowd day or a headliner goes down, hopping lets you chase the shorter lines instead of eating the wait. SupaPark’s live waits and “which park today?” read make that call for you in real time, so a Hopper you already own actually pays off.
Buy direct vs. authorized resellers vs. discount angles
You don’t have to buy tickets at full gate price, but where you buy matters.
- Direct from Disney: simplest, links cleanly to My Disney Experience, full flexibility.
- Authorized third-party resellers: legitimate, established sellers can come in slightly under gate price on multi-day tickets — useful savings on a big family order. Stick to well-known authorized sellers; anything promising deep discounts on a “used” or partially-used ticket is a trap.
- Special-eligibility tickets (verify your own eligibility before counting on these):
| Angle | Who it helps | The catch |
|---|---|---|
| Military salute tickets | Active/retired military & families | Limited date windows; must be activated correctly |
| Florida resident offers | FL residents | Proof of residency required; date restrictions |
| Disney Visa cardholder perks | Cardholders | Perks lean toward room/package and merchandise discounts more than tickets |
Your ticket-buying checklist
- [ ] Pick your travel dates around lower-demand windows (late summer/early fall weekdays tend to price softer).
- [ ] Count the days you’ll actually be in a park, then price that exact ticket length.
- [ ] Run the per-day breakeven before adding a day or an add-on.
- [ ] Add Park Hopper only if you’ll genuinely cross parks; add Water Park & Sports only for multiple water-park days.
- [ ] Check military / Florida-resident / cardholder eligibility before defaulting to full price.
- [ ] Compare an authorized reseller’s multi-day price against Disney direct.
- [ ] Buy once you’re confident — prices climb as your dates fill, not down.
One thing to remember: the cheapest ticket is the right length on the right dates, bought before the price rises — add-ons are a yes only when the math and your touring style both say yes.
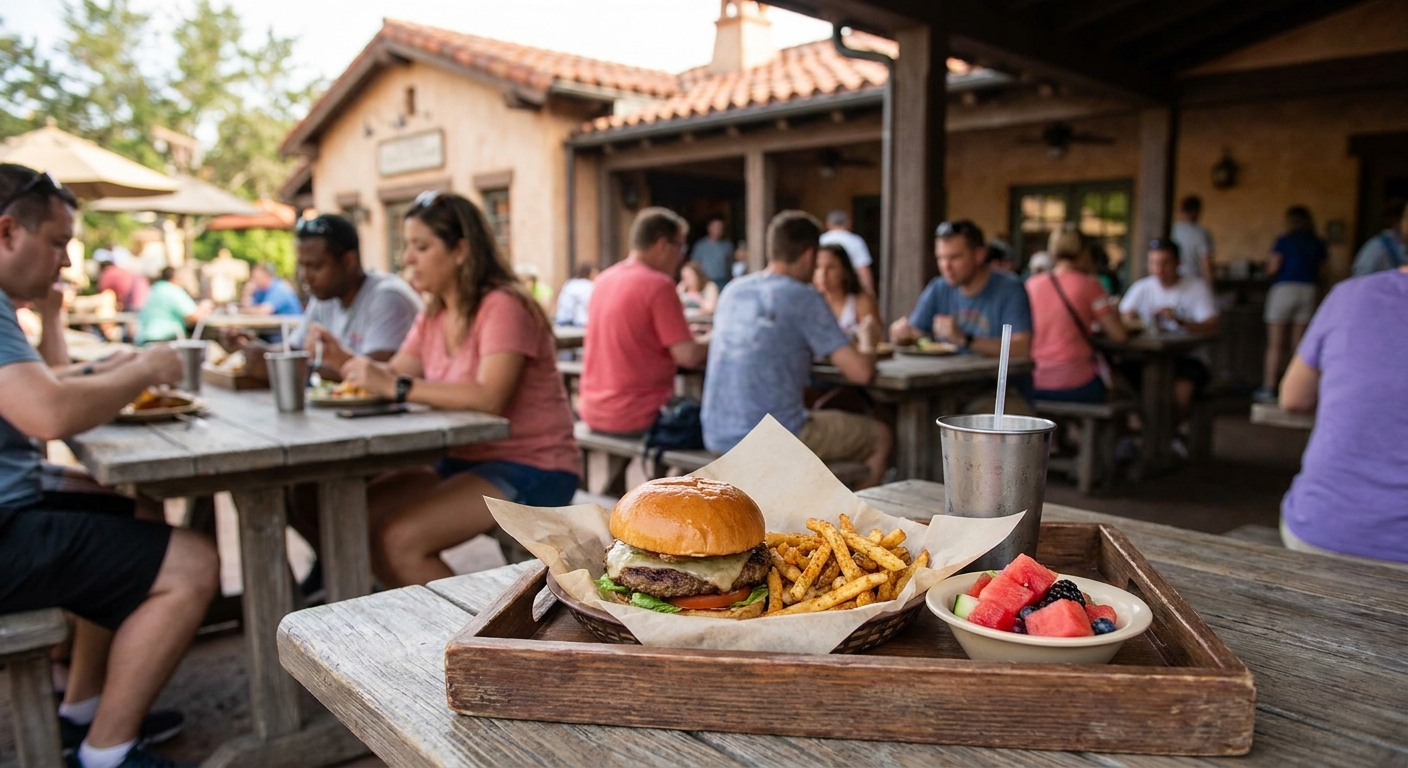
Where to Stay: On-Site vs. Off-Site Value Breakdown
The fast answer: off-site wins on sticker price almost every time, but Disney’s on-site perks claw back so much value that for short, ride-heavy trips the gap often closes to near zero. The trick is knowing which perks you’ll actually use — and which ones you’re paying for and ignoring.
What on-site actually buys you
Every Disney-owned resort — even a Value-tier All-Star — includes the same core perks. You do not need to book Deluxe to get most of them:
- Early Theme Park Entry (ETPE): 30 minutes of early access to a park every single day of your stay, including check-in and check-out days. That’s effectively a free low-wait riding window before the standby crowds arrive.
- Free Disney transportation: Buses, monorail, Skyliner, and boats are included, which wipes out the roughly $30–$35/day theme-park parking fee.
- 7-day Lightning Lane Multi Pass window: Resort guests can make Multi Pass selections up to 7 days before arrival (off-site guests get 3). More runway to lock in the rides you care about.
- Extended Evening Hours: Extra after-hours park time at no added ticket cost — but this one is Deluxe/Villa guests only, not the whole resort lineup.
The true-cost comparison
Don’t compare room rates alone. Stack the perks against the nightly price, because free parking and ETPE have real dollar and time value.
| Factor | Value resort (e.g., All-Star) | Moderate (e.g., Caribbean Beach) | Deluxe (e.g., Polynesian) | Off-site hotel / rental |
|---|---|---|---|---|
| Nightly rate | $ | $ | $$ | Usually lowest, esp. for groups |
| Parking fee at parks | Free | Free | Free | ~$30–$35/day |
| Early Theme Park Entry | ✅ Daily | ✅ Daily | ✅ Daily | ❌ |
| Extended Evening Hours | ❌ | ❌ | ✅ | ❌ |
| LL Multi Pass booking window | 7 days | 7 days | 7 days | 3 days |
| Free Disney transport | ✅ | ✅ | ✅ | ❌ (rental car/rideshare) |
| Kitchen / space for big groups | ❌ | Limited | Limited | ✅ (rentals win big) |
When off-site genuinely wins
Off-site is the smarter money move when:
- You’re a larger family or group. A vacation rental with a kitchen and multiple bedrooms undercuts two Disney rooms easily, and home-cooked breakfasts kill the priciest meal of the day.
- You’re doing a slower, fewer-park trip. If you’re not rope-dropping daily, ETPE and Extended Evening Hours go unused — you’re paying a Disney premium for perks sitting on the shelf.
- You already need a rental car. Once you’re driving anyway, free Disney transport loses its edge, and off-site hotels near the parks are often a short drive.
When on-site erases the price gap
On-site pays for itself when:
- You ride hard and rope-drop most days. Daily ETPE plus the 7-day Multi Pass window means more headliners with less waiting — that time has real value on a short trip.
- You don’t want a car. Free transport plus no parking fee can offset a few hundred dollars across a week.
- You want late-night, low-crowd park time and book Deluxe/Villa for Extended Evening Hours.
Transportation gotchas that change the math
Not all on-site resorts are equal once you’re standing at the transport stop:
- Skip Caribbean Beach if you need fast morning Skyliner access — the hub station bottlenecks at rope drop. Pop Century or Riviera load faster.
- A Pop Century Preferred-Room upgrade (around $30/night) puts you steps from the Skyliner, shaving 10–15 minutes off your morning.
- Leaving Coronado Springs, the Buena Vista Drive/Western Way light can add 15–20 minutes — depart before 8 AM or after 6 PM.
Pro tip: A Value resort gets you the exact same daily Early Theme Park Entry as a $700-a-night Deluxe. Unless you specifically want Extended Evening Hours, paying up for Deluxe buys you a nicer room and a better pool — not better ride access. Put that difference toward tickets or food instead.
The one thing to remember
Run the math on your trip, not the brochure. Add parking, the value of early hours you’ll actually use, and group size to the room rate before deciding. SupaPark’s crowd forecasts and best-time-to-ride data tell you whether you’ll really use that early-entry window — the deciding factor in whether on-site is worth the premium.
Resort Discounts That Stack: Bounce-Back, Length-of-Stay & Card Deals
The smart play isn’t finding one big discount — it’s layering several, then re-pricing your room every time a new offer drops. A Moderate or Deluxe room booked at rack rate is almost never the price you have to pay if you’re patient and watching.
The discounts that actually move the needle
Disney rarely lets you literally combine two percentage codes on the same reservation — but you can book under the best offer available now, then rebook under a better one the moment it appears. That sequencing is where the real savings live.
| Discount type | Who it’s for | Typical depth | Catch |
|---|---|---|---|
| General-public room offer | Anyone | ~20–30% off Deluxe, less on Moderate | Date and resort exclusions; sells out |
| Length-of-stay break | Longer trips (often 4–5+ nights) | Bigger % the more nights you book | Need the longer stay to qualify |
| Disney Visa cardholder offer | Disney Visa holders | Up to ~35% off select Deluxe/villa rooms | Specific resorts, dates, night minimums |
| Bounce-back (booked on-property) | Current resort guests | Strong room rates for a future trip | Must book during your current stay |
| Annual Passholder / seasonal | APs, off-peak travelers | Varies, often deepest in slow seasons | Limited dates, AP required |
Realistically, stacking the right offer with a longer stay can land you in the neighborhood of up to ~35% off a Deluxe room during the right window — the kind of cut that turns a Deluxe into “Moderate money.”
Bounce-back: the one most people walk past
If you’re already on-property, the bounce-back offer (book a future stay before you check out) is frequently the best room rate Disney hands out — and it’s not advertised to people sitting at home. Check the in-room channel or ask at the front desk near the end of your trip.
Book early, then re-price relentlessly
New offers drop on a rolling basis, and existing reservations don’t auto-update. So:
- [ ] Book early at the best rate available — locking the room and date you want first
- [ ] Note your confirmation number and current total
- [ ] Check for new public/Visa/seasonal offers every few weeks
- [ ] When a better discount appears, call Disney (or rebook online) to apply it to your existing reservation
- [ ] Re-confirm your room category and dates survived the rebook
Pro tip: Rebooking to a better offer usually keeps your room and dates — but inventory under each promo is limited, so the discount can run out before your travel dates do. The guests who win are the ones who check often and rebook the same day a new offer lands, not the ones who wait for “the best one.”
Don’t over-optimize into the wrong room
A bigger percentage off a Deluxe isn’t a deal if a Moderate genuinely fits your trip. Run the math on the final price, not the discount size:
- A 30% Deluxe offer can still cost more per night than an undiscounted Moderate.
- Length-of-stay breaks reward longer trips — don’t add nights you don’t want just to chase a tier.
- Transportation and location matter more than the discount badge: a well-placed Moderate near Skyliner or a monorail line can beat a “cheaper” Deluxe that’s a bus ride from everything.
A note on where to book
Book rooms directly with Disney — that’s where these offers live and where rebooking under a new discount actually works. SupaPark doesn’t touch room reservations; our job starts once you’re on the ground: live wait times, Lightning Lane refill and sell-out forecasts, and Drop Watch alerts the second a hard-to-get dining reservation frees up. Get the room cheap on your own, then let SupaPark squeeze the value out of the actual park days.
The one thing to remember
Treat your room rate as a moving target, not a final answer. Book early to lock the room, then re-price every few weeks and rebook the instant a stronger offer drops — that habit, plus a longer stay or a Disney Visa offer, is what quietly knocks hundreds off a Moderate or Deluxe without changing a single thing about your trip.
Picking the Right Resort for Transportation (Avoid Hidden Time Costs)
A cheap room with bad morning transit isn’t cheap — it’s a daily tax on your park time. The room rate is the number you see; the 15–20 minutes you lose every morning getting to the gate is the number you don’t. Over a 5-day trip, a slow resort can quietly cost you an entire park morning.
Here’s the part most people miss: Early Theme Park Entry (ETPE) is free with every Disney-owned resort, from the cheapest Value to the priciest Deluxe. That’s a 30-minute head start each day — essentially a free hour of near-walk-on riding — but it only pays off if your transportation actually gets you to the rope on time. A great perk wasted on a slow bus is no perk at all.
How the transportation tiers actually compare
| Transport type | Resorts (examples) | Real-world morning feel | Watch out for |
|---|---|---|---|
| Skyliner (gondola) | Pop Century, Art of Animation, Riviera | Fast, frequent, no crowded bus | Caribbean Beach hub bottleneck |
| Monorail loop | Magic Kingdom–area Deluxe resorts | Effortless to MK & EPCOT | Premium room rates |
| Bus-only | All-Star Values, others | Reliable but variable waits | Multiple stops, full buses |
The Skyliner trap nobody warns you about
The Skyliner is the budget traveler’s secret weapon — it serves Pop Century and Art of Animation (both Value-priced) and Riviera (Deluxe), and it drops you straight at EPCOT and Hollywood Studios with no bus crush. But there’s a catch:
- Caribbean Beach is the central hub where Skyliner lines converge. In the morning rush, that means transferring through a bottleneck exactly when you’re trying to make rope drop.
- If fast morning access matters to you, choose Pop Century, Art of Animation, or Riviera over Caribbean Beach. Same gondola, none of the transfer chokepoint.
Pro tip: A Preferred-Room upgrade at Pop Century (often around $30/night) puts you within steps of the Skyliner station — shaving roughly 10–15 minutes off the internal shuttle/walk every single morning. On a multi-day trip, that’s the rare upgrade that buys back real park time instead of just a nicer view.
Monorail and Deluxe: paying for proximity (and Extended Evening Hours)
Monorail-loop Deluxe resorts make Magic Kingdom and EPCOT mornings nearly frictionless. They cost more, but two things partly justify it for the right traveler:
- Extended Evening Hours — extra park time after the park closes to everyone else — are exclusive to Deluxe and villa-level guests. That’s bonus low-wait riding at night, no extra ticket required.
- Proximity means fewer transfers and no parking-lot scramble at the end of a long day.
If you’re not chasing those night hours, a Deluxe resort is a comfort splurge, not a money-saver. Be honest about which one you are.
Resort-by-transport cheat sheet
- [ ] Want fast mornings on a Value budget? Pop Century or Art of Animation (Skyliner) — skip Caribbean Beach.
- [ ] Splurging on a Deluxe? Pick a monorail or Skyliner resort so the convenience is built in, and use Extended Evening Hours.
- [ ] Stuck with bus-only? Build in a buffer — leave for ETPE about 60 minutes before park open so a full bus doesn’t blow your head start.
- [ ] Staying off-property to save? Factor the $30–$35/day on-site parking you’d skip and the time cost of driving and tramming in each morning.
One more free win at any resort
Every Disney resort guest rides the monorail, Skyliner, buses, and boats for free — and that quietly erases the daily on-site parking fee (around $30–$35) if you’d otherwise drive. It also means you don’t need to rent a car just to get around property. The transportation network itself is part of what you’re paying for when you stay on-site; use it.
The one thing to remember: Don’t shop for a resort on room rate alone. Map how each option gets you to the gate in the morning, because ETPE only pays off if you’re standing at the rope on time. The smartest budget move is often the slightly pricier room — or a small Preferred upgrade — that hands you back 15 minutes of low-wait riding every day of your trip.
The Free Perks On-Site Guests Forget to Use
Staying on-property comes loaded with extras you’ve already paid for — and most families leave half of them on the table. These aren’t discounts you hunt for; they’re automatic. The trick is actually using them.
Early Theme Park Entry: your free extra hour
Every Disney-owned resort — Value, Moderate, Deluxe, Villa — gets 30 minutes of Early Theme Park Entry into every park, every single day of your stay, including check-in and check-out days. You do not need a pricey Deluxe room to get it. An All-Star Sports guest walks in at the same time as a Grand Floridian guest.
That half hour is the highest-value window of the day. Standby lines are near walk-on, Lightning Lane isn’t even necessary yet, and you can knock out a headliner before the regular crowd clears the turnstiles. Treat it like a free Single Pass you get daily.
- [ ] Be tapped in at the gate 60+ minutes before regular opening (lines form early)
- [ ] Head straight to the back of the park — most guests stall at the first ride
- [ ] At Hollywood Studios especially, get in the right line; there are multiple early-entry queues and the wrong one costs you the head start
Pro tip: Use Early Entry on your check-out day too. Bags go to bell services, you ride for 30 low-wait minutes, and you’ve squeezed a bonus mini-park-day out of a morning most people waste at the airport.
Extended Evening Hours: the Deluxe-only night owl perk
This is the one genuine “pay more, get more” perk. Extended Evening Hours — extra park time after official close, at no added ticket cost — is exclusive to Deluxe and Deluxe Villa guests (think Polynesian, Animal Kingdom Lodge, the Villas). On select nights the park stays open just for those guests, and the walk-on waits at that hour are some of the best you’ll ever see.
If you’re already weighing a Deluxe stay, factor this in honestly: a couple of late nights of near-empty headliners can be worth more than a daytime Lightning Lane spend. If you’re in a Value or Moderate, don’t lose sleep over it — your Early Entry covers the morning equivalent.
Free transportation kills the parking fee
Standard self-parking at the parks runs around $30–$35 a day. Stay on-property and that line item disappears — buses, the monorail, Friendship Boats, and the Skyliner are all free.
| Transit | Connects | Best for |
|---|---|---|
| Buses | Every resort ↔ every park | Universal coverage, no walking required |
| Monorail | MK, EPCOT, monorail resorts, TTC | Magic Kingdom mornings, resort dining |
| Skyliner | EPCOT, Hollywood Studios, Skyliner resorts | Fast park-hopping (when not at peak) |
| Boats | Select parks & resorts | Scenic, low-stress arrivals |
Over a 5-day trip, skipping the parking fee alone saves roughly $150 — money better spent on Lightning Lane or dinner.
- Skip the Caribbean Beach Skyliner hub if you need quick morning access — it’s the central transfer point and bottlenecks early. Pop Century or Riviera load faster.
- At Pop Century, a Preferred-Room upgrade (about $30/night) puts you steps from the Skyliner station and shaves 10–15 minutes off the internal shuttle each way.
The hack nobody mentions: transport is free for everyone
Here’s the one Disney quietly doesn’t advertise — you don’t have to be a resort guest, or even have a park ticket, to ride Disney transportation. No one checks a room key to board a bus, boat, monorail, or Skyliner.
That opens up free, car-free dining trips. Finishing a day at EPCOT and want monorail-resort dinner at the Polynesian? Hop the monorail, no charge. Craving Jiko at Animal Kingdom Lodge? Take the free bus and skip resort parking entirely. It turns the whole transit network into a free way to explore restaurants and resorts you’d otherwise drive to.
Two retired “perks” to scrub from old advice
If a guide or relative tells you to use these, ignore them — they’re gone:
- Disney’s Magical Express (the free airport bus) ended in 2022. Current options are paid shuttles like Mears Connect or the Sunshine Flyer (roughly $35/adult round trip) or rideshare ($55–$70 a car).
- Extra Magic Hours no longer exists. It was split into the two perks above: Early Theme Park Entry (all on-site guests) and Extended Evening Hours (Deluxe/Villa).
The one thing to remember: the perks you already paid for — daily Early Entry, free transport, and the everyone-rides-free loophole — quietly recoup a chunk of your resort premium. Build your mornings and dining around them and they pay you back every day of the trip.
Lightning Lane on a Budget: When to Pay and When to Skip
Buy Lightning Lane only when the crowds (or the headliners) justify it — on a light-crowd day at the right park, your standby line and a little rope-drop strategy can save you the money entirely. Lightning Lane is Disney’s paid skip-the-line system, and treating it as automatic is one of the easiest ways to overspend at Walt Disney World.
How the two passes actually work
There are two products, and they solve different problems:
- Lightning Lane Multi Pass — bought per day, covers most attractions in one park. You pick your attractions in advance: Disney resort guests can start selecting up to 7 days before arrival, off-site guests 3 days out, with the window opening at 7:00 AM Eastern. You book an initial set, then once you redeem one (or its window passes), you add the next, one at a time, in My Disney Experience. It’s a “book ahead, then refill all day” system — not a wake-up-at-7-and-scramble panic.
- Lightning Lane Single Pass — à la carte, for the five biggest headliners only. Priced per ride, per day:
| Single Pass ride | Park |
|---|---|
| TRON Lightcycle / Run | Magic Kingdom |
| Seven Dwarfs Mine Train | Magic Kingdom |
| Guardians of the Galaxy: Cosmic Rewind | EPCOT |
| Star Wars: Rise of the Resistance | Hollywood Studios |
| Avatar Flight of Passage | Animal Kingdom |
Everything else with a Lightning Lane is covered by Multi Pass. Prices for both float by date and demand, so there’s no fixed sticker — watch the floor.
The decision: Multi Pass vs. Single Pass vs. neither
| Situation | Smart move | Why |
|---|---|---|
| High-crowd day, 3+ headliners on your list | Multi Pass | Stacks the most time savings; cheaper than buying several Single Passes |
| You only care about one or two of the five big headliners | Single Pass for those, skip Multi Pass | Pay only for the rides that actually have brutal standby |
| Low-crowd day, short-standby park | Skip both | Rope drop + meal/parade windows clear most lines for free |
| It’s a Small World, Haunted Mansion, most dark rides on a quiet day | Standby | Lines rarely justify the spend |
Pro tip: A spike in the Single Pass price is a crowd signal. When Disney’s dynamic pricing pushes a ride higher than usual, that’s the day demand is surging — sometimes the move is to ride it at rope drop or during a parade and skip paying the premium entirely.
When it’s genuinely worth it
- High-demand rides like TRON, Cosmic Rewind, and other headliners can hold 60+ minute standby even on lighter days — that’s where a pass earns its keep.
- 3+ headliners in one day is the classic Multi Pass break-even point. Below that, do the math before you buy.
- Free alternatives first: rope drop (be at the gate ~60 minutes before posted open), ride during lunch/parade/fireworks windows, and use Single Rider lines where offered — they’re free and often cut waits roughly in half.
Let SupaPark do the math
This is exactly the call SupaPark is built to make for you:
- The best-time-to-ride forecaster tells you when each attraction’s standby is usually shortest — so you know what you can get for free.
- Sell-out and refill predictions flag which selections will vanish and when.
- The “Is Multi Pass worth it?” ROI guidance weighs the day’s crowd forecast and your ride list against the price floor.
- Refill alerts ping you the moment a sold-out selection reopens, so you can grab it in My Disney Experience before it’s gone again.
The takeaway
- [ ] Check the crowd forecast for your park and date
- [ ] Count your must-ride headliners (3+ leans Multi Pass; 1–2 of the big five leans Single Pass)
- [ ] Watch the price floor — a spike means a crowd surge
- [ ] Lock free wins first: rope drop, meal/parade windows, Single Rider
Lightning Lane is a tool, not a tax. Pay when crowds and headliners stack up; skip it when a smart morning does the same job for nothing — and let SupaPark tell you which kind of day you’re walking into.
Free Ways to Skip Lines (No Lightning Lane Required)
You can cut your worst waits to near-zero without spending a dollar on Lightning Lane — if you ride at the right moments and verify the ride is actually open before you sprint to it. The free playbook is rope drop, mealtime/showtime gaps, single-rider lines, and the last hour of the night. Here’s how to run each one like someone who’s done it 40 times.
Rope drop — but verify before you sprint
The classic move: be at the tapstiles before posted open. On-site? You get Early Theme Park Entry (30 minutes early, every day of your stay, including check-in and check-out), so be at the gate even earlier. Get to your first headliner before the rope walks back and you’ll often ride a 60+ minute attraction as a near-walk-on.
The catch nobody warns you about: rope drop isn’t foolproof. Rides break. Guests routinely beeline straight to their must-do at open only to find it temporarily closed for a technical issue or a delayed opening — and now they’ve burned their best low-crowd window standing at a dead queue.
- [ ] Pick a primary AND a backup headliner before you walk in
- [ ] Confirm the ride is actually operating before you commit your legs to it
- [ ] At Hollywood Studios, get in the right Early Entry line — there are several, and the wrong one wastes your jump
Pro tip: This is exactly what SupaPark’s free live wait times and instant ride-down detection are for. Before you sprint, glance at the status — if your target just went down at open, SupaPark catches it and the “what should I ride next right now” recommendation reroutes you to the next-best low-wait headliner instead of letting you discover the closure the hard way.
Ride headliners during meals, parades, and fireworks
Standby waits crater when everyone’s attention is elsewhere. While the crowd eats, lines up for a parade, or stakes out fireworks spots, the popular rides empty out.
| Window | What most people are doing | Your move |
|---|---|---|
| Lunch (roughly noon–2pm) | Eating | Ride a top standby attraction |
| Parade / daytime show | Lining the route | Hit a headliner near the back of the park |
| Evening fireworks | Crowding the hub | Walk onto a coaster while the sky’s busy |
The trade-off: you’re skipping the spectacle to ride. Do it for the rides you care about most, then catch the show another night — or watch fireworks from a queue with a view.
Single-rider lines (free, and often the biggest cut)
If you’ll split your party, single-rider lines fill empty seats and frequently slash your wait — often by half or more. You won’t sit together and you can’t control your row, but for thrill rides that’s a small price.
- Great for: solo riders, couples okay splitting up, anyone who’s already ridden once and just wants a re-ride
- Skip if: you’ve got little kids who need a grown-up beside them, or the ride is the family’s shared “first time” moment
- Not every attraction offers it, and availability changes — check the standby vs. single-rider gap before you choose
End-of-night low waits
The last hour before close is one of the most underrated free hacks. As families with young kids head out, standby lines shrink fast. Get in line before posted close — if you’re in the queue at closing time, you ride. Deluxe and Club-level guests can stretch this further with Extended Evening Hours on select nights, when the park stays open late for a thinner crowd.
Make the free tactics work without guesswork
All four hacks share one weakness: timing. Rope drop fails if your ride’s down; the mealtime dip moves with the crowd; single-rider gaps swing minute to minute; the end-of-night drop starts earlier some nights than others. Guessing wastes the window.
SupaPark’s free tier closes that gap — live wait times across every park, instant ride-down detection so you know the second a headliner craters or breaks, and a “what should I ride next right now” call that points you to the lowest-wait headliner in front of you. No Lightning Lane purchase required.
The one thing to remember: Free line-skipping is all about timing, and timing is all about real-time information. Pick a backup, ride when the crowd’s distracted, use single-rider when you can — and let live data tell you the exact moment to move instead of finding out at the queue.
Dining Strategy: Cutting Food Costs Without Eating Badly
Food is the budget line you control in real time — small habits stacked across a trip save more than any single coupon. You don’t have to eat granola bars in a corner to spend less. The trick is killing the dumb costs (delivery fees, $15 mediocre combos, $4 bottled waters) and reallocating that money to the meals actually worth it.
The big levers, ranked by payoff
- Refillable resort mug. Buy one once for around $22 and refill it free at your hotel’s drink stations for the whole stay. For a family on a longer trip, that’s the easiest money you’ll ever recover versus buying drinks daily.
- Free ice water, everywhere. Any quick-service counter will hand you a cup of ice water at no charge — Spice Road Table in EPCOT’s Morocco pavilion included. In Florida heat, this single habit replaces $4+ bottled waters all day. Just ask.
- Bring your own. Pack soft cooler bags (ALDI’s are cheap and hold up) and big 40-oz refillable water bottles. A few packed sandwiches and snacks let you skip the $12–$15 quick-service combo on at least one meal a day.
- Share oversized portions. Disney plates trend huge. Many quick-service entrées and most desserts split cleanly between two people.
Mobile order or wait in line?
Use the My Disney Experience app to mobile-order quick service. You tap your meal, pick a pickup window, and walk past the register line — same price, far less wasted park time.
| Approach | What you get | Best for |
|---|---|---|
| Mobile order (My Disney Experience) | Skip the order line, lock a pickup window | Peak lunch/dinner rushes |
| Walk-up counter | Flexible, no app needed | Off-peak, simple orders |
| Packed cooler meal | Cheapest option, eat anywhere | One meal/day, picky kids |
Pro tip: Order on the app before you’re hungry — set your pickup window 30–45 minutes out while you’re still in a ride queue, and your food is ready the moment you arrive instead of after a 20-minute wait.
Smart character meals (the swap that saves the most)
Table-service character dining is where budgets quietly explode. The fix isn’t skipping it — it’s choosing the right one. Marquee experiences like Cinderella’s Royal Table command a premium for the castle setting. You get a comparable character lineup for noticeably less at alternatives like Tusker House (Animal Kingdom) or Garden Grill (EPCOT).
- Same idea — characters, sit-down meal, photos — at a meaningfully lower per-person cost.
- Book these the moment your reservation window opens.
Reservation timing that matters: Advance Dining Reservations open 60 days before arrival at 6:00 AM Eastern in My Disney Experience. Keep that separate from your Lightning Lane Multi Pass selections, which resort guests can start booking up to 7 days out (window opens 7:00 AM Eastern). Two different systems, two different alarms.
Low-price menu picks and the per-person target
Set a loose ceiling — aim to keep most quick-service and snack stops around or under roughly $12 per person — and the choices get easy. Lean on shareable snacks and counter items that punch above their price.
| Item | Approx. price | Why it’s smart |
|---|---|---|
| Pinocchio Village Haus cookie tart (Magic Kingdom) | ~$6 | Mobile-order it, big enough to share |
| Free ice water | $0 | Replaces $4+ bottled drinks |
| Refillable mug (per stay) | ~$22 once | Unlimited resort drinks |
| Split quick-service entrée | ~half each | Portions run large |
Prices drift season to season — treat these as ballpark, not gospel.
Pack-this checklist
- [ ] Refillable resort mug (buy day one, refill all trip)
- [ ] Soft cooler bag + a couple of packed meals/snacks
- [ ] 40-oz refillable water bottles per person
- [ ] One character meal booked at a value pick (Tusker House / Garden Grill), not the premium room
- [ ] Mobile orders queued in the app before each meal rush
- [ ] A reusable tote — Disney no longer ships in-park purchases to your resort, so carrying your own bag dodges any delivery fee
The one thing to remember: Defend your dollars on the boring stuff — drinks, delivery fees, rushed combo meals — so you can spend freely on the one or two meals you’ll actually remember.
Character & Table-Service Dining: Where to Splurge vs. Swap
The character-meal experience and the character-meal price tag are two different things — and you can have the first without the second. The headliner-priced spots (think Cinderella’s Royal Table inside the castle) charge a heavy premium for the setting, not for more characters or better food. Swap down to a comparable buffet or family-style meal and you keep the autographs, the photos, and the full meal — often for close to half the cost.
Swap the prestige, keep the experience
Cinderella’s Royal Table is the classic “splurge” — and the one most worth re-thinking. You’re paying for the room, not the meal. Two strong swaps:
- Tusker House (Animal Kingdom) — Mickey and friends in safari gear, a big buffet with real variety. Great for groups that won’t agree on one entrée.
- Garden Grill (EPCOT) — a rotating restaurant, family-style platters brought to the table, characters making the rounds. Easy, relaxed, kid-friendly.
| Experience | Style | Characters | Relative cost | Best for |
|---|---|---|---|---|
| Cinderella’s Royal Table | Plated, inside the castle | Princesses | Premium ($$) | The once-in-a-lifetime “in the castle” moment |
| Tusker House | Buffet | Mickey & pals (safari) | ~Half of CRT | Picky eaters, variety, value |
| Garden Grill | Family-style, rotating | Mickey, Chip & Dale & friends | ~Half of CRT | Relaxed seating, all-you-care-to-enjoy |
The math is simple: if the goal is “meet characters over a real meal,” Tusker House or Garden Grill delivers it for noticeably less. Save the castle for the trip where the room itself is the point.
The 60-day window decides whether you eat there at all
Here’s the part that quietly sinks dining plans: the hard-to-book spots are gone within minutes of opening. Advance Dining Reservations open 60 days before your arrival date at 6:00 AM Eastern in My Disney Experience — and resort guests can book their whole length of stay from that one 60-day mark. Miss the window and the marquee tables are simply unavailable.
- [ ] Mark your 60-day date (count back from arrival, not from each individual day).
- [ ] Be logged in and ready in My Disney Experience before 6:00 AM ET.
- [ ] Have 2–3 backup restaurants picked in case your first choice is gone.
- [ ] Don’t confuse this with the 7:00 AM Lightning Lane Multi Pass window — different time, different system.
Pro tip: Cancellations release inventory constantly right up to the day you visit — that “fully booked” castle dinner frees up far more often than people think. SupaPark’s Drop Watch monitors those hard-to-get reservations and pings you the second one opens, so you jump into My Disney Experience and grab it before it’s gone. You book with Disney directly; SupaPark just catches the drop you’d never have seen.
Is the Dining Plan worth it? Run the ROI, not the vibe
There’s no blanket answer — it’s pure math against how your group actually eats.
- It tends to pay off when you’re booking a character buffet or signature table-service meal most days. Those are the priciest options, and the plan’s value climbs the more high-cost meals you stack onto it.
- It usually loses when you’re a snack-and-quick-service family, skip dessert, or share entrées. You’ll pre-pay for food you don’t eat.
Quick gut check: total what your group would actually order across a typical day, then compare to the plan’s daily cost. If your real spend lands well under the plan price, pocket the difference. The plan rewards big eaters who lean into table service — not light grazers.
Make the recommendations do the prioritizing
You don’t have the bandwidth to research every restaurant at 60 days out. SupaPark’s dining recommendations flag which spots are genuinely worth the splurge, which buffets over-deliver for the price, and what to order once you’re seated — so your ADR list is set before the booking window opens, and Drop Watch backfills anything you couldn’t lock in.
The one thing to remember: decide your splurge-vs-swap meals before your 60-day date, book the moment it opens, and let Drop Watch chase the cancellations for the tables you missed.
Getting There & Around: Airport Transfer and Car Costs
The move: skip the rental car unless you’re leaving property, and never pay for parking when Disney’s free transport network already covers you. Now that Disney’s Magical Express airport bus is gone for good (it ended in 2022), getting from Orlando International (MCO) to your resort is on you — but the cheapest smart option is clear once you see the numbers.
Airport transfer: shuttle vs. rideshare vs. rental
A budget door-to-door shuttle is almost always the value play for an on-property family. Rideshare wins on speed and door-to-door convenience for small groups; a rental car only makes sense if you’ll regularly leave Disney property.
| Option | Rough cost | Best for | The catch |
|---|---|---|---|
| Budget shuttle (e.g. Mears Connect, Sunshine Flyer) | ~$35 per adult round-trip range | On-property families staying put | May make multiple resort stops; slower |
| Rideshare (Uber/Lyft) | ~$55–$70 each way | 3–4 people splitting one fare | Surge pricing; per-vehicle, not per-person |
| Rental car | Daily rate plus resort parking | Off-site stays, day trips off property | Parking eats the savings fast |
For a couple or solo traveler, the shuttle can save roughly $20–$35 per person versus rideshare. For a party of four splitting one Uber, the math tightens — run both before you book.
Pro tip: If you’re flying solo, book a two-person shuttle fare anyway. The per-seat price often undercuts the single-traveler rate, so you pay less for the empty seat than you would for one ticket.
When a rental car actually pays off
Rent only if your plan pulls you off Disney property — outlet shopping, Universal, a grocery run, or a day at the beach. If you’re parking at the parks and resort instead of using Disney transport, you’re paying twice for mobility you already get free.
- On-property resort parking: roughly $15–$35/night depending on resort tier — a cost that quietly stacks across a week.
- Theme park parking: an added daily fee on top of that (waived for resort guests).
- The break-even: if you’ll use the car fewer than 2–3 times during your trip, rideshare for those trips and skip the rental.
Use Disney’s free network to dodge parking entirely
The monorail, Skyliner gondolas, buses, and Friendship boats are free for every guest — no resort wristband required. Staying on property and leaning on this network erases the daily parking fee completely.
- Skyliner resorts (Pop Century, Riviera, Caribbean Beach, Art of Animation) get gondola access to EPCOT and Hollywood Studios — fast and scenic. If you want quick morning boarding, the Caribbean Beach hub bottlenecks at peak; Pop Century or Riviera load faster.
- Monorail resorts connect to Magic Kingdom and EPCOT without ever touching a parking lot.
- Buses cover everywhere else. The only real cost is unpredictable wait times — build a buffer into your morning.
Toll and security tips that protect your park-open window
If you do drive, a few small moves save dollars and minutes:
- [ ] Set up SunPass auto-reload before you go — it skips rental toll-by-plate surcharges and heads off the “unpaid toll” scam texts.
- [ ] Pack spare lithium batteries (chargers, power banks) in your carry-on — they’re not allowed in checked bags anyway, and keeping them on you avoids repacking hassle at the counter.
- [ ] For frequent flyers, TSA PreCheck (around $85 for 5 years) plus MCO’s pre-registered Reserve security slots can shave 30–45 minutes off airport time — the difference between making rope drop and missing it.
Traffic timing: protect your morning
Disney’s internal roads jam at predictable moments. The biggest offender for the south-side resorts is the Buena Vista Drive / Western Way light near Coronado Springs, which can add 15–20 minutes during peak.
- Depart before 8:00 AM or after 6:00 PM to slide past the worst of it.
- Aim to be at your park’s gate about 60 minutes before posted opening so you clear bag check and tap-in before the rope drops — Early Theme Park Entry gives on-site guests a 30-minute head start, and you don’t want to burn it sitting in a transport line.
The one thing to remember
If you’re staying on property, the airport shuttle plus Disney’s free transport network is almost always cheaper and less stressful than a rental car — and the only times you’ll regret skipping the car are the days you planned to leave Disney behind.
Souvenirs & Merchandise: Beating In-Park Prices
The fastest way to overspend at Disney World isn’t the rides — it’s the gift shops on your way out of every park. Merchandise carries a heavy in-park markup, and you’ll pass a dozen stores when your willpower is at its lowest. The fix isn’t going home empty-handed; it’s buying the right things at the right time and capping the impulse damage.
Where the real price gaps are
Branded collectibles are where you save the most, because the exact same item sells for less outside the parks during regular online sales.
| Item type | In-park reality | Smarter play |
|---|---|---|
| Loungefly & licensed collectibles | Full retail, rarely discounted | Buy on Amazon during Prime Day or Memorial Day sales |
| Disney-style basics (tees, ears, pins, autograph books) | Premium pricing | Budget retailers like Five Below before you leave home |
| True park-exclusive items | Only sold in-park | Buy these in-park — that’s what your budget is for |
The trick is knowing the difference. A limited-edition Loungefly bag or a generic Mickey tee is not exclusive — you’re paying for convenience and the moment. A ride-specific popcorn bucket or a land-themed item you can’t get anywhere else genuinely is. Spend your in-park dollars on the things you can only get there.
Stock up before you go
- [ ] Loungefly / collectible bags — watch for Prime Day or Memorial Day sales
- [ ] Glow toys and light-up wands (in-park versions run several times the dollar-store price)
- [ ] Plain character tees and ears from a budget retailer
- [ ] Autograph book + a fat Sharpie (character signatures need a thick pen)
- [ ] Ponchos and refillable bottles (covered in the gear section, but they double as souvenir-budget savers)
Pack these in your bag and your kids get the “new Disney thing” excitement without the on-property price.
Bring a tote — Disney no longer ships to your resort
Here’s a change a lot of returning guests miss: Disney World no longer delivers in-park purchases to your resort hotel. That old perk — buy it at 11 a.m., have it waiting at your room — is gone for resort delivery. Carrying everything yourself isn’t a hassle to grumble about; it’s the thing that saves you a delivery/shipping fee of roughly $5–$10 per order and saves you from buying duplicate bags to haul it all.
- Pack a lightweight, foldable reusable tote in your day bag.
- Consolidate purchases into it as the day goes — no per-store plastic.
- For bigger or fragile buys, you can still ship items to your home, but compare that cost before committing.
Pro tip: Photograph anything you love but don’t need in the moment and walk away. Most non-exclusive items are on Amazon or shopDisney for the same or less, and a 24-hour cooling-off period kills the majority of impulse buys. The stuff you still want tomorrow is the stuff worth owning.
Set a per-kid souvenir budget — and hand it over
The single biggest behavior change isn’t where you shop, it’s giving each kid a fixed number before you walk through the gate.
- Pick a per-child amount for the whole trip and make it real — cash in an envelope, a gift card, or a running tally on your phone.
- When it’s gone, it’s gone. No mid-park renegotiation.
- It turns “can I have this?” (a battle you fight at every register) into “is this how I want to spend my money?” (a decision they own).
Kids become startlingly thrifty when the money is theirs, and you stop being the bad guy. It also front-loads the spending mindset: they’ll often skip the first-day gift shop once they realize a better find might be waiting in another park.
The takeaway
Buy collectibles and basics before you go during real sales, save your in-park spending for genuinely exclusive items, pack a reusable tote now that resort delivery is gone, and put a hard per-kid budget in their hands. You’ll come home with the same memories — and a lot more of your money.
Special Events & Seasonal Add-Ons: Worth the Money?
The smart play: a separately-ticketed party is only a deal when the afternoon entry it unlocks does the heavy lifting — otherwise it’s an upsell dressed as a tradition.
Most evening parties (think Mickey’s Not-So-Scary Halloween Party in fall, the holiday party in winter) sell a hard ticket separate from regular admission. The hidden value isn’t the candy or the parade — it’s that your party ticket usually lets you walk in during the late afternoon, hours before the event officially starts. That turns a “night ticket” into most of a park day.
Where the ROI actually comes from
- The afternoon-entry head start. Party tickets commonly admit you around mid-afternoon while regular guests are still inside. As the park clears out the non-party crowd before the event, standby waits on headliners can crater. That gap — late afternoon into early evening — is the real product you’re buying.
- Lower in-party wait times. Capacity is capped, so during the party itself lines on big attractions often run far shorter than a normal day. If you’d otherwise pay for Lightning Lane to skip lines, a party can do that work for you.
- Exclusive entertainment + characters. Party-only fireworks, shows, and rare character meets have genuine value if your group cares about them. If they don’t, you’re paying for things you’ll walk past.
When it’s a value play vs. a skip
| Scenario | Verdict | Why |
|---|---|---|
| Big family, you’d buy Lightning Lane anyway | Often worth it | Afternoon entry + short party lines replace much of what you’d pay to skip lines |
| You love the seasonal overlay (costumes, party fireworks, rare characters) | Worth it | You’re buying the exclusive content, not just ride access |
| You only want more ride time on a budget | Usually skip | A regular day plus Early Theme Park Entry gets you low-wait riding for less |
| Party falls on your one Magic Kingdom day and you’d rather a full open-to-close day | Skip | Parks hosting a party close early to regular guests — you lose evening hours |
Weigh it against a plain park day
A party ticket isn’t free park time — it replaces a normal day, and the host park closes early to regular guests on party nights. So compare honestly:
- A regular day gives you full hours plus free perks like Early Theme Park Entry (30 minutes early for any on-site guest — essentially a free low-wait hour) and, for Deluxe/Club-level guests, Extended Evening Hours.
- A party trades those full hours for a shorter, lower-crowd window plus exclusive content. Worth it only if the afternoon entry + party content beats what you’d lose.
Pro tip: Party nights pull thousands of guests into the host park and out of the other three. So if a Magic Kingdom party is running, the non-party parks — EPCOT, Hollywood Studios, Animal Kingdom — often run lighter that evening. Don’t have a party ticket? Use a party night as cover to hit a different park while everyone else is trick-or-treating. SupaPark’s crowd forecasts and live wait data are built to flag exactly this kind of shift, so you can see whether a party night is actually thinning the park you want — instead of guessing.
Before you commit, sanity-check these
- [ ] Confirm the party admits you in the afternoon, and plan to arrive at that earliest entry time — that’s where the value lives.
- [ ] Map your “must-do” headliners for the pre-party clear-out window, when standby drops.
- [ ] Decide if anyone in your group actually wants the exclusive shows/characters — if not, the math gets thin.
- [ ] Check whether the party forces you to give up a full day at a park you cared about seeing open-to-close.
- [ ] Bring extra bags if it’s a trick-or-treat party — the candy adds up fast.
The one thing to remember
A seasonal party earns its price when the afternoon entry and short in-party lines replace ride-time value you’d otherwise pay for — and when your group genuinely wants the exclusive extras. If you’re buying it purely for “more rides,” a regular day with Early Theme Park Entry usually wins. Let the crowd forecast tell you which way the night is breaking before you spend.
Putting It Together: Sample Budget vs. Splurge Trip Plans
The whole guide pays off here: stacking date choice, resort tier, ticket length, and Lightning Lane discipline can swing a Disney World week by hundreds of dollars — without skipping a single headliner. Below are two worked plans for a family of four, both built on the cheapest 2026 ticket calendar (base dates in the Aug 18–28 / Sept 1–24 window). Same parks, same rides. Different spending philosophy.
The two trips at a glance
| Lever | Lean Budget Week | Smart Splurge Week |
|---|---|---|
| Travel dates | Base-price weekdays, Aug 18–28 | Base-price weekdays, Sept 1–24 |
| Resort tier | Value (All-Star) | Moderate/Deluxe with a discount stacked |
| Ticket length | 4-day, 1-park-per-day | 5-day with Park Hopper |
| Lightning Lane | Single Pass on 1–2 headliners only | Multi Pass on 2 busy days + select Single Pass |
| Dining | Mostly quick-service + groceries | Quick-service + 2–3 sit-downs |
| Transport | Disney buses/Skyliner, budget airport shuttle | Same free transit, occasional rideshare |
| Early hours | Early Theme Park Entry (free) | ETPE + Extended Evening Hours (Deluxe) |
Notice the levers compound. The budget family isn’t “doing less” — they’re spending where it counts and using free perks everyone qualifies for.
Lean Budget Week — where every dollar earns its spot
- Dates + tickets: Base-price weekdays save up to around $40/day per ticket versus peak. A 4-day, one-park ticket avoids the Park Hopper add-on.
- Resort: A Value resort still gets full 30-minute Early Theme Park Entry — that “free extra hour” of low-wait riding is identical to what Deluxe guests get. Book Pop Century over Caribbean Beach if you want clean Skyliner access; the Preferred-room upgrade (around $30/night) drops you next to the gondola station.
- Lightning Lane: Skip Multi Pass on light days. Buy Single Pass (roughly $20-ish, price varies by date) only for a true must-do like TRON Lightcycle / Run or Guardians of the Galaxy: Cosmic Rewind. Everything else: rope drop and meal-window riding.
- Food: Refillable resort mug, grocery-run breakfasts, and a packed cooler bag keep most meals well under quick-service prices. Swap Cinderella’s Royal Table for Tusker House or Garden Grill — comparable character time, roughly half the spend.
- Transport: Free Disney buses and Skyliner erase the daily parking fee; a budget airport shuttle (~$35/adult) beats rideshare by $20–$35 per person.
Smart Splurge Week — comfort and convenience, still disciplined
- Tickets: 5 days with Park Hopper. You can hop anytime the parks are open now — no 2 PM rule — so dinner at EPCOT after a Magic Kingdom morning is fully on the table.
- Resort: A Deluxe room with a stacked discount (bounce-back offer plus a 5-night stay can reach up to ~35% off) unlocks Extended Evening Hours — extra after-hours riding at the lowest-wait time of the day.
- Lightning Lane: Buy Multi Pass only on your two busiest park days (it’s the smart call once you’ll hit 3+ rides), and pre-select attractions up to 7 days out as a resort guest. Add Single Pass à la carte for Star Wars: Rise of the Resistance or Avatar Flight of Passage.
- Dining: Two to three sit-downs, the rest quick-service. Mobile-order to skip lines.
The savings, stacked
| Cost lever | Approx. swing for a family of four |
|---|---|
| Base-date tickets vs. peak | Up to ~$40/day per person |
| Value + free ETPE vs. paying for Deluxe perks | Hundreds over the week |
| Multi Pass only on busy days | Avoids buying skip-the-line on low days |
| Groceries + mug vs. all quick-service | Meals kept well under typical QS pricing |
| Free Disney transit vs. parking | ~$30–$35/day |
Pro tip: Before you buy any Lightning Lane, check My Disney Experience for current pricing and new rollouts — a price spike signals a surge crowd (skip that ride that day), and a brand-new attraction may not offer the service yet, so you’d be buying nothing. Let live data make the call, not your itinerary spreadsheet.
The one thing to remember
Neither family rode less or ate worse — the budget plan just refused to pay for perks that are free (Early Theme Park Entry) or avoidable (Multi Pass on a quiet day). Build your own plan the same way: lock the cheapest base dates first, take every free perk your resort tier already includes, and spend on Lightning Lane and dining only where the day genuinely demands it. That’s how a $1,200 week quietly becomes a $900 one. SupaPark’s live wait and Lightning Lane refill forecasts tell you exactly which days demand it — so you never buy skip-the-line you didn’t need.
How SupaPark Saves You Money on Every Park Day
The money isn’t saved by spending more — it’s saved by catching the right moment, and that’s the one thing humans are bad at and SupaPark does automatically. Every tactic in this guide depends on timing: riding when the standby line craters, sniping a cancelled dining reservation, buying Lightning Lane only when it’s actually worth it. SupaPark watches all of it in real time at supapark.com and tells you the second something moves.
Start free — it covers most of the budget wins
You don’t pay a cent to get the core money-savers. The free tier is built for exactly the kind of planning this guide pushes:
- Live wait times so you can skip standby lines that would otherwise tempt you into an unnecessary Lightning Lane purchase.
- The best-time-to-ride forecaster — it shows when each ride usually goes near walk-on (think lunch, parade, and fireworks windows), so you ride free instead of paying to skip.
- The crowd calendar for pre-trip budgeting: line up your visit with lighter days and you lean on free line-dodging instead of buying your way around crowds.
- 240+ planning guides so you’re not paying anyone else to tell you what’s already here.
Where rope drop goes wrong — and how SupaPark covers you
Rope drop is the classic free hack: get there at or before opening and knock out a headliner. But it’s not a sure thing. Show up, sprint to your must-ride, and you can find it temporarily down — your whole morning plan gone before it started. That’s where the live data earns its keep.
| Free move | The risk if you fly blind | What SupaPark does |
|---|---|---|
| Rope drop a headliner | Ride is down when you arrive | Instant “this ride just went down” detection so you re-route on the spot |
| Ride during lunch/parade/fireworks | You guess wrong and waste the window | Best-time forecaster flags the actual low-wait window |
| Skip a paid Lightning Lane | Standby spikes and you’re stuck | Live waits show when standby is genuinely short |
Pro tip: A sudden Lightning Lane price spike usually signals a surge crowd heading to that ride — treat it as a warning to ride something else, not a reason to panic-buy.
Paid tiers: the alerts that find you
The free tier helps you plan; the paid tiers do the watching so you don’t have to babysit your phone. This is where the real savings hide, because the savings live in moments you can’t sit and wait for:
- Live alerts that find you — a push the instant a ride craters to walk-on or goes down, so you spend zero dollars skipping a line you’d otherwise have paid for.
- Drop Watch for dining — hard-to-get tables (Advance Dining Reservations book 60 days out at 6:00 AM Eastern and vanish fast). The moment a cancellation frees one up, SupaPark catches it and pings you so you grab it in My Disney Experience instead of overpaying for a lesser plan or a character meal you settled for.
- Lightning Lane sell-out & refill predictions — know whether to buy now or wait, and when a sold-out selection is likely to refill, so you only spend when it pays off.
- The day builder — sequences your rides, meals, and Lightning Lane selections around the low-wait windows, which is how you avoid buying skips you never needed.
How it actually works: watch and alert, you book
This part matters, because it’s what keeps SupaPark honest and keeps you in control:
- [ ] SupaPark watches waits, ride status, Lightning Lane availability, and dining drops in real time
- [ ] You get the alert the second the window opens
- [ ] You confirm the booking yourself in Disney’s My Disney Experience app
- [ ] SupaPark never holds, books, or manages the reservation — it just makes sure you don’t miss it
Remember how Lightning Lane Multi Pass really works: you buy it per day and pick selections in advance (Disney resort guests up to 7 days before arrival, off-site guests 3 days, window opening at 7:00 AM Eastern), then refill one at a time through the day. Single Pass is à la carte for the top headliners — TRON Lightcycle / Run, Seven Dwarfs Mine Train, Guardians of the Galaxy: Cosmic Rewind, Rise of the Resistance, and Avatar Flight of Passage. SupaPark’s refill and sell-out forecasts tell you which of those are worth your money on your specific date.
The one thing to remember: the savings in this guide aren’t about spending less in a vacuum — they’re about catching the right moment, every time. That’s the job SupaPark does in the background at supapark.com, so the table opens up, the ride goes walk-on, or the Lightning Lane refills, and you’re already moving while everyone else is still refreshing their screen.
Key Takeaways
The whole game is timing plus alerts — pick the right dates, then let the right tools catch the savings you’d otherwise sleep through. Here’s the distilled cheat sheet, in priority order.
Lock the cheap windows first
- Dates beat every other lever. Disney’s date-based ticket pricing swings by tier, so building the trip around the lowest-priced calendar days (late-August and much of September tend to run cheapest) can save a meaningful amount per ticket before you book anything else.
- Longer stays drop the per-day rate. Ticket math rewards more days — the cost of each additional park day shrinks, so a 5–7 day trip lowers your per-day admission versus a quick 1–2 day visit.
Stack what’s free, pay only when math says so
| Move | What it gets you | Cost |
|---|---|---|
| Early Theme Park Entry | 30 min early into a park, every day, any on-site resort | Free with any Disney resort stay |
| Disney buses / Skyliner / monorail / boats | Skip the daily parking fee | Free |
| Lightning Lane Multi Pass | Worth it when you need 3+ in-demand rides; book selections in advance (resort guests 7 days out) | Per day — buy only when the day is busy |
| Lightning Lane Single Pass | TRON, Seven Dwarfs Mine Train, Cosmic Rewind, Rise of the Resistance, Flight of Passage | À la carte — skip on light-crowd days |
Pro tip: Don’t pre-buy Lightning Lane on autopilot. Check Multi Pass and Single Pass availability for your park on your day first — on a genuinely quiet day with short standby, the smarter spend is zero.
Stretch the resort and food budget
- Stack discounts where they overlap. Bounce-back offers and length-of-stay room deals can combine for real savings on higher tiers — always check whether two offers can sit on top of each other.
- Mug + cooler + mobile order. A refillable resort mug covers drinks for the stay, a packed cooler bag and your own water bottles dodge repeat quick-service spend, and mobile ordering skips the line for the food you do buy.
- Pick the comparable-but-cheaper table. Buffet and family-style character meals like Tusker House or Garden Grill deliver a similar experience to the priciest signature character dining for noticeably less.
Don’t overpay for merch or memories
- [ ] Shop Loungefly, plush, and collectibles online (Amazon sale events, Five Below) before paying park prices
- [ ] Pack a reusable tote — in-park purchases aren’t shipped to your resort for free anymore
- [ ] Compare airport transfers: a budget shuttle generally beats rideshare per person since Magical Express ended
Win the dining-reservation game
- ADRs open 60 days before arrival at 6:00 AM Eastern in My Disney Experience — set the alarm and book the hard-to-get tables that morning.
- Missed it? Cancellations are constant. This is where SupaPark’s Drop Watch earns its keep: the instant a sought-after table frees up, you get pinged so you can grab it in My Disney Experience — no manual refreshing.
Protect your park-open hours
- Arrive about 60 minutes before posted open so you’re through the gate when the rope drops, then knock out the highest-demand rides during lunch and parade windows when standby sags.
- Mind your transfer point. If a Skyliner resort works for you, a hub-station resort like a Caribbean Beach-style bottleneck can cost you 10–15 morning minutes versus a more direct option — choose the resort whose transportation matches how you tour.
Pro tip: Before you buy any Lightning Lane, watch the live wait trend for the ride that morning. A sudden price or wait spike usually signals a crowd surge — sometimes the savviest move is to ride something else and circle back.
The one thing to remember
Every dollar you save here comes from being early or being alerted — cheap dates booked ahead, ADRs at the 60-day mark, free perks claimed, Lightning Lane bought only when it pays off. Planning around timing and letting alerts catch the cancellations and price drops is what turns “we’ll save where we can” into savings you actually keep.
<!-- SUPAPARK-LINKS:START -->
Keep planning: today’s crowd forecast · is Lightning Lane worth it
<!-- SUPAPARK-LINKS:END -->