Walt Disney World With Kids: The Ultimate Family Optimization Guide
Published June 14, 2026 · Updated September 9, 2026
At a Glance
- Best for: Families navigating Walt Disney World with kids, toddlers, and easily spooked little ones.
- The golden rule: Base ride readiness on temperament, not just height or age—use the free “home video test” before your trip to prevent in-park meltdowns.
- Don’t miss: Rider Switch to accommodate non-riders without re-queuing, Mobile Order to bypass food lines, and asking for free ice water to cut costs.
- Skip: Wasting a Lightning Lane selection on a coaster your child might bail on, paying for bottled water, and guessing if a ride is too intense while standing in a 60-minute standby queue.
This guide is built for parents who want to navigate Disney World like a veteran, eliminating the guesswork around ride intensity, height requirements, and dining logistics. By trading the usual trial-and-error approach for proven strategies, you will save money, bypass unnecessary lines, and keep your family’s park day moving smoothly.
The Golden Rule of Ride Readiness: The At-Home POV Video Test
“Tall enough” does not mean “ready to ride”—and the single biggest mistake families make is guessing a child’s ride tolerance at the park entrance, risking a meltdown and a wasted Lightning Lane.
The trap families fall into is asking, “Is my five-year-old old enough?” That is the wrong question. A bold four-year-old who craves speed is a green light for most gateway coasters, while a cautious seven-year-old who freezes in the dark might tip from “nervous-excited” to “never again” on a single sudden drop. Relying strictly on Disney’s height requirements to gauge readiness will blindside you.
Instead, use the free test that settles the debate before you ever leave home.
The Kitchen Table Test
This is the trick most planners never use. You can accurately predict your child’s reaction with zero pressure and zero wasted park time by running a simulated ride experience in your living room.
- [ ] Search YouTube for an “on-ride POV” (point-of-view) video of the attraction.
- [ ] Put it on your largest TV screen and turn the volume up to mimic the actual noise level.
- [ ] Watch your kid watch the video, not the screen.
- [ ] Look for the verdict: A child who sees a lunging animatronic or high-speed launch and says “I want to do that” is ready.
- [ ] Respect the bailout: A child who covers their eyes just answered the question for you. Do not force it.
A two-minute video at the kitchen table beats guessing in a 60-minute standby line.
The Trap Rides: What Looks Easy but Rides Hard
Disney excels at hiding intense experiences behind cute IP or unassuming facades. Here is where the POV test is absolutely mandatory:
| Attraction | Park | The Deception | The Reality | POV Test Focus |
|---|---|---|---|---|
| DINOSAUR | Animal Kingdom | “It’s just dinosaurs.” | Disney’s most intense ride for kids. Pitch-black, violently bouncing Time Rover, strobe lights, blaring sirens, and massive lunging animatronics. | The startle reflex and the Carnotaurus jump-scare. |
| Star Tours | Hollywood Studios | “It’s just a screen.” | Loud blasters, simulated plunges, and intimidating villains like Darth Vader or Kylo Ren. | Sudden drops and dark sequences. |
| Slinky Dog Dash | Hollywood Studios | “It’s a cute family coaster.” | Modest hills and no inversions, but it’s an actual coaster that can easily spook a cautious kid. | The first big drop and the mid-ride launch. |
| Cosmic Rewind | EPCOT | “They clear the 42-inch height.” | High-speed backwards launch in the dark. It is a genuine thrill ride. | The backwards launch and the spinning motion. |
| Test Track | EPCOT | “It’s just a fast car.” | High-speed outdoor thrill ride that routinely tops out at 65 mph. | The sudden acceleration and outdoor speed test. |
Don’t Burn Your Lightning Lane on a Guess
The POV test isn’t just about avoiding tears; it is a critical Lightning Lane strategy.
Lightning Lane Multi Pass selections are booked in advance, and top-tier rides like Slinky Dog Dash go fast. There is nothing worse than spending your highest-priority Multi Pass selection on a ride, only to have your child nope out at the tapstile.
The stakes are even higher with Lightning Lane Single Pass. Guardians of the Galaxy: Cosmic Rewind is a Single Pass attraction purchased à la carte. If your kid clears the 42-inch height requirement but freezes on anything fast or dark, the launch will terrify them. You do not want that memory burning your only Single Pass of the day. Run the video test first, then decide where your money and passes go.
Pro tip: If you have a split group—say, one parent and a brave kid who want to ride, but a little one who is too short or too scared—always use Rider Switch. One adult waits outside the queue with the non-rider, the other rides, and then you swap without the second adult having to wait in the full standby line.
Strategic Alternatives
If the POV test reveals a yellow light—meaning your child is on the fence and you are genuinely unsure if they will ride—do not commit a Lightning Lane to it. Instead, leverage park timing.
For a ride like Slinky Dog Dash, rope drop it. Disney often starts moving guests through security and into the park well before the official posted opening time. If you are at the front of the pack, head straight to Toy Story Land. You can test the coaster waters at a fraction of the midday wait, and if your kid bails, you haven’t wasted your Multi Pass or an hour of your day. For Test Track, hit it via the single-rider line or save it for the last 60 minutes before the park closes, pointing your Lightning Lane Multi Pass at friendlier attractions instead.
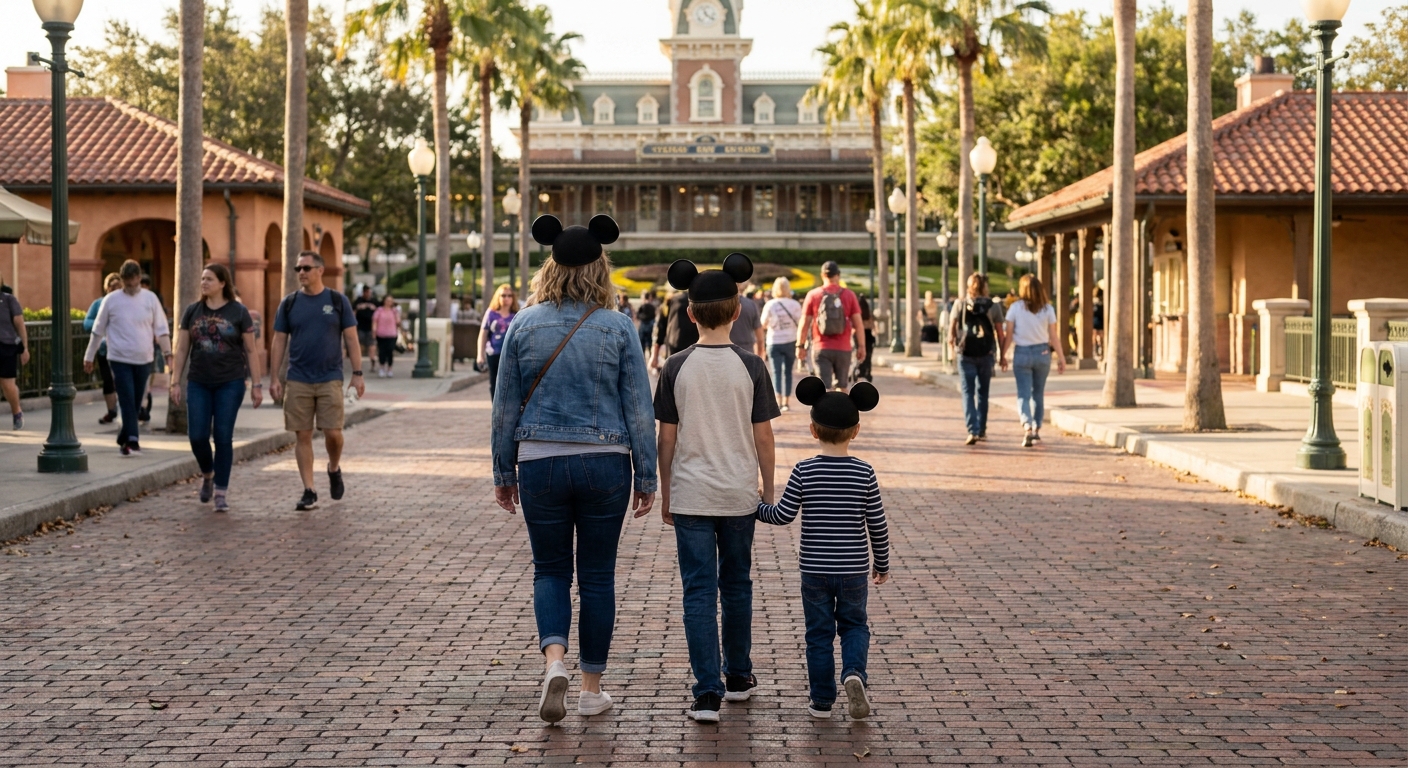
Navigating Height Requirements Without the Heartbreak
The biggest mistake parents make is confusing “tall enough” with “ready.”
Measuring your kids at home before the trip is mandatory so a too-short surprise doesn’t blindside a tired child at the park entrance. But just because a preschooler clears the 38-inch or 40-inch bar does not mean they are emotionally prepared for high speeds, pitch-black drops, or blaring sirens. A child who clears the height but freezes in the dark can easily tip from “nervous-excited” to “never again” on a single ride.
Pro tip: The trick most planners never use is the “Home Video Test.” Pull up an on-ride point-of-view (POV) video on YouTube and watch your kid watch it. A child who sees the launch and says “again!” is ready. A child who covers their eyes just answered the question for you—for free, weeks before the trip, saving you wasted park time and burned Lightning Lanes.
Here is how to execute the home video test before your trip:
- [ ] Find a high-quality POV video of the ride in question.
- [ ] Watch it together on a TV or tablet.
- [ ] Watch their physical reaction to dark sections, villains, or launches.
- [ ] Ask, “Do you want to do that, or skip it?” and trust their answer.
The Coaster & Thrill Breakdown
Age is the wrong metric; go by temperament. Here is the honest read on the intensity of Disney’s major height-restricted rides.
| Attraction | Height | Lightning Lane | The Real Fear Factor |
|---|---|---|---|
| Slinky Dog Dash | 38" | Multi Pass | Gateway coaster. Bright, sunny, modest bunny hills. No big drops, but still fast. |
| Seven Dwarfs Mine Train | 38" | Single Pass | Plunges into a pitch-black mine with glowing gems. The dark sequence is a yellow light for cautious toddlers. |
| Soarin’ | 40" | Multi Pass | Gentle swaying motion, but you are lifted up to 40 feet in the air in a dark theater. |
| Star Tours | 40" | Multi Pass | Aggressive simulated plunges, loud blasters, and intimidating appearances by villains like Darth Vader or Kylo Ren. |
| DINOSAUR | 40" | Multi Pass | Pure sensory overload. Violent bouncing in the dark, strobe lights, sirens, and lunging predators. |
| Test Track | 40" | Multi Pass | High-speed, wind-in-your-face outdoor launch. |
| Cosmic Rewind | 42" | Single Pass | Intense backward launch and high speeds in the dark. |
The Lightning Lane Traps to Avoid
If your child is a “yellow light” (cautious and easily spooked), be extremely strategic about where you allocate your Lightning Lane selections.
- Skip the Lightning Lane, Not the Ride on Test Track: Test Track is a genuine thrill. But if you have a cautious kid, do not burn a Multi Pass on it only to have them bail at the loading zone. Hit it via the single rider line, or jump in standby in the last 60–90 minutes before the park closes.
- Protect Your Single Passes: Guardians of the Galaxy: Cosmic Rewind and Seven Dwarfs Mine Train are Lightning Lane Single Pass rides, meaning you buy them à la carte. Do not pay for a pass for a kid who hates the dark. If they are a green light for speed, it’s incredible. If they aren’t, save your money.
- Don’t Waste Your 7:00 AM Pick on Slinky Dog: It is a family coaster, but do not make it your priority Multi Pass selection if there is real doubt your kid will board. Book it only if the home video test was a success.
- Beware DINOSAUR: This is Disney’s most intense ride for kids. If your child gets startled easily, do not even attempt it.
Handling the Split Group: Rider Switch
What happens if one parent and a brave older child want to ride, but your youngest is too short or too scared? You do not have to skip the headliners.
Rider Switch is the tool most families fumble. It allows one adult to wait safely outside the queue with the non-rider while the other adult rides. Then, you swap without the second adult having to wait in the full standby line.
- How it works: See the Cast Member at the ride entrance. They scan your group. Adult A rides while Adult B waits. When Adult A finishes, Adult B taps into the Lightning Lane entrance.
- The EPCOT Move: While one parent rides Soarin’, the waiting adult can take the non-rider on Living with the Land right next door—a slow, gentle boat ride that perfectly kills the wait time.
Demystifying Rider Switch: How to Swap Without Re-Queuing
The takeaway: Rider Switch (Disney’s official “Rider Swap”) lets your whole group experience a height- or temperament-gated ride without anyone waiting in line twice — one adult rides while the other stays with the non-rider, then you trade places and walk on through the Lightning Lane. No re-queuing, no wasted park time.
How it actually works
The mechanics are simpler than most planners think:
- [ ] At the ride entrance, tell the Cast Member you want to use Rider Switch.
- [ ] They tag your party — usually via your MagicBand or My Disney Experience account — so the system knows a second adult is owed a turn.
- [ ] Adult #1 rides while Adult #2 waits with the non-rider (and up to a couple of other riders, depending on the attraction).
- [ ] When Adult #1 returns, Adult #2 (plus those waiting kids) enters through the Lightning Lane entrance and rides — no standby line again.
The brilliance: the second group skips the full queue entirely. On a 70-minute headliner, that’s over an hour you don’t pay twice.
Pro tip: Run the free home video test before you ever set up Rider Switch — pull up an on-ride POV at the kitchen table and watch your kid watch it. A child who says “again!” is ready; a child who covers their eyes just answered the question for free, weeks early, with zero wasted park time. That single habit decides whether you even need the swap.
Decide by temperament, not by inches
Clearing the height bar doesn’t mean a kid is ready. Measure at home first to avoid a heartbreaking too-short surprise at the gate — then read the temperament, because the cautious kid who clears the height but freezes on speed can tip from “nervous-excited” to “never again” on one ride.
| Ride | Min height | The real call | Rider Switch play |
|---|---|---|---|
| Test Track (EPCOT) | Posted minimum | Genuine high-speed thrill — go by temperament, not just inches | Riders go; cautious/too-short kid waits, then swap |
| Cosmic Rewind (EPCOT) | 42 inches | Launch coaster; under 42" is a hard no; cautious kids = yellow light | Don’t burn your one Single Pass if there’s real doubt — swap instead |
| Soarin’ (EPCOT) | 40 inches | Gentle, but you’re lifted ~40 ft in a dark theater; heights are the hurdle | Waiting adult rides Living with the Land next door |
Where to set it up at EPCOT
Rider Switch lives at the ride entrance — flag the first Cast Member you reach. A few attraction-specific notes:
- Cosmic Rewind: This is where split groups fumble. It’s a Lightning Lane Single Pass ride, so you don’t want to spend that pass on a kid who bails at the gate. If one parent and a brave kid want the launch and you’ve got a too-short or too-scared little one, Rider Switch is the tool — set it up at the entrance and swap cleanly.
- Soarin’: While Adult #1 rides inside The Land pavilion, the waiting adult can walk the non-rider onto Living with the Land — a slow, gentle boat ride through the working greenhouses right downstairs. Two attractions, one wait.
- Test Track: Worth riding, not worth a Lightning Lane. Skip the swap-the-Lightning-Lane temptation: hit it via single rider or save it for the last 60–90 minutes before close, and aim your Multi Pass picks at rides that actually clog up.
Don’t waste your best line-skipping tool
The costly mistake is spending a Single Pass or a priority Multi Pass selection on a ride your kid noped out of at the gate. Do the home video test, read the temperament, and only then decide where your passes go. Rider Switch is what protects you when the group is split — it means the brave riders aren’t punished and the cautious kid isn’t forced.
The one thing to remember: Rider Switch turns “someone has to sit this out” into “everyone rides, nobody waits twice.” Set it up at the ride entrance, decide by temperament over height, and save your paid Lightning Lanes for the rides that genuinely need them — not the ones a two-minute video already settled.
Stroller Logistics: Rules, Sizes, and Park Navigation
Measure your stroller before you pack it — Disney enforces a hard size cap, and wagons are banned outright. Showing up with an oversized rig or a pull-wagon means it gets turned away at the gate, and there’s no good Plan B once you’re standing at the tapstiles.
Disney’s posted rule: strollers can’t exceed 31 inches wide by 52 inches long (about 79 cm x 132 cm). Most single and side-by-side double strollers fit fine. What does not fit — and is flat-out prohibited regardless of size — is any wagon, pull or push. If your at-home setup is a wagon, you’ll need to rent or buy something compliant.
Rent or bring your own?
| Option | Best for | Watch-outs |
|---|---|---|
| Bring your own | Families who already own a compliant stroller; multi-day trips | You haul it through airports/transport; no replacement if it breaks |
| Disney in-park rental | Light packers, single-park days | Hard plastic, no recline, can’t leave the park with it; not great for nap-prone toddlers |
| Off-site rental delivery | Toddlers who nap, longer stays | Book ahead; delivery/pickup logistics at your resort |
Disney’s own rentals are sturdy but basic — rigid shells, no real recline — so for a kid who naps in the stroller, a personal or off-site-rental model with a recline and canopy usually wins.
Navigating crowds without losing your mind
A stroller is a tank in a river of people. The fix is timing and route, not muscle.
- Move with the early-morning lull. If you’re an on-site guest, Early Theme Park Entry gets you in 30 minutes before official open — and that half hour is the easiest stroller-pushing of the day before the walkways jam up. Aim to be through security and at the gate well before posted open, not strolling up at open.
- Hug the edges. Walkway centers clog first. The outer lanes flow faster and give you room to turn.
- Park the stroller, then queue. Most ride lines aren’t stroller-accessible, so you’ll park outside anyway. Pair this with Mobile Order in My Disney Experience for meals — one adult waits with the stroller while the kitchen preps the food, and nobody loses the parking spot.
Stroller parking etiquette
Cast members corral strollers into designated zones near each attraction, and they will re-organize yours — sometimes moving it several feet to tidy the row. That’s normal. Don’t fight it.
- Park only in marked stroller zones, wheels aligned with the others.
- Never block walkways, ramps, or accessible paths.
- Don’t leave valuables. Strollers get moved and the zones aren’t watched. Phones, wallets, tablets come with you.
- Expect to find your stroller shifted when you return — that’s the cast doing crowd control, not someone taking it.
The sea-of-identical-rentals problem
Here’s the thing nobody warns first-timers about: at peak times a stroller zone can hold a hundred near-identical black-and-gray rentals. Finding yours by sight is hopeless.
Pro tip: Tie something loud and unmistakable to the handle before you ever enter the park — a bright bandana, a ribbon, a balloon weight, a patterned luggage strap. One five-second visual flag turns a five-minute scavenger hunt (with a melting-down toddler) into a walk-up.
A quick pre-park checklist:
- [ ] Confirm stroller is under 31" x 52" (and not a wagon)
- [ ] Tie a bright marker to the handle for ID
- [ ] Snap a phone photo of it parked, so you remember the zone
- [ ] Clip on a small under-seat bag for sunscreen, snacks, ponchos
- [ ] Remove anything valuable before parking — every single time
The one thing to remember
Compliant size, a bright handle marker, and parking-then-queuing solve 90% of stroller headaches. Get those three right and the stroller stops being the thing that slows your family down — it becomes the rolling base camp that lets you stay in the park longer.
Stroller Cost Comparison: Bringing vs. Renting
Bringing your own stroller saves the most cash, but renting from a third-party vendor is the absolute smartest play to maximize convenience without getting gouged at the Disney gates.
| Strategy | Approx. 5-Day Cost | The Pros | The Cons | ROI / Verdict |
|---|---|---|---|---|
| Bring from Home | Free | Familiar to your kid; ready immediately at the airport. | You have to lug it through the airport and wrestle it onto Disney buses. | High. Best if you own a travel-friendly folding model. |
| Disney Park Rental | Around $65–$75 | Pick up inside the park; no lugging it on transportation. | Hard plastic seats; zero storage; wastes precious rope-drop time in line. | Low. A last-resort option if your kid unexpectedly gives up on walking. |
| Third-Party Rental | Around $75–$90 | Premium models (like City Mini); waiting at your hotel; plush and reclinable. | You still have to fold it quickly for Disney buses. | Maximum. The ideal balance of comfort, massive storage, and ease. |
Bringing Your Own (The Free Route)
If you already own a lightweight, easily collapsible stroller, bringing it from home is the ultimate budget move. However, factor in the travel hassle. Airlines are getting much stricter with luggage. Southwest Airlines, for instance, is ending its famous “two free checked bags” policy on May 28, 2025. While gate-checking a stroller usually skirts standard bag limits, the overall squeeze on luggage makes dragging a massive double-stroller through the airport increasingly burdensome.
Renting Directly From Disney (The Trap)
Renting Disney’s hard-plastic strollers at the front gate sounds convenient until you actually do it. They do not recline, they lack meaningful storage, and worst of all, they cost you time. Rope drop now requires arriving by 8:00 AM for a 9:00 AM open to maximize Early Theme Park Entry. The last thing you want to do during that crucial first 30 minutes is stand in a rental line while everyone else marches toward the headliners. Skip the Disney rentals unless it’s a mid-day emergency.
Renting from a Third Party (The Insider Move)
Using an Orlando-based third-party vendor is the sweet spot. They deliver a premium, sanitized stroller right to your Walt Disney World resort. You get massive under-seat storage, a deep recline for park naps, and huge sun canopies. Plus, you have the stroller for the grueling walk back to your hotel room at night when your kid is completely passed out.
Pro tip: If you pay for a third-party rental or a Disney rental, use discounted Disney gift cards to offset the cost. You can often snag a $200 Disney gift card for $180 during Sam’s Club promotions. Every $10 saved pays for another Dole Whip.
The Stroller’s Hidden ROI: Pack Mule & Rider Switch Basecamp
A good stroller is more than a seat; it is your family’s Disney survival vehicle.
The Pack Mule Walt Disney World allows you to bring your own food. Pack soft cooler bags (ALDI’s are cheap and hold up great) filled with sandwiches, 40-oz refillable water bottles, and your $22 refillable resort mugs. Ask for free cups of ice water at any quick-service spot—even Spice Road Table in EPCOT. Skipping just one $15 quick-service meal a day because your stroller hauled your snacks pays for the rental itself. When you do buy meals, use Mobile Order in the My Disney Experience app, share the massive portions, and ask for “no side” to cut costs further.
The Rider Switch Basecamp Disney is full of intense rides, and your stroller is the ultimate waiting room. When your group is split, use Rider Switch: one adult rides while the other waits with the non-rider, then you swap without re-queuing.
Before you ever leave home, use the free POV video test to settle the debate on what your kid can handle. Pull up a ride video at the kitchen table. If they watch the pitch-black drops of Seven Dwarfs Mine Train, the high-speed launch of Guardians of the Galaxy: Cosmic Rewind, the violently bouncing Time Rover and blaring sirens of DINOSAUR, the 40-foot heights of Soarin’, or the loud blasters of Star Tours and say “again,” they are ready. If they cover their eyes, you just got your answer for free.
Even for gateway coasters like Slinky Dog Dash or Test Track, if they clear the height requirement but freeze on speed, do not waste a Lightning Lane Multi Pass or Single Pass selection. Park them comfortably in their reclining stroller with a snack. At EPCOT, while the first adult rides Soarin’, the waiting adult can push the stroller right next door to the gentle Living with the Land boat ride.
Stroller Packing Essentials
- [ ] Soft cooler bag (for packed lunches and cold snacks)
- [ ] 40-oz refillable water bottles (to fill with free quick-service ice water)
- [ ] Clip-on stroller fan (an absolute requirement for the Florida heat)
- [ ] Bright ribbon or tag (to easily spot yours in a sea of identical strollers)
- [ ] Rain cover (afternoon downpours are guaranteed)
Baby Care Centers: Disney’s Best-Kept Free Secret
The smartest way to handle a mid-day meltdown, a diaper blowout, or a quiet feeding is to bypass the crowded restrooms and head straight to the air-conditioned sanctuary of a Disney Baby Care Center.
Most first-time visitors walk right past these facilities without realizing they exist, assuming they are just glorified restrooms or first aid stations. In reality, each of the four Walt Disney World theme parks has a dedicated, fully staffed Baby Care Center. They are completely free to use, gloriously air-conditioned, and arguably the most valuable resource for parents navigating the parks with infants and toddlers.
Where to Find Them
Every park has exactly one Baby Care Center. They are strategically located near the front or center of the parks, but you need to know exactly where to look before the emergency hits.
| Theme Park | Baby Care Center Location | Best Way to Find It |
|---|---|---|
| Magic Kingdom | Off Main Street, U.S.A., next to The Crystal Palace | Head toward the central hub, take a left just before Casey’s Corner, and walk past The Crystal Palace restaurant. |
| EPCOT | The Odyssey Center, between Test Track and the Mexico Pavilion | Look for the large building situated on the water right before you cross into the World Showcase. |
| Hollywood Studios | Right at the park entrance | It is immediately on your left after you scan your ticket and enter the park, right next to Guest Relations. |
| Animal Kingdom | Discovery Island, near Creature Comforts (Starbucks) | Head toward the path to Africa; it is tucked away on the left just past the Starbucks location. |
What’s Inside?
Baby Care Centers are explicitly designed to be a quiet escape from the sensory overload, heat, and noise of the theme parks. Here is what you will find inside:
- Private Nursing Rooms: These are dimly lit, quiet rooms equipped with comfortable rocking chairs. (Note: These are exclusively for nursing mothers; the rest of the family will need to wait in the main lounge area, which has couches and a TV playing Disney movies).
- Massive Changing Tables: Unlike the cramped, hard plastic pull-down tables found in standard park restrooms, these are large, padded, and constantly sanitized by cast members after every single use.
- Feeding Areas: You will find highchairs and designated seating areas perfect for feeding toddlers without fighting for a dirty table at a crowded quick-service restaurant.
- Kitchen Facilities: Each center features microwaves, bottle warmers, and a heavy-duty sink with soap for washing out bottles, pump parts, or sippy cups.
The “We Forgot It” Emergency Shop
When you are three diapers short or dropped the last pacifier on the concrete, the Baby Care Center has a small shop staffed by a cast member, stocked with essentials for purchase.
- [ ] Diapers (usually sold individually or in small travel packs)
- [ ] Baby wipes and diaper rash cream
- [ ] Pacifiers and teething rings
- [ ] Formula, juice, and baby food (jars and pouches)
- [ ] Over-the-counter medication (like infant Tylenol) and sunscreen
- [ ] Extra clothing (onesies and socks)
Pro tip: If you find yourself needing to restock on supplies here, pay using a discounted Disney gift card. You can regularly buy $200 Disney gift cards for around $180 at Sam’s Club, effectively giving you a 10% discount on whatever overpriced park essentials you are forced to buy in a pinch.
How to Optimize Your Park Day With Baby Care Centers
Using the centers effectively can save your entire day. Here are the smartest plays for families:
- The Ice Water Trick: Do not waste money buying bottled water to mix baby formula. Any quick-service counter in the park (even sit-down adjacent spots like Spice Road Table in EPCOT) will hand you a cup of free, filtered ice water. Just ask. You can let the ice melt or mix it with warm water from the Baby Care Center to hit the perfect temperature.
- Bring the Right Cooler: Disney allows you to bring your own food and milk into the parks. Pack a soft cooler bag (ALDI’s cooler bags are cheap and hold up great) along with big 40-oz refillable water bottles to store pumped milk or baby food, and use the microwaves in the Baby Care Center when it’s time to eat.
- Split the Group with Rider Switch: If you have an infant who needs to nurse or take a quiet nap in the Baby Care Center, do not make the older kids sit around waiting. Send the other adult and the older kids to ride a headliner. Using Rider Switch on attractions like Slinky Dog Dash or Seven Dwarfs Mine Train ensures the older kids get their thrills while the baby gets a break. One adult waits with the non-rider, the other rides, and then you swap without waiting in the full standby queue twice.
Taking a 30-minute break in the Baby Care Center doesn’t mean you are losing valuable park time; it means you are resetting your child so the rest of your day isn’t a disaster.
Lightning Lane Multi Pass Strategy for Families
The smartest thing you can do with Lightning Lane Multi Pass is not burn your advance selections on a ride your kid will refuse to board.
With the Lightning Lane system, you buy it per day and book your selections in advance—7 days before your arrival if you stay at a Disney resort, or 3 days before if you stay off-site. The booking window opens right at 7:00 AM Eastern. You lock in your initial set of rides, and once you redeem one in the park (or its window passes), you can book your next one, refilling your passes one at a time throughout the day in My Disney Experience.
But families consistently make one costly mistake: they prioritize the hardest-to-get Lightning Lanes over what their child is actually willing to ride. When you get to the park and your kid takes one look at the coaster and refuses to get on, you haven’t just skipped a ride—you’ve wasted an advance selection that could have saved you 60 minutes somewhere else.
The Kitchen Table Test
This is the trick most planners never use: pull up an on-ride point-of-view (POV) video of the attraction at home, and watch your kid watch it.
A child who sees the drop on a screen or the lunging Carnotaurus on DINOSAUR and says “I want to do that!” is ready. A child who covers their eyes just answered the question for you—for free, weeks before the trip, with zero pressure and zero wasted park time. It costs nothing, and it is the most reliable predictor you will get. A two-minute video at the kitchen table beats guessing in a 60-minute standby line.
How to Handle the “Yellow Light” Rides
Disney has several rides that technically have low height requirements but can be intensely overwhelming for little ones. Do not judge readiness by age or height—go purely by temperament.
| Ride | Lightning Lane Tier | The Reality for Kids | The Smart Move |
|---|---|---|---|
| Slinky Dog Dash | Multi Pass | A bright, sunny coaster with no inversions, but it’s fast. Great for bold kids, but a yellow light for cautious ones. | Do the video test. If unsure, do not burn a Multi Pass here. Instead, rope drop it (arrive 60 mins before park open) or ride during big distractions. |
| Test Track | Multi Pass | High-speed thrill ride. A kid who loves fast is a green light; a cautious one might freeze at the speed. | Skip the Lightning Lane, not the ride. Use Single Rider, or jump in the standby line 60 to 90 minutes before park close. |
| DINOSAUR | Multi Pass | Sensory overload by design. Bouncing, pitch black, flashing strobes, and loud, lunging dinosaurs. | The most intense kid-accessible ride at Disney. If they startle easily, skip it entirely. |
| Star Tours | Multi Pass | Simulated plunges, loud blasters, and intimidating screen characters (Darth Vader). | Green light for action-loving 4-year-olds; yellow light for a cautious 7-year-old who hates sudden changes or the dark. |
| Cosmic Rewind | Single Pass | Smooth but fast launch coaster in the dark. Must be 42 inches. | Never buy this à la carte Single Pass if you aren’t sure. Do the video test first. |
The Rider Switch Strategy
If your group is split between brave riders and a too-short or too-nervous little one, you do not have to skip the ride. This is where Rider Switch is your tool.
- [ ] Measure your child’s height at home before the trip so there are no heartbreaking, too-short surprises at the gate.
- [ ] Bring your entire party to the attraction entrance and ask the Cast Member for Rider Switch.
- [ ] One adult waits safely outside with the non-rider while the other adult rides.
- [ ] Swap places without the second adult having to wait in the full standby queue.
Pro tip: While the first adult rides, take the non-rider to a nearby, gentle attraction so they aren’t just sitting idle. If one adult is riding Test Track, the other can take the little one to ride Gran Fiesta Tour or explore the aquarium at The Seas.
Securing Your Selections
To maximize your Multi Pass value with younger kids, you have to be tactical about the 7:00 AM advance booking window:
- [ ] Log into My Disney Experience exactly at 7:00 AM Eastern on your eligible booking day (7 days out for resort guests, 3 days for off-site).
- [ ] Prioritize high-demand family rides that your child has already “passed” via the home video test.
- [ ] Book your initial selections for as early in the day as possible. Once you tap into your first ride, you can immediately add your next one, effectively refilling your passes all day long.
- [ ] Let go of the idea that you must book the biggest headliner. A Lightning Lane for a gentle ride like Peter Pan’s Flight that saves you 70 minutes of toddler meltdown is worth infinitely more than a Slinky Dog Dash pass your kid will nope out of at the last second.
Focus your money and your early selections on the sure things. Use standby, early entry, or Rider Switch for everything else.
Lightning Lane Single Pass ROI for Kids
Pro tip: Don’t let your child’s age dictate whether you buy a Single Pass—go by their temperament, and use a point-of-view ride video at home to test their readiness before you spend the money.
Single Pass rides are Disney’s top-tier headliners: TRON Lightcycle / Run, Seven Dwarfs Mine Train, Guardians of the Galaxy: Cosmic Rewind, Star Wars: Rise of the Resistance, and Avatar Flight of Passage. Because these are bought à la carte, purchasing them for a family can quickly add a significant chunk to your daily park budget. The biggest financial risk you face? Paying for a Single Pass, waiting in the Lightning Lane, and having your child freeze and back out at the boarding area. Here is how to evaluate the return on investment (ROI) and avoid wasting your money.
The “Tall Enough” vs. “Ready” Trap
The trap many families fall into is asking, “Is my three-year-old old enough for Seven Dwarfs Mine Train?” That is the wrong question. A child might clear the 38-inch height requirement for Seven Dwarfs, which is the premier coaster in Fantasyland, but “tall enough” does not mean “ready.”
Unlike a ride like Slinky Dog Dash, which is bright, sunny, and mostly bunny-hop hills, Seven Dwarfs plunges into a pitch-black mine filled with glowing gems and audio-animatronic dwarfs. A bold kid who already loves speed is a green light. But for a cautious kid who freezes in the dark or gets spooked by sudden drops, that mine section is a yellow light.
The same applies to Cosmic Rewind. Forget age—go by temperament. Cosmic Rewind is a green light for a kid who already rides launch coasters and likes the rush. But it’s a yellow light for the cautious kid who clears 42 inches but freezes on anything fast or dark. The backward launch can tip them from “nervous-excited” to “never again,” and you don’t want that memory burning a pricey Single Pass.
The Free Test That Settles It Before You Leave Home
This is the trick most planners never use, and it is the ultimate way to protect your Single Pass ROI. Pull up an on-ride point-of-view (POV) video of the attraction at home and watch your kid watch it.
- [ ] Find a high-quality POV video of the ride on your TV or tablet.
- [ ] Watch it together at the kitchen table.
- [ ] Observe their genuine reaction without pressure.
A child who sees the backward launch of Cosmic Rewind or the dark drops of Rise of the Resistance and says “again!” is ready. A child who covers their eyes just answered the question for you—for free, weeks before the trip, with zero pressure and zero wasted park time. It costs nothing, and it is the most reliable predictor you will get. A two-minute video at the kitchen table beats guessing in line and losing the money you spent on the Single Pass.
How to Handle a Split Group with Rider Switch
If you have a child who doesn’t meet the height requirement—or one who clears the height but failed the home video test and is too scared to ride—you do not have to skip it. This is where families fumble their budget: you do not need to buy a Single Pass for the non-riding child or the adult who will sit out with them.
Instead, use Rider Switch to maximize your money:
- Only buy Single Passes for the riders. Do not buy a pass for the child who isn’t riding, and skip it for the adult who will wait with them.
- Set up the swap. Approach the Cast Member at the Lightning Lane entrance with your entire group and state that you need to use Rider Switch.
- Ride and swap without re-queuing. One adult waits outside with the non-rider while the first adult and any older/braver kids scan their Single Passes and ride. When they finish, the waiting adult gets to ride via the Lightning Lane without having to wait in the standby line.
Note: The Cast Member will typically allow one other person to ride with the waiting adult, meaning a brave older sibling gets to ride twice for the price of one Single Pass.
Single Pass Considerations for Kids
| Attraction | Park | The Hurdle for Kids | The Smart Move |
|---|---|---|---|
| Seven Dwarfs Mine Train | Magic Kingdom | Pitch-black indoor mine section can spook cautious toddlers. | Test with a POV video; use Rider Switch if they hate the dark. |
| TRON Lightcycle / Run | Magic Kingdom | Intense outdoor launch and awkward motorcycle seating. | If they hesitate at the test seat out front, don’t buy the pass. |
| Cosmic Rewind | EPCOT | Backward launch, spinning vehicles, and total darkness. | Only for kids who love intense speed. Not a starter coaster. |
| Rise of the Resistance | Hollywood Studios | Sudden drop sequence, loud blasters, and intimidating characters. | Warn them it is “pretend” if they are easily scared by villains. |
| Flight of Passage | Animal Kingdom | Restrictive back restraints and the sensation of extreme heights. | Do not force a child who is a hard “no” on heights. |
Protect your budget by being honest about your child’s temperament. If there is real doubt your kid will ride, don’t book the Single Pass for them. Rely on Rider Switch so the adults still get the experience, and save that money for souvenirs or snacks they will actually enjoy.
Assessing Coaster Intensity: Slinky Dog, Seven Dwarfs, and Cosmic Rewind
Stop asking if your child is “old enough” for a coaster—height and age are the wrong metrics; temperament is everything.
The biggest trap families fall into at Disney World is deciding a ride’s suitability based on a birthday. A bold four-year-old who already begs for speed is a green light for most family coasters. A cautious seven-year-old who freezes at the first sign of darkness or a sudden drop is a yellow light—and that is the kid who can tip from “nervous-excited” to “never again” on a single ride.
Pro tip: The most reliable predictor of ride success costs nothing and happens at your kitchen table. Weeks before your trip, pull up an on-ride POV (point-of-view) video on YouTube and watch your kid watch the screen. A child who sees the drop and says “again!” is ready. A child who covers their eyes just gave you your answer for free, with zero pressure and zero wasted park time. It beats guessing in a 60-minute standby line.
Here is how Disney’s premier family coasters actually stack up when it comes to intensity:
| Coaster | Minimum Height | Lightning Lane | The Real Intensity Factor | The Verdict |
|---|---|---|---|---|
| Slinky Dog Dash | 38 inches | Multi Pass | Modest hills, fully outdoor, visible track | The ultimate gateway coaster for nervous kids. |
| Seven Dwarfs Mine Train | 38 inches | Single Pass | Pitch-black dark ride elements, mild drops | A trap for kids who are tall enough but fear the dark. |
| Guardians of the Galaxy: Cosmic Rewind | 42 inches | Single Pass | Backward launch, spinning, extreme speed, dark | Only for bold kids who genuinely crave the rush. |
Slinky Dog Dash: The Bright, Sunny Gateway
Slinky Dog Dash at Hollywood Studios is not a thrill machine. It is the perfect gateway coaster: bright, themed to a toy, and built with bouncy bunny-hop hills rather than stomach-dropping plunges. There are no inversions, no pitch-black moments, and no intense launches.
But do not book Slinky Dog as your priority Lightning Lane Multi Pass selection if there is real doubt your kid will ride. There is nothing worse than blowing your most valuable line-skipping tool on a ride your child nopes out of at the gate. Do the home video test first. If you want to test the waters without spending a Lightning Lane, leverage timing:
- Rope drop it by arriving well before the official park opening. Disney often lets guests through security and into the park before the posted time. Head straight to Toy Story Land to knock it out at a fraction of the midday wait.
- Ride during big distractions, like major shows or parades, when the standby line naturally thins out.
Seven Dwarfs Mine Train: The Toddler Trap
The question isn’t whether your three-year-old is tall enough for Seven Dwarfs Mine Train at Magic Kingdom—many preschoolers easily clear the 38-inch bar. The question is whether they can handle the dark.
Unlike Slinky Dog Dash’s sunny outdoor track, Seven Dwarfs features a distinct dark-ride element. Mid-ride, the coaster plunges into a pitch-black mine filled with glowing gems and audio-animatronic dwarfs. For a brave kid, it is magical. For a cautious kid who gets spooked by darkness or sudden transitions, that mine section is terrifying. Because this ride requires an à la carte Lightning Lane Single Pass, bailing at the loading dock is an expensive mistake.
Cosmic Rewind: The High-Speed Rush
Forget age entirely here. Cosmic Rewind at EPCOT requires riders to be 42 inches tall, but it is intensely fast, dark, and features a backward launch and spinning ride vehicles.
This is a hard green light for a kid who already rides launch coasters and loves the thrill. It is a massive yellow light for a cautious kid who barely clears the height requirement. The initial backward launch is aggressive enough to permanently sour a timid rider on coasters for the rest of the trip—you do not want that memory burning your only Single Pass of the day. And for anyone under 42 inches? It is a full stop. Do not build your morning around a ride they cannot physically board.
How to Handle a Split Group Without Wasting Time
If one parent and a brave older sibling want to ride, but you have a little one who is too short or too scared, you do not have to split up for hours. Rider Switch is your best logistical tool.
- [ ] Approach the entrance together: Bring your entire group to the Cast Member at the front of the attraction and ask for Rider Switch.
- [ ] Divide and conquer: The first adult and the riding child enter the standby or Lightning Lane queue, while the second adult waits outside with the non-rider.
- [ ] Pivot to another activity: The waiting adult can take the non-rider to grab a snack, use the restroom, or ride a gentle nearby attraction.
- [ ] Swap without the wait: When the first group finishes, the adults swap. The second adult now enters the Lightning Lane queue without having to wait in standby—and the riding child often gets to ride a second time.
Dark Rides and Sensory Overload: Avoiding the Fear Factor
Stop deciding by age and start deciding by temperament—that single shift saves you a meltdown and saves you from blowing your best line-skipping tool on a ride your kid bails on.
The trap families fall into is asking “is my 5-year-old old enough?” That is the wrong question. A bold four-year-old who already begs for roller coasters and loves loud action is a green light for almost anything they are tall enough to ride. A cautious seven-year-old who freezes in the dark or gets spooked by sudden drops is a yellow light—and that is the kid who can tip from nervous-excited to never-again on a single intense ride.
The Home Video POV Test
This is the trick most planners never use, and it costs exactly zero dollars.
- [ ] Pull up an on-ride point-of-view (POV) video on YouTube for any questionable dark ride.
- [ ] Sit your child down at the kitchen table and watch them watch the screen.
- [ ] Watch their reaction during the ride’s peak intensity (a plunge, a jump scare, or a loud noise).
- [ ] If they say “I want to do that,” you have a green light. If they cover their eyes, you just answered the question for free.
A two-minute video at home beats guessing in a 60-minute standby line. More importantly, it prevents the ultimate Lightning Lane mistake: booking a Lightning Lane Multi Pass selection for a ride your child refuses to board at the entrance.
Pro tip: Do the home video test weeks before your trip, well before your advance booking window opens, so you know exactly which rides are actually worth your Lightning Lane selections.
DINOSAUR: Disney’s Most Intense Ride for Kids
Make no mistake: DINOSAUR is sensory overload by design. You board a Time Rover that violently bounces, jerks, and tilts over rough, unpredictable terrain. The majority of the ride takes place in pitch darkness, punctuated by flashing strobe lights, blaring sirens, and massive audio-animatronic dinosaurs that lunge just inches from your vehicle.
If your child tends to tip from “nervous-excited” to “never again” when startled, tread carefully here. The lunging Carnotaurus is terrifying for cautious kids, and the aggressive motion makes it impossible to just close your eyes and wait it out. It is the most intense ride at Disney World for young children.
Star Tours: The Honest Truth
Star Tours is a different kind of intensity. It features simulated plunges, loud blasters, and screen appearances by intimidating characters like Darth Vader or Kylo Ren. While the physical movement is contained to a simulator cabin and lacks the physical aggression of DINOSAUR, the combination of darkness, sudden changes in the story (like jumping to hyperspace), and loud noises can easily overwhelm a timid rider.
| Ride | Primary Fear Triggers | The “Green Light” Kid | The “Yellow Light” Kid |
|---|---|---|---|
| DINOSAUR | Pitch darkness, extreme roughness, strobe lights, loud sirens, lunging monsters. | Loves jump scares, aggressive rides, and massive monsters. | Spooked by loud noises, sudden darkness, or aggressive jerking motion. |
| Star Tours | Simulated plunges, loud blasters, dark cabin, intimidating villains. | Loves action, loud noises, and fast-paced screen media. | Dislikes sudden drops, dark enclosed spaces, or imposing villains. |
Handling a Split Group with Rider Switch
If you have one brave kid who wants to ride but a little one who is too scared (or too short), you do not have to skip the attraction. This is where most families fumble by splitting up entirely and wasting time.
Instead, use Rider Switch. Here is the play:
- [ ] Approach the cast member at the attraction entrance with your entire group.
- [ ] Tell them you want to use Rider Switch.
- [ ] Adult 1 and the brave child ride first via the standard or Lightning Lane queue.
- [ ] Adult 2 waits outside with the non-rider (this is the perfect time to grab a snack or knock out a gentle ride nearby).
- [ ] When Adult 1 finishes, Adult 2 scans in and gets to ride without waiting in the full standby queue.
This ensures the brave riders get their thrills while the cautious kids stay out of the dark—without wasting anyone’s park time or forcing a terrified kid onto a ride they aren’t ready for.
Early Entry and Rope Dropping With Little Legs
Rope dropping with kids is no longer just about waking up early; it is a calculated operation where arriving 60 minutes before the official Early Entry time is the only way to beat the crowds at kid-heavy lands like Fantasyland and Toy Story Land.
Rope dropping used to be a fairly straightforward hustle—show up a little early, walk to a popular ride before the lines explode, and boom, success. But the process has shifted. Today, if you are relying on the Early Theme Park Entry perk (which gets Disney resort guests into the parks 30 minutes before official opening) and you just stroll up exactly 30 minutes early, you have already lost.
The “60-Minute Rule” for Early Entry
If a park opens to the general public at 9:00 AM, Early Entry begins at 8:30 AM. You need to be standing at the front gates by 7:30 AM.
Why? Because Disney does not wait until 8:30 AM to let people in. They routinely start moving guests through security, past the tap points, and into internal holding areas well before the posted Early Entry time. The first 15 to 30 minutes of actual park operation is your single best window to knock out a headliner ride without waiting an hour. If you arrive right at 8:30 AM, you will be stuck behind thousands of fast-walking adults who got there at 7:30 AM.
Factoring in the “Toddler Tax”
When you are childless, you can power-walk from the Magic Kingdom turnstiles to Seven Dwarfs Mine Train in a matter of minutes. With small children, that same walk takes triple the time. You have to account for stroller wrangling, unexpected bathroom stops, and the reality of tiny legs navigating massive crowds.
This is why being at the absolute front of the holding pack matters. You need the buffer. When the rope officially drops, the crowd will surge. If you are starting from the back, your kids will get swallowed in the sea of people, and the wait times for top kid rides will skyrocket before you even park the stroller.
Why Toy Story Land and Fantasyland Are Crucial
There are two specific lands where the morning rush is make-or-break for families:
- Fantasyland (Magic Kingdom): This is the epicenter of kid-friendly rides. Your two big targets are Peter Pan’s Flight and Seven Dwarfs Mine Train. (Note: Seven Dwarfs is a Lightning Lane Single Pass, so if you don’t want to pay à la carte for it, rope dropping is your only free skip-the-line move).
- Toy Story Land (Hollywood Studios): Slinky Dog Dash is arguably the most popular family coaster in Disney World. It is completely exposed to the sun, and the standby line reliably swells to 90+ minutes within an hour of park opening. Knocking this out first saves you a massive headache and frees up your Lightning Lane Multi Pass selections for other attractions.
The Kid-Friendly Rope Drop Strategy
| Target Land | Park | Primary Ride Target | Secondary Ride Target | The Reality Check |
|---|---|---|---|---|
| Fantasyland | Magic Kingdom | Seven Dwarfs Mine Train (if 38"+ & brave) | Peter Pan’s Flight | If you aren’t at the very front of the rope drop pack, skip Seven Dwarfs and hit Peter Pan first instead. |
| Toy Story Land | Hollywood Studios | Slinky Dog Dash (if 38"+ & brave) | Toy Story Mania | The sprint here is intense. One adult should park the stroller while the other walks the kids to the ride entrance. |
| World Nature | EPCOT | Remy’s Ratatouille Adventure | Frozen Ever After | Enter through the International Gateway (Skyliner/BoardWalk entrance) for a massive head start on Remy. |
Your Morning Execution Plan
Do not try to wing a morning with kids. Follow this exact sequence to ensure you actually get on the rides you want:
- [ ] 6:00 AM: Wake up and get dressed. Have a quick, pre-packed breakfast in the hotel room (granola bars, fruit) so you aren’t wasting time at the food court.
- [ ] 6:45 AM: Leave your hotel room. Whether you are taking a bus, the Skyliner, or driving, you need to be in transit early.
- [ ] 7:30 AM: Arrive at the park gates, get through security, and scan in.
- [ ] 7:45 AM: Navigate to the Early Entry holding area. Cast members will scan your MagicBand or phone to verify you are an eligible Disney resort guest.
- [ ] 8:30 AM: The rope drops. Walk briskly—do not run—directly to your primary target ride.
- [ ] 8:45 AM: Ride your first attraction, grab the stroller, and immediately head to your secondary target before the official park opening crowd floods in at 9:00 AM.
Pro tip: The biggest mistake parents make at rope drop is stopping to unfold or organize the stroller right at the tap points while the crowd blows past them. Prep the stroller at the bus stop or in the parking lot. When you scan into the park, the stroller should be fully loaded, kid strapped in, ready to move immediately to the holding area.
Character Dining: Securing Tables With Drop Watch
The smartest way to book a sold-out character meal isn’t waking up early to refresh your app—it’s letting SupaPark’s Drop Watch catch the inevitable cancellation and pinging you the second it happens.
Scoring a table at Topolino’s Terrace or Chef Mickey’s is famously difficult. Advance Dining Reservations (ADRs) open 60 days before your arrival at exactly 6:00 AM Eastern Time in the My Disney Experience app. This is completely distinct from the 7:00 AM Lightning Lane Multi Pass window, but it requires the exact same level of speed. Because Disney resort guests can book for their entire length of stay (up to 10 days), the most coveted character dining spots are often fully booked by people who checked in earlier in the week, long before your own 60-day window even opens.
But here is the reality: guests change their plans constantly, and tables always open up. SupaPark’s Drop Watch monitors these high-demand restaurants in real time. The moment a hard-to-get reservation frees up from a cancellation, SupaPark catches it and alerts you instantly via push notification. You can then grab the table directly in My Disney Experience before anyone else even knows it’s there.
How to Snipe a Table With Drop Watch
SupaPark does the watching, but you do the actual booking. To successfully snipe a canceled reservation, you need to be prepared to act quickly. Here is the exact sequence:
- [ ] Identify your target restaurants (like Topolino’s Terrace or Chef Mickey’s) and your preferred dates.
- [ ] Set up a Drop Watch alert in SupaPark for those specific meals and timeframes.
- [ ] Ensure your phone is off silent and push notifications are enabled for SupaPark.
- [ ] When SupaPark sends an alert that a table has dropped, tap it immediately.
- [ ] Complete the booking yourself directly inside Disney’s My Disney Experience app.
Pro tip: Have your My Disney Experience app already logged in with a valid credit card saved to your profile. Drop Watch finds the table first, but Disney does not hold it in your cart until you click confirm. Checking out in seconds is the difference between securing the table and getting an error message.
Strategic Character Dining Swaps
If you miss out on the top-tier reservations during the initial 60-day drop, or if you simply want to optimize your budget and time, you don’t have to skip character dining entirely. Use these insider swaps to get an excellent experience with far less stress:
| The Popular Pick | The Smart Alternative | Why It’s the Better Move |
|---|---|---|
| 'Ohana Breakfast (Polynesian) | Garden Grill (EPCOT) | Skip the pricey 'Ohana scramble. Head to EPCOT’s Garden Grill for a fantastic family-style, all-you-can-eat menu with a modified character experience. It is easier to book and the rotating restaurant setting keeps kids engaged. |
| Akershus Royal Banquet Hall (EPCOT) | Cinderella’s Royal Table (Magic Kingdom) | For a budget princess meal, book Cinderella’s Royal Table (around $60 for adults). While it does not currently feature the traditional character meet-and-greets, the setting inside the actual castle is unmatched for the price. |
Why Drop Watch Beats Manual Refreshing
Refreshing the My Disney Experience app all day drains your phone battery and ruins your park experience. Drop Watch runs constantly in the background, giving you a massive edge for high-demand locations.
- It runs 24/7: Drop Watch never sleeps. It checks inventory constantly, catching the people who cancel their plans at 2:00 AM just as easily as the midday drops.
- It catches the penalty drops: Disney enforces a strict cancellation policy, charging a per-person no-show fee if guests do not cancel at least two hours in advance of their reservation. This creates a highly predictable flurry of tables opening up the day before or the morning of the reservation, as families adjust their plans or realize they won’t make it. Drop Watch catches these last-minute panic cancellations instantly.
- It separates watching from booking: Remember, SupaPark never holds, confirms, or manages the reservation. It is simply an alert engine. You always maintain full control of your dining plans, making the final booking securely within your own Disney account.
Everyday Dining Hacks for Kids
While Drop Watch handles your hard-to-get reservations, you will still rely on everyday meals to get through the park day. Use these insider tricks to save time and money:
- Ask for “no side” at the register: When ordering quick service in person, asking for no side removes the extra vegetable or fruit cup, instantly cutting the cost of the meal and simplifying allergy management.
- Mobile Order is non-negotiable: Order your food through My Disney Experience while waiting in the stroller line. Many quick-service locations block entry for guests without an active mobile order, so you can let the kitchen prepare the meal while you handle logistics outside.
- The Creature Comforts backdoor: At Animal Kingdom’s Starbucks location (Creature Comforts), use the entrance on the Africa side. It reliably has a noticeably shorter queue than the main doors.
- Skip the standard chicken nuggets: Head to Yak & Yeti Local Food Cafes in Animal Kingdom, where the kids’ menu features egg rolls and lo mein for a tasty alternative. Over at Magic Kingdom, Tony’s Town Square Restaurant offers a cheeseburger calzone—a fun, easily shareable spin on pizza that kids consistently love.
Pacing the Day: Mid-Day Breaks vs. Pushing Through
The honest call: if you’ve got a kid under 7 or anyone who naps, leave the park midday — but only if you’ve done the transportation math first. Otherwise an in-park reset beats a round trip that eats your afternoon.
The midday meltdown is the most predictable thing about a Disney day. Heat peaks, lines peak, and tired legs hit at the same time — usually right when you’re three rides deep and stubbornly “pushing through.” The smart families don’t push through. They plan the dip on purpose.
Break vs. push: which one fits your crew
| Leave for a hotel nap | Stay + find a quiet zone | |
|---|---|---|
| Best for | Toddlers, true nappers, on-site guests | Kids who recharge with AC + a snack, off-site guests |
| Time cost | 1.5–3 hrs door-to-door round trip | 30–60 min |
| Park re-entry | Same day, no reservation needed | You never left |
| Risk | Nobody wants to leave the comfy room | Less total horizontal rest |
| Payoff | Genuine reset, stronger evening | Keeps momentum, no transit drain |
The deciding factor is almost always transportation overhead, and it’s bigger than people guess. Budget the full chain: walk to the bus/Skyliner/monorail, wait, ride, security, room, then reverse it. A “quick nap” can quietly cost three hours. On-site monorail and Skyliner resorts make leaving viable; a bus-only resort or an off-site hotel often tips the math toward staying.
If you stay: where the quiet actually is
Pushing through doesn’t mean standing in the sun. Every park has cool, low-stimulation pockets:
- EPCOT — the World Showcase pavilions are the calmest real estate on property; slow rides and shaded seating around the lagoon. (Annual Passholders sometimes get an exclusive air-conditioned lounge in the Morocco pavilion at the Restaurant Marrakesh location during limited-time perk windows — worth checking if you hold a pass.)
- Magic Kingdom — the air-conditioned slow rides (think the dark, gentle ones) double as recovery time that still counts as “riding.”
- Animal Kingdom — shaded trails and a long, calm boat-style attraction beat baking in a standby line.
Pro tip: Stack your “free test” rides into the break. A child who’s unsure about Test Track — a genuine high-speed thrill with a posted minimum height — doesn’t need to find out at the gate. Watch an on-ride video together at home weeks before; a kid who says “again” is ready, a kid who covers their eyes just saved you a Lightning Lane. Then during your midday lull, knock out the gentle, cool attractions everyone can do, and save the headliner debate for when energy’s high.
Use the forecaster to time the dip, not the clock
Here’s the part most planners miss: don’t break at a fixed time — break when the data says the park is at its worst. Crowds and waits don’t peak at the same hour every day, and “leave at noon” is a guess.
SupaPark’s wait-time forecaster shows you, ride by ride, when each attraction is usually shortest versus slammed. Use it to:
- [ ] Front-load your must-dos in the cool, low-wait first 90 minutes (Early Theme Park Entry gets on-site guests in 30 minutes before open — a real head start if you’re staged at the holding point before it begins, not strolling up at park-open).
- [ ] Spot the forecasted heat-and-crowd peak for your specific day.
- [ ] Schedule your nap or quiet-zone reset across that ugly window.
- [ ] Return when the forecaster shows waits softening into the evening.
That’s the whole trick: you’re not skipping the hot, crowded hours by luck — you’re stepping out of them on purpose and letting everyone else stand in them. Pair it with live alerts and you’ll get pinged when a ride you wanted craters to a near walk-on, so you can pop back in at exactly the right moment.
The one thing to remember
A break isn’t lost time — it’s the thing that buys you a happy, functional evening instead of a 4 p.m. stroller meltdown. Decide leave-vs-stay by your transportation math and your kid’s nap reality, then let SupaPark’s forecaster pick the when. Rest during the peak, ride during the lulls, and you’ll do more with less waiting than the family who powered through and burned out by dinner.
Key Takeaways
The smartest Disney day starts long before you scan into the park. Maximize your family’s time and budget by predicting ride readiness at home, mastering Rider Switch, and letting technology monitor the parks for you.
The “POV Video” Test (Temperament > Age)
Age and height minimums only tell you if a child can ride, not if they should. The trap most families fall into is wondering if their child is old enough for a specific attraction. Instead, evaluate by temperament. The single most useful tool you have is the point-of-view (POV) video test.
- [ ] Run the POV Test at home: Pull up an on-ride video on your TV or tablet. A child who watches the launch on a screen and says “again!” is ready. A child who covers their eyes just gave you your answer for free—weeks before the trip, with zero pressure and no wasted park time.
This test is critical for protecting your Lightning Lane selections. Never blow a high-value Lightning Lane on a ride your child might refuse at the loading dock.
| Attraction | The Real Threat Level | The Smart Strategy |
|---|---|---|
| Cosmic Rewind (EPCOT) | High speed, dark, backwards launch. Yellow light for cautious kids. | Lightning Lane Single Pass. Do not buy this à la carte pass unless you are 100% sure they will ride. |
| Seven Dwarfs Mine Train (Magic Kingdom) | 38" height. Dark ride mine section with sudden drops can spook toddlers. | Lightning Lane Single Pass. Gateway coaster, but run the POV test before paying for it. |
| DINOSAUR (Animal Kingdom) | Massive sensory overload. Violent jerks, pitch black, loud sirens, lunging animatronics. | If they tip from “nervous-excited” to “never again” when startled, skip it. |
| Star Tours (Hollywood Studios) | Simulated plunges, blasters, and intimidating characters. | Run the POV test. A two-minute video beats guessing in a standby line. |
| Test Track (EPCOT) | High-speed launch, outdoor track. Strict height check. | Measure at home. Don’t burn a Multi Pass on it if unsure; use Single Rider or ride right before park close. |
| Slinky Dog Dash (Hollywood Studios) | Smooth bunny-hop hills, bright, no inversions. A true family coaster. | If they pass the POV test, prioritize it. If unsure, rope drop it instead of spending a Lightning Lane. |
Pro tip: For Slinky Dog Dash, if you don’t secure a Lightning Lane, rope drop it. Arrive well before official park opening—Disney often moves guests through security early—and head straight to Toy Story Land, or ride during major midday distractions like parades.
Master Rider Switch
Never force a scared kid onto a ride, and never force a brave kid to miss out. If you have a child who doesn’t meet the height requirement or is simply too scared, you don’t have to skip the headliners.
- How it works: One adult waits outside the queue with the non-rider while the other adult rides. Then, you swap. The second adult uses the Lightning Lane entrance to skip the standby line entirely.
- The Soarin’ Hack: Soarin’ lifts you up to 40 feet in the air in a dark theater. If your child is a hard “no” on heights, use Rider Switch. While Adult A rides Soarin’, Adult B can take the non-rider on the gentle Living with the Land boat ride right next door.
Book Lightning Lanes in Advance
Lightning Lane Multi Pass is not a 7:00 AM day-of scramble. You now purchase and book your initial Multi Pass selections before your trip.
- [ ] Know your booking window: Disney resort guests can book selections 7 days before arrival for the length of their trip. Off-site guests book 3 days before.
- [ ] Set your alarm: The booking window opens at 7:00 AM Eastern.
- [ ] Keep refilling: Once you tap into your first Lightning Lane in the park (or the window expires), immediately book your next one in the My Disney Experience app.
Food & Dining Hacks for Kids
Cut costs and skip the meltdowns by altering how you order. Disney food portions are massive, and standard kids’ meals can get repetitive.
- [ ] Ask for “no side” at quick service: This removes the extra vegetable or fruit cup, instantly dropping the cost and simplifying allergy management.
- [ ] Use Mobile Order religiously: The My Disney Experience app blocks entry to many quick-service locations without a mobile order. Order while waiting in the stroller line so the kitchen prepares the meal before you walk in.
- [ ] Find the secret queues: At Animal Kingdom’s Creature Comforts, use the entrance on the Africa side—the line is noticeably shorter.
| The Standard Option | The Smarter Family Alternative | Why It Wins |
|---|---|---|
| 'Ohana Breakfast (Polynesian) | Garden Grill (EPCOT) | Garden Grill offers a massive all-you-can-eat family-style meal with a modified character experience, usually easier to book and slightly cheaper. |
| Chicken Nuggets | Yak & Yeti Local Food Cafes (Animal Kingdom) | The kids’ menu egg rolls and lo mein are a massive upgrade over standard theme park chicken tenders. |
| Standard Pizza | Tony’s Town Square (Magic Kingdom) | They offer a cheeseburger calzone—a highly shareable, fun spin on pizza that kids actively devour. |
| Character Premium | Cinderella’s Royal Table | Still pricey (around $60 adult), but you book this for the setting of eating inside the castle, not a full character meet-and-greet rotation. |
Automate Your Park Day
Stop staring at your phone and let SupaPark’s live alerts do the work. The biggest drain on your energy is constantly refreshing the Disney app hoping a dining reservation drops or a ride wait time collapses.
Set your targets in SupaPark and put your phone away. The platform watches the live data and pings you the second a Lightning Lane refills, a ride goes walk-on, or a coveted dining table opens up from a cancellation. When you get the alert, simply tap over to My Disney Experience and secure the booking. You get the exact itinerary you want, and your kids get your actual attention.
<!-- SUPAPARK-LINKS:START -->
Keep planning: today’s crowd forecast · is Lightning Lane worth it
<!-- SUPAPARK-LINKS:END -->