First-Timer's Ultimate Walt Disney World Planning Checklist & Survival Guide
Published June 14, 2026 · Updated September 9, 2026
At a Glance
- Best for: First-timers planning a 4–7 day Walt Disney World trip who want to skip the rookie mistakes
- Time needed: Start booking 60+ days out (dining opens 60 days before arrival at 6:00 AM ET; ticket calendars open 6–12 months ahead for high-demand dates)
- Biggest money lever: Lightning Lane Multi Pass — best ROI for a typical first-timer; book Single Pass à la carte only for the headliners (TRON, Seven Dwarfs Mine Train, Cosmic Rewind, Rise of the Resistance, Flight of Passage)
- Best time to go: Off-peak weeks — avoid Thanksgiving and late-Jan/early-Feb cheer-competition weekends, when Lightning Lane prices tend to run 30–40% higher
- Don’t miss: Early Theme Park Entry (all on-site guests, 30 min early), free transportation/walking shortcuts, and mobile-ordering quick service before the lunch rush
- Skip: Day-of scrambling — Multi Pass selections are made in advance (7 days out on-site, 3 days off-site), so there’s no 7 AM panic, and standard tickets need no separate park reservation
This guide is for anyone who’s never set foot in the parks and wants to walk in with a pre-built plan instead of winging it. The single biggest win: a front-loaded checklist that locks in free perks, cuts transit time, and steers your money toward the passes and meals actually worth it — so you spend the trip riding, not researching.
Your Disney Planning Timeline: A Countdown Checklist
The single biggest first-timer win: a pre-filled itinerary that locks in perks, cuts travel time, and saves real money — and it all starts with calendar discipline, not magic. The guests who walk in relaxed aren’t lucky; they hit each booking window the moment it opened. Here’s the countdown that gets you there.
The master countdown
| When | What to do | Why it matters |
|---|---|---|
| 12–6 months out | Pick dates, buy tickets, book your resort | High-demand days (think Magic Kingdom over a holiday) can sell out within days of the calendar opening |
| 6–2 months out | Download My Disney Experience, link tickets, build a rough park plan | Everything downstream lives in this app |
| 60 days out, 6:00 AM ET | Book Advance Dining Reservations (ADRs) | The hardest tables go in minutes |
| 7 days out (resort) / 3 days out (off-site), 7:00 AM ET | Make Lightning Lane Multi Pass selections | Headliner windows fill fast |
| Final week | Finalize itinerary, set rope-drop plan, pack | Lock it in before the chaos |
Pro tip: ADRs (60 days, 6:00 AM ET) and Lightning Lane Multi Pass (7/3 days, 7:00 AM ET) are different windows at different times — first-timers blow this constantly. Put two separate alarms in your phone now, labeled with the exact dates and times.
12–6 months out: dates, tickets, resort
This is where the money is made or lost.
- [ ] Lock your dates first. Avoid demand spikes — cheer-competition weeks in early February and Thanksgiving week push Lightning Lane prices and crowds noticeably higher. Shoulder weeks are calmer and cheaper.
- [ ] Buy tickets as soon as the calendar opens for your dates. Note: standard date-based tickets do not require a separate park reservation — that COVID-era rule is gone, so don’t waste time hunting for one.
- [ ] Book your resort. On-site stays unlock a 7-day Lightning Lane head start (vs. 3 days off-site) and Early Theme Park Entry — 30 minutes before official open at every park.
- [ ] Watch for room/package discounts, which Disney releases in waves; rebooking an existing reservation under a new offer is a common way to save.
Use SupaPark’s crowd calendar here to compare candidate weeks side by side before you commit — it’s free, and it’ll steer you off the spike weeks toward the quieter, cheaper dates.
60 days out: dining (6:00 AM ET sharp)
Your ADR window opens 60 days before arrival, and on-site guests can book their whole trip’s dining starting on day 60. Be logged in and ready at 6:00 AM Eastern.
- [ ] Target the tough-to-get tables first (signature dining, character meals, anything in EPCOT during a festival).
- [ ] Have backups ready in case your top pick is gone.
Missed a table? You don’t have to refresh all day. SupaPark’s dining Drop Watch catches the moment a cancellation frees up a hard-to-get reservation and pings you instantly — then you grab it in My Disney Experience.
7/3 days out: Lightning Lane Multi Pass (7:00 AM ET)
This is not the old wake-up-and-scramble system. You buy Multi Pass per day, then pick your attractions in advance: resort guests starting 7 days before arrival, off-site guests 3 days before, with the window opening at 7:00 AM Eastern.
- [ ] Book your initial selections at 7:00 AM, then refill one at a time through each park day as you redeem them.
- [ ] Decide separately on Lightning Lane Single Pass for the à-la-carte headliners — TRON Lightcycle / Run and Seven Dwarfs Mine Train (Magic Kingdom), Guardians of the Galaxy: Cosmic Rewind (EPCOT), Star Wars: Rise of the Resistance (Hollywood Studios), and Avatar Flight of Passage (Animal Kingdom). Everything else with a Lightning Lane is Multi Pass.
For a typical 5-day first-timer trip, Multi Pass tends to be the best ROI of the paid add-ons. SupaPark’s 7:00 AM rope-drop booking board shows you exactly what to grab the second your window opens, and its refill predictions tell you when a sold-out lane is likely to reopen so you’re not guessing.
Final week: link, finalize, pack
- [ ] Confirm tickets are linked in My Disney Experience and reservations show up.
- [ ] Build your day-by-day order of operations (rope-drop ride first, dining mid-day, fireworks spot picked).
- [ ] Pack supportive shoes, a light daypack, and a refillable water bottle.
- [ ] Pad for the unexpected — check for ride refurbishments and adjust before you’re standing at a closed queue.
The one thing to remember: tickets, tables, and Lightning Lane all run on tight, separate clocks. Set the alarms now — 60 days at 6:00 AM for dining, 7/3 days at 7:00 AM for Lightning Lane — and let SupaPark watch the windows you can’t.
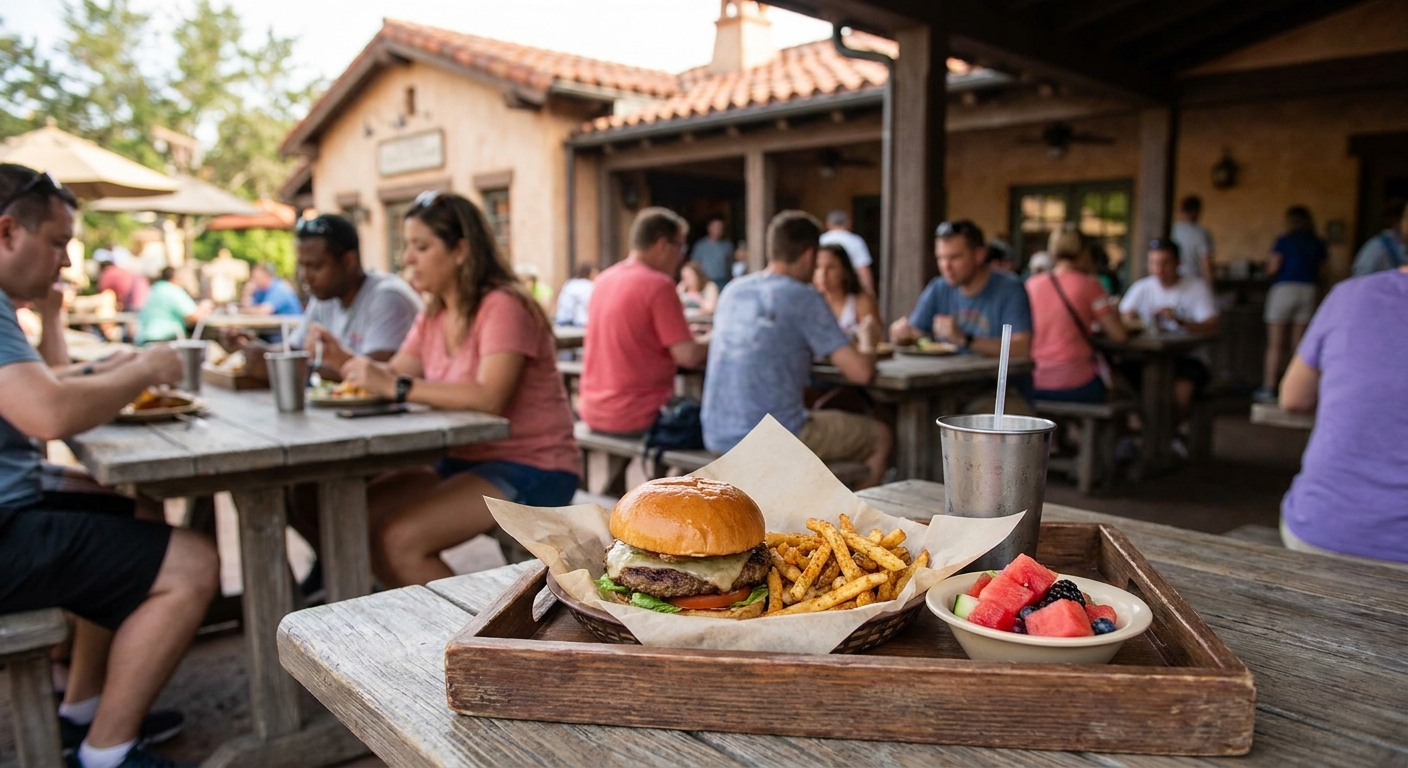
Choosing When to Go: Crowd Calendars & Cost by Season
The single biggest lever on your trip cost isn’t your hotel or your tickets — it’s the week you pick. Disney prices tickets by date, so the same park, the same rides, and the same Lightning Lanes can cost dramatically more during a holiday week than during a quiet stretch in late winter or fall. Crowd levels swing the same way, and they drag everything else up with them.
How the season changes your day (and your bill)
Disney uses date-based ticket pricing: pick a low-demand “value” date and the per-day ticket is meaningfully cheaper than a peak holiday date. The catch is that demand drives everything in tandem:
- Tickets cost more on peak dates — the calendar literally charges you for popularity.
- Hotels spike during holiday and special-event weeks; the same room can swing hundreds of dollars night to night.
- Lightning Lane prices float with crowds. On packed weeks — think Thanksgiving week or the late-January/early-February cheer-competition stretch — Multi Pass and Single Pass pricing can run roughly 30–40% higher than a slow weekday.
In other words, a “cheap” week is cheaper three times over: ticket, room, and skip-the-line.
Season-by-season cheat sheet
Dates shift year to year, so treat these as patterns, not a calendar — and confirm the live forecast before you commit.
| Season (typical) | Crowds | Weather | Price | Best for / watch-outs |
|---|---|---|---|---|
| Mid-Jan to early Feb (non-holiday) | Low | Cool, 50–60°F mornings | Lowest | Value pick — but cheer-competition weekends spike crowds and LL prices |
| Late Aug to late Sept | Low–Moderate | Hot, humid, afternoon storms | Low | Quiet parks, short lines; pack rain gear |
| Spring break / Easter | High | Warm, pleasant | High | Avoid unless dates are fixed |
| Summer (June–July) | Moderate–High | Hottest, daily rain | Moderate–High | Long days, evening hours; heat is brutal midday |
| Thanksgiving week | Very High | Cool, comfortable | Peak | Holiday overlays, but max crowds + 30–40% higher LL |
| Christmas–New Year’s | Highest | Cool | Peak | The most expensive, most crowded week of the year |
Read the calendar, then book the gaps
The smart play is to find the soft weeks tucked between the spikes — a low-crowd window where ticket, hotel, and Lightning Lane pricing all sag at once.
- [ ] Pull up SupaPark’s crowd forecasts and scan a few candidate weeks side by side.
- [ ] Cross-check Disney’s date-based ticket calendar — the cheap ticket dates usually line up with the low-crowd ones.
- [ ] Steer around the known spikes: Thanksgiving week, Christmas–New Year’s, spring break, and those late-Jan/early-Feb cheer weekends.
- [ ] Lock dates the moment they release. High-demand dates can sell through fast, so set a reminder for the exact release time and book early.
Pro tip: Two cold-weather weeks can look identical on paper and play out completely differently — a quiet mid-January stretch versus a cheer-competition weekend can mean a near-walk-on day versus a packed one, with Lightning Lane priced 30–40% higher, even though the weather’s the same. SupaPark’s crowd forecasts catch that gap before you’ve spent a dollar; the ticket calendar alone won’t.
Don’t overcorrect on weather
The cheapest weeks are cheap for a reason — usually heat or the chance of cooler days. Late summer brings low crowds but real humidity and near-daily afternoon storms; midwinter brings bargain pricing but mornings in the 50s, so a light layer earns its space in your bag. Neither is a dealbreaker — they’re the trade you make for shorter lines and a smaller bill. Decide what your group tolerates, then let crowds and price break the tie.
The one thing to remember: Your date is your budget. Pick a low-crowd, value-date week and you save on the ticket, the room, and Lightning Lane all at once — so check the crowd forecast before you book anything else, and let the calendar pick the week for you.
Picking the Right Park Tickets & Add-Ons
Buy the fewest days and add-ons you’ll actually use — every extra day drops your per-day cost, and most first-timers overbuy on hopping they won’t touch. Disney World tickets are date-based: the price is tied to the calendar dates you pick, and the more consecutive days you add, the cheaper each day gets. A single day during a peak window can cost nearly as much as two off-peak days, so your dates matter as much as your day count.
First, the relief: standard date-based tickets do NOT require a separate park reservation. The old COVID-era Park Pass system is gone. Pick your ticket dates, walk into the park you want — no extra reservation step to forget.
The three ticket layers
You’re really choosing two things: a base ticket (how many park days) and whether to bolt on hopping or water parks.
| Option | What it does | Roughly adds | Best for |
|---|---|---|---|
| Base ticket | One park per day | — | First-timers doing one park, start to finish |
| Park Hopper | Visit more than one park in a day | A flat add-on across your whole ticket | EPCOT dinner after a Magic Kingdom morning; repeat-ish visitors |
| Park Hopper Plus | Hopper + water parks, golf, mini-golf | A bit more than Hopper | Trips with a planned Blizzard Beach/Typhoon Lagoon day |
| Water Park & Sports (standalone) | Water park / recreation entry, no theme parks | À la carte | A dedicated pool day without theme-park admission |
Key Hopper update: you can hop anytime the parks are open. The old “no hopping before 2:00 PM” rule is retired — the only catch is the park you’re heading to needs to have capacity.
When Park Hopper is worth it (and when it isn’t)
For a typical 4–5 day first trip, most first-timers do NOT need Park Hopper. Each park is a full day on its own, and the add-on stacks up across every day of your ticket — you pay for hopping on days you never leave the first park.
Buy the Hopper if:
- You’re doing EPCOT’s World Showcase for dinner/festival sipping after a morning elsewhere
- Your trip is short (2–3 days) and you want to sample multiple parks fast
- You’ve got commando energy and want Magic Kingdom fireworks to close a Hollywood Studios day
Skip it if:
- You have kids who fade by mid-afternoon
- Your itinerary is one-park-per-day with a midday break
- You’re trying to trim cost — that money buys a couple of Lightning Lane Single Pass rides instead
Pro tip: If you’re a Disney resort guest checking in before noon, you may receive a complimentary water-park ticket as a check-in perk — which can make a standalone Water Park & Sports add-on redundant. Confirm what your specific booking includes before paying for water-park access twice.
How date-based pricing actually bites
- High-demand dates (holiday weeks, Thanksgiving, busy festival weekends) cost more per day AND push Lightning Lane prices up 30–40% over a quiet week.
- The ticket calendar typically opens 6–12 months out; the most sought-after dates can sell out within days. Set a reminder for the release and book the exact dates early.
- Stretching the same trip by one extra ticket day usually lowers your average per-day cost — sometimes enough that a 5-day ticket is barely more than 4.
Your ticket-buying checklist
- [ ] Lock your exact travel dates before pricing anything — dates drive the whole cost
- [ ] Count real park days (subtract arrival/departure travel days and any pool day)
- [ ] Decide Hopper honestly: do you have a concrete two-park day planned?
- [ ] Check whether your resort booking already includes a water-park perk before adding one
- [ ] Confirm you do NOT need a park reservation (you don’t, for standard tickets)
- [ ] Buy as soon as your dates open if they’re high-demand
Where SupaPark fits
Ticket math is easier when you know which dates are actually busy. SupaPark’s crowd forecasts and calendar show you the cheaper, quieter windows before you commit to dates — and the Lightning Lane sell-out and refill predictions tell you whether skipping Hopper to fund a couple of Single Passes is the smarter spend for your trip.
The one thing to remember: match your ticket to your real itinerary — right number of days, Hopper only if you have a genuine two-park plan — and let your dates, not the add-ons, do the cost-cutting.
Where to Stay: On-Site vs. Off-Site Resort Strategy
The short version: on-site buys you time and convenience; off-site buys you space and savings. For a first trip, the on-site perks usually win — but only if you’d actually use them.
Disney’s owned resorts fall into four tiers, and the jump between them is mostly about location, theming, and amenities — not the quality of the bed. Here’s how they stack up.
The four tiers at a glance
| Tier | Rough nightly range | What you’re paying for | Best for | Transport |
|---|---|---|---|---|
| Value (All-Star Sports/Music/Movies, Pop Century) | ~$140–250 | Cheapest on-site entry, fun theming, food courts | Budget-minded first-timers who’ll be in the parks all day | Bus (Skyliner at Pop/Art of Animation) |
| Moderate (Caribbean Beach, Port Orleans, Coronado Springs) | ~$250–400 | More space, better pools, table-service dining | Families wanting comfort without Deluxe pricing | Bus (Skyliner at Caribbean Beach) |
| Deluxe (Contemporary, Polynesian, Grand Floridian, Beach/Yacht Club, Wilderness Lodge) | ~$500–900+ | Prime location, walk/monorail/boat to parks, Extended Evening Hours eligibility | Travelers who value proximity and after-hours park time | Monorail, boat, walking, Skyliner, bus |
| DVC / Villas (Disney Vacation Club resorts) | Varies widely | Larger units, kitchens, longer stays | Bigger groups or multi-week trips cooking some meals | Same as their host Deluxe resort |
Pro tip: Extended Evening Hours — the extra after-dark park time on select nights — is only for Deluxe and Club-level guests. If you book a Value resort expecting it, you won’t have access. That perk alone is a real reason some families stretch to Deluxe.
What every on-site guest actually gets
These come with any Disney-owned resort, regardless of tier:
- Early Theme Park Entry — all on-site guests get into a designated park 30 minutes before official opening. That half hour is the easiest walk-on time of the day for headliners.
- Free Disney transportation — buses, monorail, boats, and the Skyliner gondola between resorts and parks.
- The 7-day Lightning Lane Multi Pass window — staying on-property lets you make Lightning Lane Multi Pass selections 7 days before arrival (off-site guests get 3). For a first-timer chasing rides like Slinky Dog Dash, that four-day head start matters.
- Package delivery — buy something in a park and have it sent to your resort instead of carrying it around.
The transportation reality
Free Disney transit is a genuine perk, but factor it into your specific resort, not just the brand:
- Skyliner and monorail resorts skip bus-stop bottlenecks. Caribbean Beach, Pop Century, the Epcot-area Deluxes, and the Magic Kingdom monorail loop are the fastest commutes.
- Bus-only Value and Moderate resorts can mean 20–45 minutes door-to-park during peak times. Build that in.
A few small-but-real shortcuts on-site guests can use:
- [ ] At the All-Star resorts, any All-Star bus works for any of the three — hop on whichever comes first and walk over.
- [ ] From the monorail resorts, you can walk to Magic Kingdom along the Seven Seas Lagoon path — no waiting on transport at all.
- [ ] The Contemporary’s fourth-floor balcony gives a free, uncrowded fireworks view if you’re staying there.
When off-site is the smarter call
Off-site (the hotels near Disney Springs and along the 192 corridor) trades perks for value:
- More room for less money — suites and multi-bedroom units that cost a fraction of a Deluxe.
- Free parking, often free breakfast, and bigger pools for downtime.
- The catch: you lose Early Theme Park Entry, the 7-day Lightning Lane window drops to 3, and you’re driving and parking each day (factor in the daily theme-park parking fee).
Off-site makes the most sense for larger groups, longer stays, or budget-first travelers who’ll rope-drop one park and call it a day rather than park-hop and stay for fireworks.
The takeaway
Match the resort to how you’ll actually spend the day. If you’re a commando first-timer who wants every minute of Early Entry, the 7-day Lightning Lane jump, and Extended Evening Hours, lean on-site — and pick a Skyliner or monorail resort so transport doesn’t eat your morning. If you want space, a kitchen, and a lower bill more than you want perks, off-site is no mistake. The wrong move is paying Deluxe prices for perks you’ll sleep through.
Getting Around: Disney Transportation Decoded
Your resort choice IS your transportation plan — pick the hotel, and you’ve basically picked how you’ll commute all week. Walt Disney World runs four free transit modes (bus, monorail, boat, Skyliner), but no single resort gets all four, and which one you draw decides whether a park hop is a 10-minute glide or a 45-minute slog.
The four free modes, decoded
| Mode | Connects | Best for | Watch out for |
|---|---|---|---|
| Bus | Every resort ↔ all four parks, Disney Springs, water parks | Universal coverage; the only ride to Animal Kingdom from most hotels | Slowest and most crowded; bottlenecks at big resorts like Caribbean Beach and Port Orleans |
| Monorail | Magic Kingdom resorts (Contemporary, Poly, Grand Floridian) ↔ MK + EPCOT via TTC | Fast hops to Magic Kingdom | Doesn’t reach Hollywood Studios or Animal Kingdom |
| Skyliner | Caribbean Beach, Riviera, Art of Animation, Pop, Boardwalk-area ↔ EPCOT + Hollywood Studios | Quiet, scenic, skips road traffic | Pauses in lightning/high wind — outages happen sporadically |
| Boat | Select resorts ↔ MK, EPCOT/Studios area, Disney Springs | Relaxing, low-stress | Weather-dependent; slower than it looks |
If two-park days matter to you, a Skyliner resort is the quiet MVP — it links EPCOT and Hollywood Studios without ever touching a bus.
Plan travel time like a realist
Budget 60 minutes door-to-tapstile, every time. That covers the walk to the depot, the wait, the ride, security, and the walk to the gate. Resort-to-resort trips (dinner reservation across property) almost always route through a park or Disney Springs — there are few direct connections, so they can eat 60–90 minutes.
- [ ] Leave 90 minutes before any hard reservation (ADR, Lightning Lane window)
- [ ] Always have a backup route — if the Skyliner pauses, the bus line covers the same resorts
- [ ] For early-entry mornings, add 15 minutes; depots get slammed at rope drop
Pro tip: Skip Disney transportation entirely for the Magic Kingdom area — the Seven Seas Lagoon walking path lets you stroll free from the Contemporary (and nearby) straight to Magic Kingdom’s gate, often faster than waiting for a monorail or bus.
Monorail tricks
The Transportation & Ticket Center is the monorail’s chokepoint, so position smart:
- Board toward the far end of the platform — those cars empty closest to the exits.
- When the secret connector stairs near the TTC are open (My Disney Experience flags them), they shave a few minutes off the walk versus the long ramp.
- The Resort Monorail and Express Monorail are different loops — confirm you’re on the Express if you’re racing to the park.
When to ditch the free transit
Free isn’t always fastest. Rent a car or rideshare when:
| Situation | Smarter move |
|---|---|
| Group of 5+ | Rental car — beats herding everyone through bus-stop bottlenecks |
| Tight cross-property dinner | Rideshare; a direct car trip is often half the transit time |
| Early flight / pre-dawn start | Rideshare — buses run limited hours at the edges of the day |
| Animal Kingdom + a far resort | Driving skips the no-direct-route bus relay |
A few notes that trip up first-timers: Disney’s Magical Express airport bus ended in 2022 — getting from the airport now means Mears Connect, Sunshine Flyer, rideshare, or a rental. And if you drive to a park, the parking-lot tram to the TTC is the quickest way in from any Magic Kingdom-area lot.
The one rule to remember
Match your transit to your day’s shape: park-hopping EPCOT and Hollywood Studios? Lean Skyliner. Magic Kingdom-focused? Monorail or the lagoon walk. Animal Kingdom or odd cross-property runs? Strongly consider driving. Always keep a backup mode in your back pocket — the guests who lose an hour are the ones who only knew one way to get there.
Mastering Lightning Lane: Multi Pass & Single Pass
Lightning Lane is how you skip the standby line — and as a first-timer, getting the buy-and-book mechanics right is worth more than almost any other planning move. There are two products, they work differently, and mixing them up is the rookie mistake that costs you a headliner.
The two products, side by side
| Lightning Lane Multi Pass | Lightning Lane Single Pass | |
|---|---|---|
| What it covers | Most Lightning Lane attractions across all four parks | The 5 top headliners, à la carte |
| How you buy | One per-day purchase, then multiple selections | Buy each ride individually |
| Best for | Stacking up shorter waits all day | Guaranteeing the must-do blockbuster |
The five Single Pass rides — and the only ones — are:
- TRON Lightcycle / Run (Magic Kingdom)
- Seven Dwarfs Mine Train (Magic Kingdom)
- Guardians of the Galaxy: Cosmic Rewind (EPCOT)
- Star Wars: Rise of the Resistance (Hollywood Studios)
- Avatar Flight of Passage (Animal Kingdom)
Everything else with a Lightning Lane — Space Mountain, Big Thunder, Slinky Dog Dash, Test Track, Expedition Everest, and the rest — runs through Multi Pass.
How Multi Pass actually works
Forget anything you heard about waking up at 7 AM to scramble for the day’s passes — that was the old system. Multi Pass lets you book your selections in advance:
- [ ] Buy Multi Pass for each park day (price varies by date and park)
- [ ] On-site resort guests: make selections up to 7 days before arrival (for your whole trip)
- [ ] Off-site guests: selections open 3 days before
- [ ] Your booking window opens at 7:00 AM Eastern on your eligible day
- [ ] Pick your initial set of attractions and times in My Disney Experience
- [ ] Redeem one (or let its window pass), then add the next — one at a time, all day long
So the rhythm is: lock in your first picks early, then keep refilling as you go. The more efficiently you redeem and re-book, the more rides you stack.
Pro tip: Multi Pass is generally the best ROI for a typical first-timer trip — but only if you keep refilling. Most rookies book three selections, ride them, and forget to add more. The value is in the rebooking loop, not the first three taps.
Prioritize what sells out
Not all Multi Pass slots are equal. Some attractions burn through their inventory within an hour of your window opening; others stay available into the afternoon. Your opening picks should be the fast-sellers, not the rides you can grab anytime.
- Book first (tend to sell out fast): Slinky Dog Dash (Hollywood Studios), Test Track (EPCOT), Remy’s Ratatouille Adventure (EPCOT), Peter Pan’s Flight (Magic Kingdom)
- Grab later (usually linger): lower-demand dark rides and show attractions that rarely run out
For Single Pass, decide before your trip which headliners are worth paying à la carte for. Flight of Passage and Rise of the Resistance are the two most first-timers regret skipping; TRON and Cosmic Rewind are the call for thrill-seekers. You don’t need all five — pick the one or two that matter to your group and buy those.
Where SupaPark does the heavy lifting
The hard part isn’t understanding the system — it’s timing. Inventory moves all day, and you can’t stare at My Disney Experience while riding.
- Sell-out and refill predictions: SupaPark forecasts when a given Lightning Lane is likely to run out and when a fresh batch tends to refill, so you book the volatile ones first and don’t waste your 7 AM window on a ride that’s available at 2 PM anyway.
- One-tap booking hand-off alerts: the moment a Single Pass you wanted or a sold-out Multi Pass slot becomes bookable, SupaPark pings you instantly — you confirm it in your own Disney app. (SupaPark watches and alerts; the booking always happens in My Disney Experience.)
The one thing to remember
Multi Pass for the everyday wins, Single Pass for the one or two blockbusters you can’t risk missing — and book your fast-sellers first. Lean on SupaPark’s refill forecasts and drop alerts so you’re never refreshing the screen while the line you wanted quietly reopens behind you.
Building Your Day-by-Day Park Itinerary
The single biggest first-timer win is walking in with a park assigned to every day before you ever leave home — not deciding at breakfast. Locking parks early lets you stack your trip around the two windows that actually matter: your 6:00 AM ET dining-reservation drops (60 days out) and your 7:00 AM ET Lightning Lane selection window. Everything else flexes around those anchors.
Step 1: Assign one park per day
Don’t park-hop on day one. Give each park a dedicated day and match the park to the day’s crowd forecast — not your mood.
- [ ] Pull a crowd forecast for your travel dates (SupaPark’s crowd calendar is free) and send your big-headliner park to its lowest-crowd day.
- [ ] Avoid known spikes: cheer-competition weekends and the Thanksgiving week push Lightning Lane prices roughly 30–40% higher and pack the parks.
- [ ] Build in at least one rest/pool/Disney Springs day on a 5+ day trip. First-timers who go four parks in four straight days burn out by day three.
Step 2: Anchor each day to your reservations
Your itinerary isn’t built around rides first — it’s built around the two booking clocks, which you keep distinct:
| Window | Opens | Where | What |
|---|---|---|---|
| Advance Dining (ADR) | 60 days before arrival, 6:00 AM ET | My Disney Experience | Hard-to-get tables (think signature dining) |
| Lightning Lane Multi Pass | 7 days out on-property / 3 days off-property, from 7:00 AM ET | My Disney Experience | Your day’s skip-the-line selections |
Lightning Lane Multi Pass isn’t a day-of scramble — you pick attractions in advance, then refill one at a time through the day as you redeem them. Single Pass (TRON, Seven Dwarfs Mine Train, Cosmic Rewind, Rise of the Resistance, Avatar Flight of Passage) is bought à la carte for the headliner you care most about.
Pro tip: Book your sit-down meals at the edges of the day — a late breakfast or a 4:30 PM “linner” — so a reservation never pulls you out of a park mid-afternoon when you’ve finally got rope-drop momentum.
Step 3: A repeatable first-timer day structure
This skeleton works for any park. Slot in that park’s headliners and dining.
- [ ] Rope drop (be at the tap-stiles 30–45 min before official open). On-site guests get Early Theme Park Entry — 30 minutes early — so use it. Head straight to the one ride that builds the longest line.
- [ ] First 90 minutes: knock out 2–3 high-demand attractions while waits are lowest. This is your most valuable hour of the whole day.
- [ ] Mid-morning: redeem your first Lightning Lane, then immediately book your next one.
- [ ] Midday: mobile-order lunch (place it early — popular spots run out of pickup windows) or hit your ADR. Build in a genuine break here.
- [ ] Afternoon: lower-priority rides, shows, character stops, snacks. Keep refilling Lightning Lanes.
- [ ] Evening: dinner, then claim a fireworks or nighttime-show spot 20–30 minutes early.
A few park-specific moves worth baking in: at Magic Kingdom, watch the parade from a side entrance of Main Street to dodge the densest crowd; at Animal Kingdom, Sanaa’s lounge serves its bread-and-accompaniments spread with no reservation, a great no-stress lunch; at Hollywood Studios there’s even a mail slot to drop postcards without leaving. On Tiana’s Bayou Adventure, the back of the log stays driest.
Step 4: Leave buffer — then let the data drive
The most common first-timer mistake is an itinerary so tight that one ride breakdown collapses the whole day. Plan roughly 70% of your time and leave the rest open for spontaneity and rest.
That open space is where SupaPark earns its keep:
- The park-day builder lays out your selections, ADRs, and rope-drop targets in one timeline so you can see the gaps and the overlaps before you go.
- “What should I ride next, right now?” reads live waits and ride status and tells you the smartest next move from where you’re standing — so you’re not squinting at five wait times trying to do mental math with a tired five-year-old.
- Live alerts find you: SupaPark pings you the second a ride craters to walk-on, goes down, or a Lightning Lane refills. Drop Watch does the same for dining — the moment a cancelled hard-to-get table frees up, you get the alert, then grab it in My Disney Experience.
The one thing to remember: assign your parks, anchor each day to the 60-day dining clock and the 7-day Lightning Lane clock, and leave real slack in between — then let live data, not a rigid printout, decide your next move.
Rope Drop & Park-by-Park Priority Rides
Rope drop is the single best free tool you own — being at the tap-stiles 30+ minutes before official open can save you two or three hours of waiting across the day. On-site guests get Early Theme Park Entry (30 minutes before the public), and that head start is gold for the rides below.
The play is simple: hit your park’s hardest-to-ride headliner first, ride it as a walk-on or near-walk-on, then mop up the rest while the crowd is still parking. Lightning Lane Single Pass rides are the ones to target early because you either pay à la carte or you wait — there’s no Multi Pass shortcut for them.
Magic Kingdom
Go straight back. The hub crowd fans out toward the castle, so the rope-drop move is to beeline past it.
- Hit first: Seven Dwarfs Mine Train (Single Pass) or TRON Lightcycle / Run (Single Pass) — both crater to their best waits in the first 30 minutes, then climb hard.
- Next: Tiana’s Bayou Adventure, Big Thunder Mountain, Space Mountain.
- Family note: Mine Train has a 38" minimum; TRON is 48". Tiana’s and the mountains run small-rider minimums too, so check heights before you queue.
Pro tip: On Tiana’s Bayou Adventure, ask for the back of the log — you stay noticeably drier than the front rows.
EPCOT
- Hit first: Guardians of the Galaxy: Cosmic Rewind (Single Pass) — it’s the park’s true headliner and the hardest to grab later.
- Next: Test Track and Frozen Ever After, both of which build long lines by mid-morning.
- Family note: Cosmic Rewind is 42"; it’s a high-speed coaster (no inversions, but it spins). Frozen Ever After is all-ages, so park it for a midday lull if you’ve got little ones.
Hollywood Studios
This park punishes a late arrival more than any other — be there for rope drop or accept long waits.
- Hit first: Star Wars: Rise of the Resistance (Single Pass) — chronically the longest standby in the park.
- Next: Slinky Dog Dash and Millennium Falcon: Smugglers Run. Slinky tends to sell out of Lightning Lane fast and holds long standby waits all day, so ride it early or bank a Multi Pass selection for it.
- Family note: Rise is 40"; Slinky is 38".
Pro tip: There’s a working mail slot inside the park — drop your postcards without leaving to find a mailbox.
Animal Kingdom
- Hit first: Avatar Flight of Passage (Single Pass) in Pandora — the wait spikes fastest here, often topping every other ride on property by late morning.
- Next: Na’vi River Journey (right next door, knock both out together), then Expedition Everest and Kilimanjaro Safaris (animals are most active early, so the safari doubles as a smart morning pick).
- Family note: Flight of Passage is 44"; Everest is 44". Na’vi River Journey and the Safari have no height minimum — good anchors for younger kids.
How to time the rest of your day
| When | What’s usually shortest | Why |
|---|---|---|
| Rope drop (first 30–45 min) | Single Pass headliners | Crowd hasn’t reached the back of the park yet |
| Midday (12–3 PM) | All-ages dark rides, shows | Peak crowd funnels to coasters; use this for Frozen, Na’vi, Safari |
| Last hour before close | Headliners again | Lines drop as families with kids leave |
This is exactly where SupaPark earns its keep. The best-time-to-ride forecaster tells you when each attraction usually bottoms out so you’re not guessing, and walk-on alerts ping you the instant a ride craters — so if Flight of Passage suddenly drops to a near-walk-on at 4 PM, you’ll know before the standby board catches up.
Your rope-drop checklist
- [ ] Arrive 30+ min before official open (more if you have Early Entry)
- [ ] Know your one “hit first” ride per park before you walk in
- [ ] Check every rider’s height against the minimums above
- [ ] Use Rider Switch so adults can ride headliners without re-queuing
- [ ] Let SupaPark’s walk-on alerts redirect you when a wait suddenly tanks
The one thing to remember: pick a single headliner to chase at rope drop, get it done before the park fills, and let the forecaster handle the timing for everything after — that’s how a first-timer rides more and waits less.
Dining Strategy: Reservations, Quick Service & Mobile Order
The whole game is two clocks: ADRs at 60 days, Lightning Lane at 7 days. Get them confused and you lose the hard-to-get tables. First-timers waste their best meals scrambling on the wrong timeline, so lock this in first.
Two windows, two alarms — don’t blur them
These are different systems with different timers. Set both reminders now.
| What | When it opens | Where | What it’s for |
|---|---|---|---|
| Advance Dining Reservations (ADRs) | 60 days before arrival, 6:00 AM ET | My Disney Experience | Sit-down tables, character meals |
| Lightning Lane Multi Pass | 7 days out (resort guests) / 3 days (off-site), window opens 7:00 AM ET | My Disney Experience | Skipping ride lines |
ADRs are about food; Lightning Lane is about rides. The 6 AM dining drop is the one that books out fastest for the headliner restaurants.
Which tables to actually fight for
Most restaurants have openings the week of your trip. A short list does not — be online at 6:00 AM ET, 60 days out, logged in and ready:
- Space 220 (EPCOT) — the “ride to space” gimmick books fast; the prix-fixe two-course lunch tends to be the easier grab than dinner.
- Character meals and the marquee signature spots — these are the ones that vanish in minutes.
Everything else? You can usually relax and book closer in.
Pro tip: The single most useful dining tool isn’t the booking page — it’s a cancellation watcher. People drop reservations constantly as plans shift. SupaPark’s dining availability tracker plus Drop Watch monitors the table you want and pings you the instant a cancellation frees it up, so you grab it in My Disney Experience without refreshing the app 40 times a day. That’s how walk-up-impossible tables actually get got.
No-reservation gems (eat well without the 60-day stress)
Skipping ADRs entirely is a legitimate strategy. A few standouts that take no reservation:
- Sanaa Lounge (Animal Kingdom area) — the naan service brings five breads and nine accompaniments. It’s one of the best low-effort meals on property and you just walk in.
- Territory Lounge (near Wilderness Lodge) — order the mushroom bisque (around $12) or the three-rib skillet (around $15) for a quick, genuinely good sit-down lunch without booking a thing.
These are your safety net when the 6 AM window slipped past you or you just don’t want a rigid schedule.
Mobile Order: the quick-service cheat code
Quick-service lines at peak lunch are pure wasted time. Mobile Order in My Disney Experience lets you order ahead and skip the register line entirely — pick up at the designated window and you save roughly 10–15 minutes per meal.
- [ ] Open My Disney Experience early in the day and place your lunch order before the noon rush
- [ ] Pick a pickup window before you’re starving — popular spots sell out their windows by mid-afternoon
- [ ] Walk to the designated mobile pickup window, tap “I’m here,” grab your food
Good Mobile Order picks include Yorkshire County Fish Shop (EPCOT) and Alien Pizza Planet (Tomorrowland). The mistake nearly every first-timer makes: waiting until they’re hungry, then finding no pickup windows left for the rest of the day. Order early.
Make the food budget stretch
Two moves quietly save families the most:
| Tactic | The move | Why it works |
|---|---|---|
| Order off the kids’ menu | Adults order kids’ portions at quick service | Portions are filling and run roughly 30–40% cheaper than adult entrées |
| Share a meal | Split large quick-service plates | Disney portions are big; one entrée + a side often feeds two |
No one checks who the kids’ meal is “for” at a quick-service counter, and the portions genuinely satisfy an adult appetite. Over a five-day trip, those swaps add up to real money.
The one thing to remember
Two alarms, not one: 6:00 AM ET at 60 days for the hard-to-get tables, 7:00 AM ET at 7 days for Lightning Lane. Book only the few restaurants that truly sell out, lean on no-reservation gems like Sanaa and Territory Lounge for the rest, order Mobile Order early, and let SupaPark’s Drop Watch catch the cancellation tables you couldn’t snag the first time.
Money-Saving Hacks & Discounts
The biggest savings come from perks you already qualify for and purchases you avoid — not from chasing every “deal” online. Lock in the free stuff tied to your stay, eat smart, and pack to skip the impulse buys.
Stack the on-site perks (these are free)
Staying at a Disney resort unlocks built-in value that off-site stays can’t match. The two that move the needle most for first-timers:
| Perk | What you get | The catch |
|---|---|---|
| Early Theme Park Entry | 30 min before official open, every on-site guest, every park | Best used on Single Pass headliners while lines are short |
| Extended Evening Hours | Extra nighttime ride time | Deluxe / Club-level resorts only |
| Earlier Lightning Lane window | Book Multi Pass selections 7 days out (vs. 3 off-site) | Disney resort guests only |
That 30-minute jump is the single most valuable free perk — it can save you a 60-90 minute standby line on a headliner if you walk straight to it at opening.
Pro tip: Watch for room and package discounts before you pay rack rate. Disney runs seasonal offers (and sometimes a limited free dining promotion in qualifying windows only) fairly regularly, and a Disney Visa cardholder can occasionally stack package perks. None are guaranteed — book a refundable rate first, then rebook if a discount drops for your dates.
Eat well for less
Food is where first-timers quietly overspend. A few moves cut the bill without cutting the fun:
- Order off the kids’ menu at quick-service. Portions often satisfy an adult and run roughly 30-40% cheaper.
- Use Mobile Order in My Disney Experience. Place it early in the day to lock a pickup window — popular spots sell out of slots by lunch, and you skip 10-15 minutes of line.
- Use lounges as cheap table-service. No reservation needed: Sanaa Lounge (Animal Kingdom) gets you the bread service — five naans, nine accompaniments — and Territory Lounge serves the mushroom bisque without a booking. Lounge prices, sit-down quality.
- Budget sit-down picks: The Plaza Restaurant (Magic Kingdom) is a genuine full-service meal at a lower price point than the marquee spots; Olivia’s Café (Old Key West) is an overlooked brunch option.
For festivals like the EPCOT Festival of the Arts, the snack-passport approach (a set number of items for one flat price) is a cheap way to sample widely instead of paying à la carte at every booth.
Snack timing matters
Limited-run treats sell out — beignets and other small-batch items can be gone by mid-afternoon. If there’s a snack you’ve earmarked, grab it in the morning, not after your last ride.
Pack to avoid in-park prices
Everything costs more once you’re past the turnstiles. The fix is a light daypack you actually carry:
- [ ] Refillable water bottle — counter-service spots give free cups of ice water; refills all day instead of buying bottled
- [ ] Supportive, broken-in shoes (saves a midday souvenir-sandal panic buy)
- [ ] Ponchos from home (in-park rain gear is marked way up)
- [ ] Sunscreen, a couple of snacks, and any meds you might need
- [ ] A reusable utensil set if you do a lot of quick-service
You’re allowed to bring your own food and drinks into the parks — a few packed snacks per person adds up over a multi-day trip.
Where to spend vs. skip
| Spend on | Skip / DIY |
|---|---|
| Lightning Lane Multi Pass (best ROI for a typical 5-day first trip) | Bottled water — refill for free |
| One or two must-do Single Passes if your party loves the headliner | Marked-up ponchos, sunscreen, phone chargers |
| A sit-down meal you’ll genuinely remember | Impulse character-meal upgrades you won’t |
A quick note on Single Pass: the à-la-carte rides are TRON Lightcycle / Run and Seven Dwarfs Mine Train (Magic Kingdom), Guardians of the Galaxy: Cosmic Rewind (EPCOT), Rise of the Resistance (Hollywood Studios), and Avatar Flight of Passage (Animal Kingdom). Everything else with a Lightning Lane is Multi Pass — so don’t double-pay for an experience your tickets and Multi Pass already cover.
The takeaway
The cheapest dollar is the one you never spend in the park. Stack your free on-site perks, lean on kids’ menus and lounges, refill that water bottle, and only pay up for the few things — Multi Pass, a standout meal, a headliner Single Pass — that genuinely buy you time or memories. SupaPark’s pricing intelligence can tell you whether Multi Pass pencils out for your dates, and Drop Watch pings you the moment a hard-to-book table frees up — so you grab the deal instead of hunting for it. Watch for seasonal room and package discounts, but never wait on a promo that may not come; book refundable and rebook if one lands.
Sample Trip Cost Breakdown
A 5-day Disney World trip for a family of four lands anywhere from the low five figures to well over double that — and the resort tier is the single biggest lever, not the parks. Here’s a realistic build-up so you know where the money actually goes, and where you can trim without gutting the trip.
Treat every number here as a planning range. Disney prices flex hard by date — Lightning Lane alone runs roughly 30–40% higher during peak weeks like Thanksgiving and the late-January/early-February cheer-competition stretch, and resort rates swing the same way. Build your budget around the dates you’re actually going.
The five-day, family-of-four estimate
| Category | Budget | Mid | Splurge |
|---|---|---|---|
| 5-day base tickets (×4) | $ | $ | $$ (add Park Hopper) |
| Resort, 5 nights | Value (All-Star/Pop) | Moderate (Caribbean Beach/Port Orleans) | Deluxe (Contemporary/Poly) |
| Lightning Lane | Multi Pass a few days | Multi Pass daily | Multi Pass + Single Pass headliners |
| Dining | Quick-service + groceries | Mix + 1–2 table-service | Multiple sit-downs/character meals |
| Transport | Free Disney buses/Skyliner | Free transport + occasional rideshare | Rental car or Mears Connect |
| Souvenirs/extras | Set a cap | Moderate | Open wallet |
Where the totals separate: resort tier can triple your lodging line, and dining quietly balloons if you book table-service for every meal. Tickets and transport barely move by comparison.
Where to trim (without feeling it)
- Resort: A Value resort gets you the same free Disney transportation, Early Theme Park Entry, and park proximity as a Deluxe — you’re paying for theming and pools, not park access. Dropping one tier is the fastest big save.
- Dining: Quick-service kids’ meals are filling and run 30–40% cheaper than adult entrées — adults can order them too. Stock the room with breakfast groceries and you cut a full meal per day.
- Transport: If your group is four or fewer and you’re staying on-site, Disney’s free buses, monorail, and Skyliner cover everything. A rental car only earns its cost for groups of five-plus or off-site stays.
- Souvenirs: Set a per-kid cap before you walk in. This is the most overspent line in every first-timer budget.
The one upgrade worth paying for
Pro tip: For a typical 5-day first-timer trip, Lightning Lane Multi Pass is the best ROI of any add-on — it saves more hours per dollar than a fancier resort or extra table-service meals. Buy it per day, then book your selections in advance (7 days out for Disney-resort guests, 3 days off-site, window opening 7:00 AM Eastern) and refill one at a time as you go.
Single Pass is the à-la-carte exception, sold only for the top headliners — TRON Lightcycle / Run, Seven Dwarfs Mine Train, Guardians of the Galaxy: Cosmic Rewind, Rise of the Resistance, and Avatar Flight of Passage. Budget for one or two of these as splurges; you don’t need all of them.
Free perks that quietly lower the bill
- Early Theme Park Entry: Every on-site guest gets 30 minutes before official open — effectively free ride time that shrinks your need for paid skips on day one.
- Free transportation: Buses, monorail, boats, and Skyliner are included with an on-site stay, which can offset the resort premium.
- Disney promotions: Free Dining Plan and free water-park-ticket offers surface periodically. They’re not guaranteed for your dates, so check what’s actually available when you book rather than counting on one.
The smart move
Book the big three early — tickets, room, and Lightning Lane — because the windows are tight and prices climb as dates fill. Pick your resort tier honestly (it’s your biggest number), pour the savings into Multi Pass, and cap souvenirs before you arrive.
Remember: Resort tier sets your budget’s ceiling; Lightning Lane Multi Pass is where your money does the most work. Get those two right and the rest is rounding.
Is Lightning Lane Multi Pass Worth It? ROI for First-Timers
For a typical 5-day first-timer trip hitting the headliner-heavy parks, Multi Pass usually earns its keep — but it’s not a flat “always buy” call. The math swings on which park you’re in, how crowded the day is, and whether you’ll actually be at the gate for rope drop.
Here’s the honest read: Multi Pass pays off when you’re skipping multiple long standby lines on a busy day. It’s a waste of money on a quiet day at a low-headliner park where rope drop alone clears your must-dos.
The quick decision framework
- [ ] Busy day + headliner-heavy park (Magic Kingdom, Hollywood Studios) → buy Multi Pass.
- [ ] Low-crowd day or a touring-light park → skip it, rope drop instead.
- [ ] You’ll be at the gate for Early Theme Park Entry → you may only need Multi Pass for the afternoon, not the whole day.
- [ ] The park’s top rides are all Single Pass anyway → Multi Pass covers fewer of your bucket-list rides than you’d think (more on that below).
When Multi Pass earns its money
| Scenario | Recommendation | Why |
|---|---|---|
| Magic Kingdom, peak week, no rope drop | Buy Multi Pass | Stacks short waits on Space Mountain, Big Thunder, Peter Pan’s Flight, Jungle Cruise — the heavy hitters that balloon to 60–90 min standby |
| Hollywood Studios, busy day | Buy Multi Pass | Slinky Dog Dash and Mickey & Minnie’s Runaway Railway lines get brutal fast |
| Animal Kingdom, moderate crowds | Often skip | Fewer Multi Pass headliners; rope drop covers a lot |
| EPCOT, lighter day | Usually skip | Walkable waits early; spend the budget on the Single Pass for Cosmic Rewind instead |
| Any park, low-crowd shoulder season | Skip + rope drop | You can walk on much of your list before 11 a.m. |
The catch first-timers miss: the biggest rides aren’t on Multi Pass
The marquee attractions are sold separately as Lightning Lane Single Pass, à la carte, and Multi Pass does not include them:
- Magic Kingdom — TRON Lightcycle / Run, Seven Dwarfs Mine Train
- EPCOT — Guardians of the Galaxy: Cosmic Rewind
- Hollywood Studios — Star Wars: Rise of the Resistance
- Animal Kingdom — Avatar Flight of Passage
So “I bought Multi Pass, I’m covered” is a rookie trap. Budget for Single Pass on the one or two headliners you can’t miss, then decide if Multi Pass is worth it for everything else.
Rope drop + Single Pass only — the cheaper play
You can genuinely tour well without Multi Pass if you commit to early entry. The trade: you front-load the morning and accept longer standby after lunch.
| Approach | Cost | Best for | Trade-off |
|---|---|---|---|
| Multi Pass (+ Single Pass as needed) | Highest | Busy days, late starters, big touring lists | Per-day cost; prices spike on peak dates |
| Rope drop + Single Pass only | Medium | Early risers, moderate crowds | Afternoons get line-heavy |
| Rope drop only, no paid lanes | Lowest | Quiet days, flexible families | You’ll eat some long standby waits |
Pro tip: Buy Multi Pass for your busiest park day and your latest-starting day — skip it on the day you’re at the gate for Early Theme Park Entry, when the first 90 minutes already hand you several near-walk-ons for free.
How the booking actually works (so you don’t overpay)
Multi Pass is bought per day, and you pick your attractions in advance — Disney resort guests up to 7 days before arrival, off-site guests 3 days before, with the window opening at 7:00 a.m. Eastern. You lock an initial set, then add the next one at a time through the day in My Disney Experience. It’s not a day-of 7 a.m. scramble.
Watch the calendar: prices aren’t fixed. Peak stretches — cheer-competition weeks, Thanksgiving — can push Lightning Lane pricing 30–40% higher than a quiet weekday. The same touring plan can be a clear “buy” one week and a “skip” the next.
Where SupaPark does the math for you
This is exactly the call SupaPark’s pricing intelligence is built for. Instead of guessing, you get an ROI read on whether Multi Pass pays off for your park, your date, and your must-do list — plus sell-out and refill forecasts so you know whether a lane will even survive to the afternoon. SupaPark pings you the second a high-demand Lightning Lane refills; you grab it in My Disney Experience.
The one thing to remember: Multi Pass is a situational buy, not a default. Match it to crowd level and park, fund Single Pass for the true headliners separately, and let the data — not the marketing — tell you when it’s worth it.
What to Pack: First-Timer Essentials
Pack a light daypack with supportive shoes and a refillable water bottle, and leave the giant rolling bag and anything resembling a weapon at home. A Disney park day is a 7-to-10 mile walking marathon in Florida heat, so what’s on your feet and on your back decides whether hour eight feels magical or miserable.
The day-pack checklist
Keep it small. A backpack that fits under a ride lap bar means fewer “please use the locker” delays. Pack:
- [ ] Broken-in supportive shoes (plus a second pair if you can — feet swell, and rotating shoes prevents blisters)
- [ ] Refillable water bottle — quick-service counters give free cups of ice water, so you almost never pay for a drink
- [ ] Compact poncho — afternoon storms roll in fast and in-park ponchos cost several times what one does at home
- [ ] Portable charger + short cable — wait times, Mobile Order, and your park tickets all live in My Disney Experience, and that app drains a battery by mid-afternoon
- [ ] Sunscreen (apply before you leave the room; reapply midday)
- [ ] Snacks — granola bars, fruit, crackers to bridge the gap and skip a $7 impulse churro line
- [ ] Reusable utensil set — eco-friendly and handy for shared portions
- [ ] Kid comfort items — a small lovey, a change of clothes for little ones, and battery-powered fans clip nicely to a stroller
Pro tip: Order off the kids’ menu at quick-service spots even for adults — portions tend to satisfy and run roughly 30–40% cheaper than the regular menu. Pair that with a packed snack stash and your in-park food spend drops fast.
Hydration and heat: the cheap wins
| Item | Why it earns its space | Smart move |
|---|---|---|
| Refillable bottle | Free ice water at any counter | Refill before leaving each restaurant |
| Cooling towel | Drops your felt temperature fast | Soak it at a water fountain |
| Poncho (not umbrella) | Hands-free in rain and on water rides | Stash it where you can grab it in 10 seconds |
| Light sweatshirt | Mornings and winter days run cool (think 50–60°F on a January morning) | Tie it around the stroller, not your waist |
What NOT to bring
Disney’s bag check is real, and showing up with a banned item means a slow walk back to the car. Leave these home:
- Oversized bags — anything larger than roughly 24" x 15" x 18" (and no rolling bags or coolers larger than the posted limit) gets turned away
- Anything weapon-like — toy or real firearms, knives, and self-defense items are prohibited
- Selfie sticks and large tripods — banned on rides and generally not worth the hassle
- Glass containers (small baby-food jars are the exception)
- Loose dry ice and most marijuana/CBD products
- Wagons — pull-style wagons aren’t allowed, so bring a folding stroller within the size limit instead
Family-aware extras
If you’re traveling with kids, a few small additions save the day:
- A stroller you can collapse one-handed (you’ll fold it for buses and the Skyliner)
- Glow sticks from home for nighttime shows — far cheaper than the in-park light-up toys
- A backup outfit and gallon zip bag for the inevitable Tiana’s Bayou Adventure splash or spilled Dole Whip
Pro tip: Use Mobile Order in My Disney Experience the moment you know what you want for lunch — popular windows at spots like Yorkshire County Fish Shop fill up, and locking a pickup time early shaves 10–15 minutes off your midday. SupaPark’s free crowd forecasts can tell you which days lunch lines get ugly, so you know when ordering at 10 AM actually matters.
The one thing to remember
Pack light, pack your feet first. A small bag of essentials — supportive shoes, water bottle, poncho, charger, sunscreen — keeps you comfortable, keeps you cheap, and keeps you moving. Everything you overpack is one more thing to lug through bag check and cram under a ride seat.
Family-Aware Planning: Kids, Heights & Rider Switch
The move that saves your day: log every kid’s height before you arrive, then let Rider Switch — not luck — decide who rides what. Nothing tanks a first-timer’s morning faster than queuing 40 minutes only to get turned away at the measuring stick, or splitting up the group over a baby who can’t ride.
SupaPark’s family-aware planning does the boring math for you: track each child’s current height, and it flags which attractions they clear, which they don’t, and where Rider Switch applies — so your itinerary only includes rides your crew can actually do.
Heights: know the cutoffs before the stick
Disney measures at the entrance, and a quarter-inch can mean a no. A few realities to plan around:
- Theme-park shoes add a little height — measure the way they’ll actually be standing.
- Heights creep up over a long trip; a kid who’s borderline on day one might clear by day five.
- Tall, intense rides (the Single Pass headliners like TRON Lightcycle / Run and Avatar Flight of Passage) have the strictest minimums; gentle dark rides have none.
Pro tip: Do a measuring-tape check at home a week out and enter it into SupaPark’s height tracker. Walking up to a ride already knowing “yes” or “no” means you never burn a Lightning Lane or a long standby line on a turn-away.
Rider Switch: ride without re-queuing
Rider Switch (Disney’s official “Child Swap”) lets adults take turns on a ride too intense for a little one — without anyone standing in the full line twice.
| Without Rider Switch | With Rider Switch |
|---|---|
| Both adults queue separately, twice the wait | One adult rides while the other waits with the kid |
| Lightning Lane or standby burned per adult | Second adult rides via a short return path |
| Older kids re-wait the whole line | Up to a couple of riders can re-ride with the second adult |
How it plays out: tell a cast member at the entrance you want Rider Switch. Adult one rides; adult two waits with the non-riding child; then adult two (often with an older sibling who wants a second lap) rides without the full wait. It works alongside both standby and Lightning Lane.
SupaPark tags the Rider Switch–eligible attractions in your day builder so you know where to use it instead of skipping a headliner entirely.
Strollers, quiet zones & Baby Care Centers
Each park has a Baby Care Center — air-conditioned rooms for nursing, feeding, and diaper changes, far calmer than a restroom. Worth knowing where yours is before the meltdown, not during.
- [ ] Note the nearest Baby Care Center for each park on your plan
- [ ] Map a stroller-friendly route — avoid stairs, choose ramps and wider walkways
- [ ] Pin one quiet zone per park (shaded, low-traffic corners) for a reset
- [ ] Pack a stroller tag or ribbon — lots look identical at the parking areas
Quiet zones matter more than first-timers expect. Tucked-away spots — shaded seating off the main paths, calmer corners away from parade routes — give an overstimulated toddler ten minutes to recover before the day goes sideways.
Nap and meltdown timing
The single biggest first-timer mistake is grinding straight through the afternoon. Crowds and heat peak midday; so does the toddler fuse.
- Rope drop hard, then break. Knock out headliners early, head back for a real rest around early afternoon, return refreshed for evening.
- Stroller naps count. If you can’t get back to the resort, build in a slow, shaded stretch so a stroller nap can happen.
- Feed before the wall. Hungry plus tired is the meltdown formula. The kids’ menus at quick-service spots are filling and run noticeably cheaper than adult entrées — an easy way to keep everyone fed without overspending.
Pro tip: Place a Mobile Order in My Disney Experience early in the day for your lunch window. Pickup windows for popular quick-service spots fill up; ordering at 9 AM for a noon pickup means food is ready right when the youngest hits empty — no line, no scramble.
The one thing to remember
Plan around your kids’ heights and energy, not around the ride list. Log heights in SupaPark, use Rider Switch everywhere it’s offered, and protect an afternoon reset — that’s the difference between a magical first day and a stroller full of tears by 2 PM.
Day-Of Survival Playbook: Staying Flexible
Your itinerary is a hypothesis, not a contract — the guests who have the best days are the ones who change plans fastest when the park changes on them. Rides break down, skies open up, and a land that was a walk-on at 9am becomes a wall of people by 11am. Here’s how to roll with it instead of getting wrecked by it.
Read the park, not your plan
The single most useful in-park habit: glance at live wait times before you commit to walking anywhere. A posted 60-minute wait that’s actually trending down, a headliner that just dropped to a walk-on, a Lightning Lane Multi Pass return window opening up — these shift minute to minute, and the My Disney Experience map filter for “open attractions” only tells you what’s running, not what’s smart right now.
- Ride goes down? Don’t stand and wait for a vague “we’ll update you.” Pivot to a nearby attraction and circle back — most breakdowns clear within 15–45 minutes, but some don’t reopen for hours (always treat any longer closure or refurbishment as “check current status”).
- Lightning Lane Multi Pass selection sells out before you grab it? Refill with a different attraction immediately — you book one at a time through the day, so a sold-out headliner just means you slot in the next-best and keep moving. Don’t burn 20 minutes refreshing for the one that’s gone.
- Crowd surge in one land? Hop to the opposite corner of the park. Parades and fireworks pull thousands toward Main Street, U.S.A. — that’s your window to walk onto rides everyone else abandoned.
How SupaPark’s alerts find you
This is the part you can’t do by manually refreshing an app every five minutes. SupaPark runs the most accurate Disney wait-time and alert engine out there, and it watches the things you’d otherwise miss while you’re actually riding rides:
| Alert | What it catches | Your move |
|---|---|---|
| Walk-on drop | A ride craters to near-zero wait | Detour now — these windows are short |
| Ride-down detection | A headliner goes down (often before the standby line knows) | Skip the dead-end walk; rebook your time |
| Reservation Drop Watch | A hard-to-get table frees from a cancellation | Grab it in My Disney Experience before it’s gone |
The booking still happens in Disney’s own app — SupaPark never reserves for you. It just pings you the second the opportunity exists so you can pounce. That’s the whole game on a flexible day: you’re not glued to a screen, the screen taps you on the shoulder.
Pro tip: Cancellations for premium tables (think Space 220 or other tough-to-book spots) tend to surface in clusters in the morning and again a day or two out as other guests finalize plans — Drop Watch is how you catch one without obsessively refreshing.
Pace your body, not just your schedule
Florida heat ends more park days early than any ride closure. A meltdown — kid or adult — is almost always dehydration, blood sugar, or sore feet in disguise.
- [ ] Refill a bottle at any quick-service drink station (free cups of ice water on request)
- [ ] Bank a midday break — pool, resort nap, or air-conditioned ride — when waits peak
- [ ] Pre-order Mobile Order early; lunch windows for spots like Yorkshire County Fish Shop fill by midday
- [ ] Keep a no-reservation backup: Sanaa Lounge’s naan service or Territory Lounge’s mushroom bisque get you fed without a wait
- [ ] Pack supportive shoes and a light daypack — comfort is what keeps you flexible past hour eight
The smart move when things go sideways
Build slack into the day on purpose. Leave one block unplanned, keep one indoor attraction in your back pocket for a downpour, and treat any single ride as skippable — no attraction is worth a 90-minute standby when three nearby ones are walk-ons.
The one thing to remember: flexibility isn’t winging it — it’s having better information faster than the crowd around you, then acting on it without hesitation. Let the live data and alerts do the watching so you can spend the day deciding, not refreshing.
Key Takeaways
A first Disney World trip lives or dies by your booking windows — hit them in order and the rest falls into place. Everything below is the short version of the plan. If you remember one thing: the calendar does the heavy lifting, and missing a window costs more than any in-park mistake.
Lock the windows in the right order
Each piece of your trip unlocks on its own timeline. Confuse them and you’ll either overpay or miss out entirely.
| What to book | When it opens | Where |
|---|---|---|
| Resort + tickets | 6–12 months ahead | Disney / package |
| Advance Dining Reservations (ADRs) | 60 days before arrival, 6:00 AM ET | My Disney Experience |
| Lightning Lane Multi Pass selections | 7 days out (on-site) / 3 days out (off-site), from 7:00 AM ET | My Disney Experience |
The two morning times are easy to blur: dining is 60 days out at 6 AM; Lightning Lane is 7 days out at 7 AM. They are not the same alarm.
Pro tip: Lightning Lane Multi Pass isn’t a day-of scramble — you pick attractions in advance, then refill one at a time as you redeem them through the day. Treat it like dining: set it early, adjust on the fly.
Spend on what actually saves you time
- Lightning Lane Multi Pass is the best value for a typical first-timer week — it covers the most attractions for the lowest per-ride cost. Buy it first.
- Lightning Lane Single Pass is à la carte for the headliners only: TRON Lightcycle / Run, Seven Dwarfs Mine Train, Guardians: Cosmic Rewind, Rise of the Resistance, and Avatar Flight of Passage. Pick one or two that matter to your group; skip the rest.
- Watch the calendar: high-demand weeks (cheer-competition stretches in late Jan/early Feb, Thanksgiving) push Lightning Lane prices noticeably higher. A shoulder-week trip stretches every dollar.
Cash in the on-site perks
If you’re staying on property, these are already paid for — use them:
- [ ] Early Theme Park Entry — all on-site guests get 30 minutes before official open. Rope-drop a headliner before the crowd lands.
- [ ] Free water-park ticket when offered — check in before noon to claim same-day entry.
- [ ] Extended Evening Hours — Deluxe and Club-level guests only; near-walk-on rides late at night.
- [ ] Free transportation — but keep a backup. Skyliner outages happen; have the bus route ready.
Pack light, walk smart
You’ll log miles. Comfort and a few shortcuts beat brute force.
- [ ] Broken-in, supportive shoes (not new ones)
- [ ] Light daypack — phone battery, sunscreen, ponchos
- [ ] Refillable water bottle (free ice water at any quick-service counter)
- [ ] A layer for cool mornings if you’re visiting in winter
Small route hacks add up: the Seven Seas Lagoon walking path gets you to Magic Kingdom on foot from the monorail resorts, the Emporium cut-through on Main Street dodges the post-fireworks crush, and the kids’ menu at quick-service runs 30–40% cheaper while still filling up most adults.
Build flexible, not rigid
Have a loose plan per park — one or two must-dos and a backup — but leave room to pivot. Rides go down, weather shifts, and refurbishments close attractions on Disney’s schedule, not yours. Always check the My Disney Experience map filter for what’s actually open before you commit to a walk across the park.
Let the alerts do the watching
You can’t refresh your phone all day, and you shouldn’t have to. This is where SupaPark earns its keep: it runs the most accurate Disney wait-time and forecasting engine out there, so it catches the moments you’d otherwise miss.
- Drop Watch pings you the second a hard-to-get dining reservation frees up from a cancellation — then you grab it in My Disney Experience.
- Lightning Lane refill predictions tell you when a sold-out pass is likely to come back.
- Walk-on and ride-down alerts find you when a headliner suddenly craters to a short wait.
The free tier already covers live waits, the best-time forecaster, crowd calendar, and 240+ guides; the alerts and Drop Watch live on the paid tiers.
The one thing to remember
A checklist is the entire difference between a chaotic first visit and a smooth, memory-rich one. Hit your windows, claim the perks you’ve already paid for, pack for the miles, stay flexible — and let SupaPark catch the openings you can’t watch for yourself. Do that, and you’ll spend your trip in the parks, not on your phone.
<!-- SUPAPARK-LINKS:START -->
Keep planning: Seven Dwarfs Mine Train · live wait times · is Lightning Lane worth it · First Trip to Disney World: The 101
<!-- SUPAPARK-LINKS:END -->